


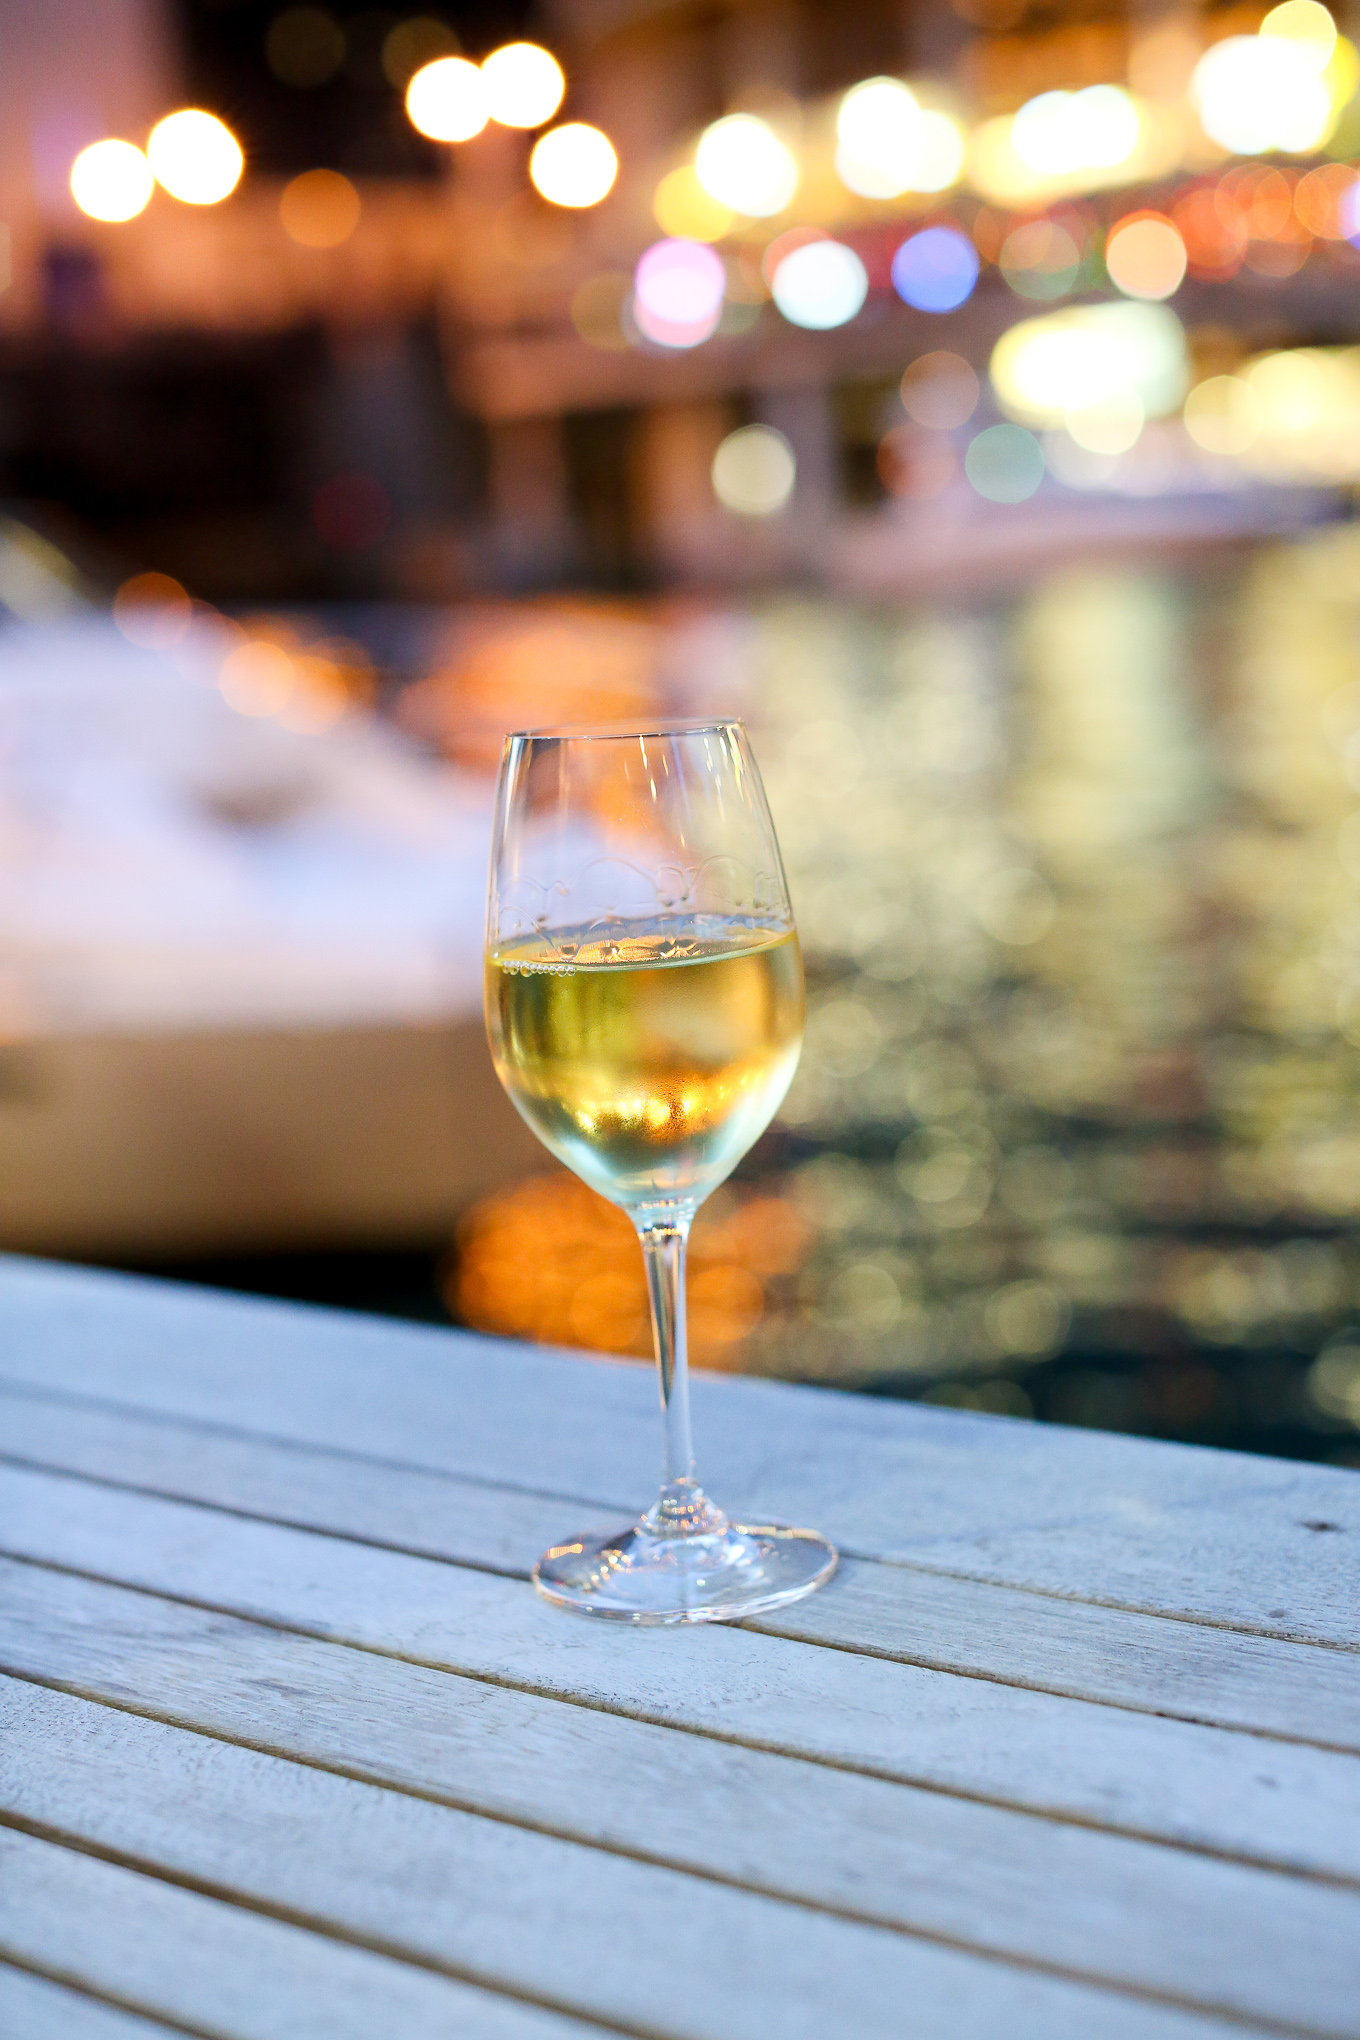
One of my absolute favorite hobbies is editing photos. I know: it doesn’t sound thrilling, but I can’t even tell you how much I enjoy it. :) Hand me a glass of Chardonnay, my headphones, and an SD card full of unedited photos, and I’m one very happy girl! So today, I thought I’d share my Lightroom editing process with you.
When I first started with DSLR photography, I edited every photo in Photoshop. Holy goodness, guys. It took me so long. I actually edited two full weddings on it, and each took me 80+ hours. Needless to say, it was the opposite of enjoyable.
Photoshop is for graphic design and large-scale photo editing jobs. It’s great for when you need to edit out an entire person, for example, or add a T-Rex to a bridal party shot. (And yes, I’ve received both these requests, haha.) And it’s fabulous for creating graphics like the one you see above. But it’s not for everyday photo editing.
For everyday photo editing, I use Lightroom, which is specifically designed for that purpose. Available for purchase or via subscription form, it’s the best photo editing software out there, in my opinion. It’s straightforward and affordable, and it helps you get the job done quickly.
Keep in mind that the title of this post isn’t “How to Edit Photos in Lightroom.” It’s “How I Edit Photos in Lightroom,” meaning that there’s no one right way to edit, and my style may not be your style. My best suggestion is edit and tinker with the program as often as you can, so you can determine and develop what you like.
Keep in mind that the title of this post isn’t “How to Edit Photos in Lightroom.” It’s “How I Edit Photos in Lightroom,” meaning that there’s no one right way to edit, and my style may not be your style. My best suggestion is edit and tinker with the program as often as you can, so you can determine and develop what you like. Something else to consider is that this blog post is simply an overview of what I do with most of my blog shoots. There’s so much more you can do with Lightroom, and I use these functions from time to time, too. Additionally, lots of my photographer friends use completely different settings than I do, and their results are phenomenal. :)
Also, I can’t stress this enough: it’s super important to get it right inside the camera first. Lightroom is an amazing tool, but it’s only as amazing as you allow it to be. Sure, it’s saved me on a few occasions when I messed up and desperately needed to revive a severely underexposed photo, but I can’t expect it to save every photo.
Oh, and two other little tips before we begin:
Shoot in RAW! RAW, like JPEG, is a type of image format. But unlike JPEG, RAW saves a lot of information that other file formats discard. RAW images are larger, and therefore you’ll need a bigger SD card to accommodate them. But you’ll be astounded by how much more vibrant and detailed your photos are when you make the switch. (“Switching” is easy, by the way. It’s a setting in your camera’s menu.) I love how “Cambridge in Color” describes RAW: “Digital photography’s equivalent of a negative in film photography. It contains untouched, ‘raw’ pixel information straight from the digital camera’s sensor.” And don’t worry: Lightroom converts RAW files so you can edit them. When you’re done editing, you simply export back into JPEG format–but this time you have all that detail!
Note: I should mention that when you shoot in RAW, things look a bit flatter than they do in real life, and RAW photos won’t pop as much as JPEGs will right out of the camera. This is because RAW files aren’t actually real photos. They’re just stored information, waiting for you to make decisions about what to do with it. RAW files require work, whereas JPEGs don’t — the camera compresses everything, and does that work for you. Shooting in RAW allows you do to a lot more in Lightroom, but if you don’t intend on editing your photos, your best bet would be to stick with shooting in JPEG.
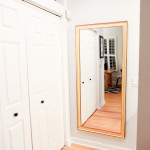
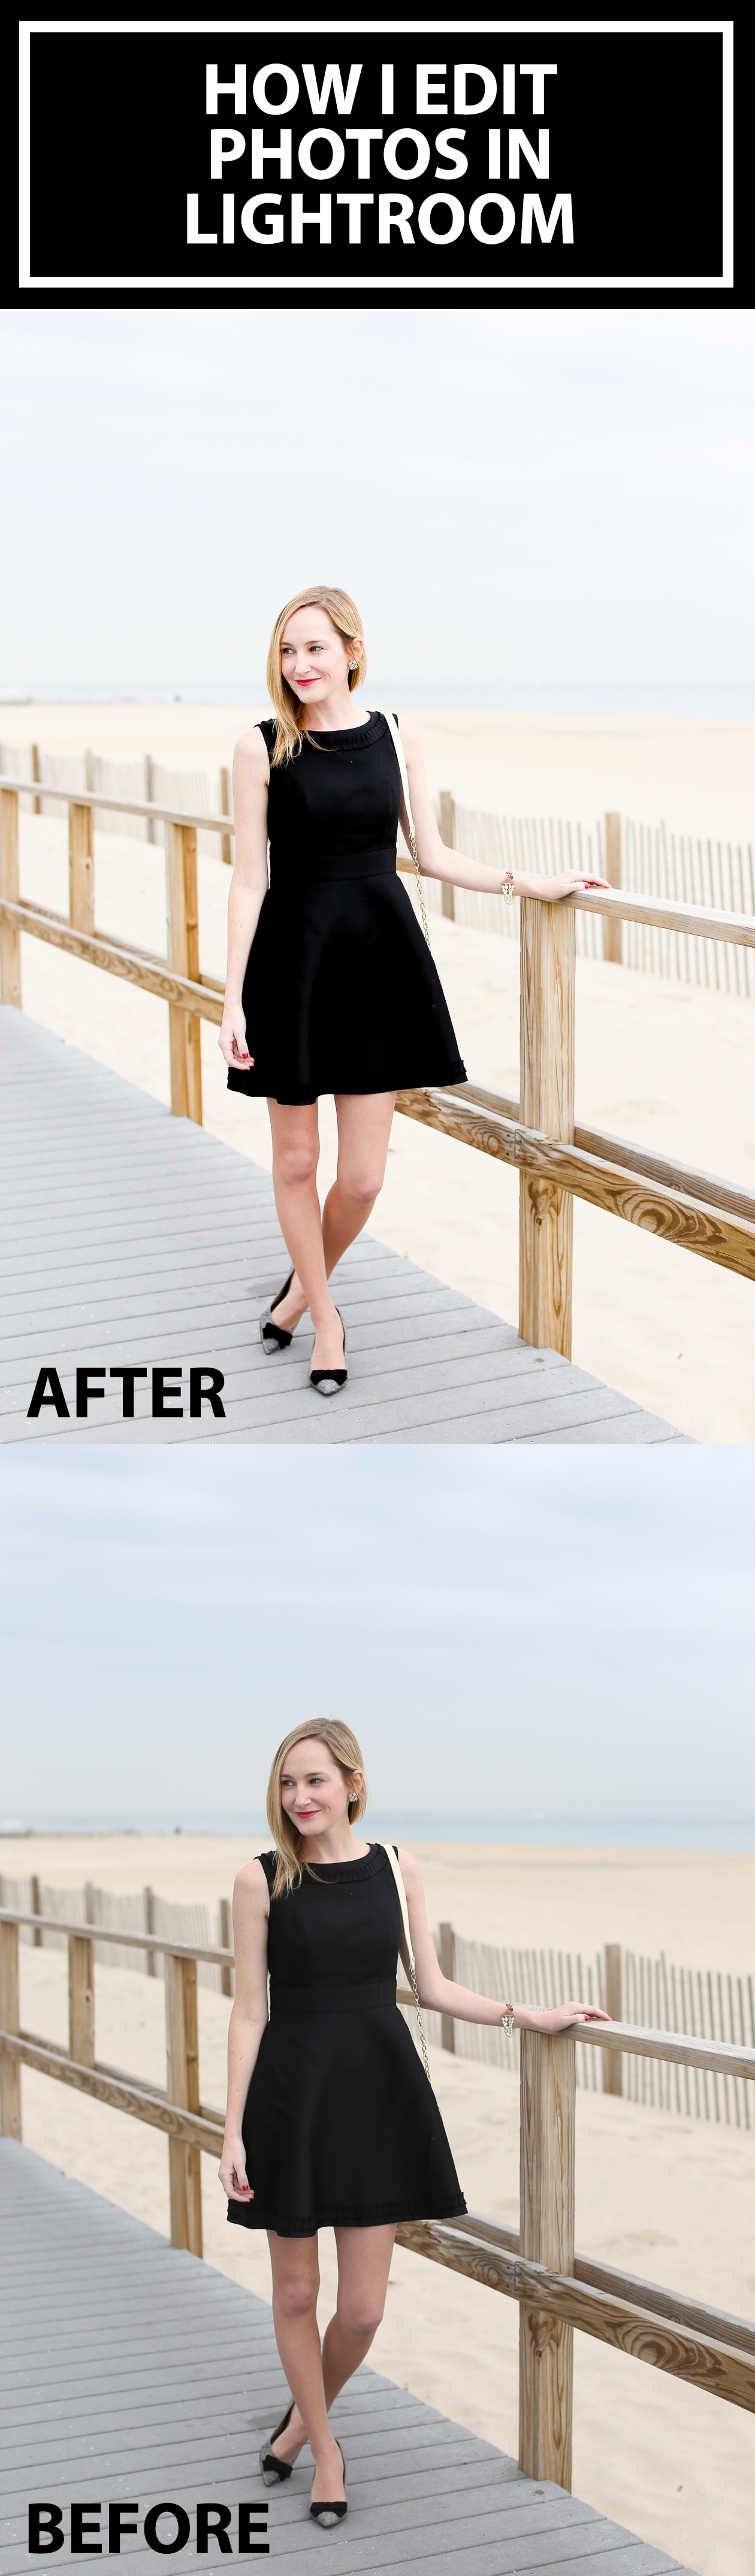
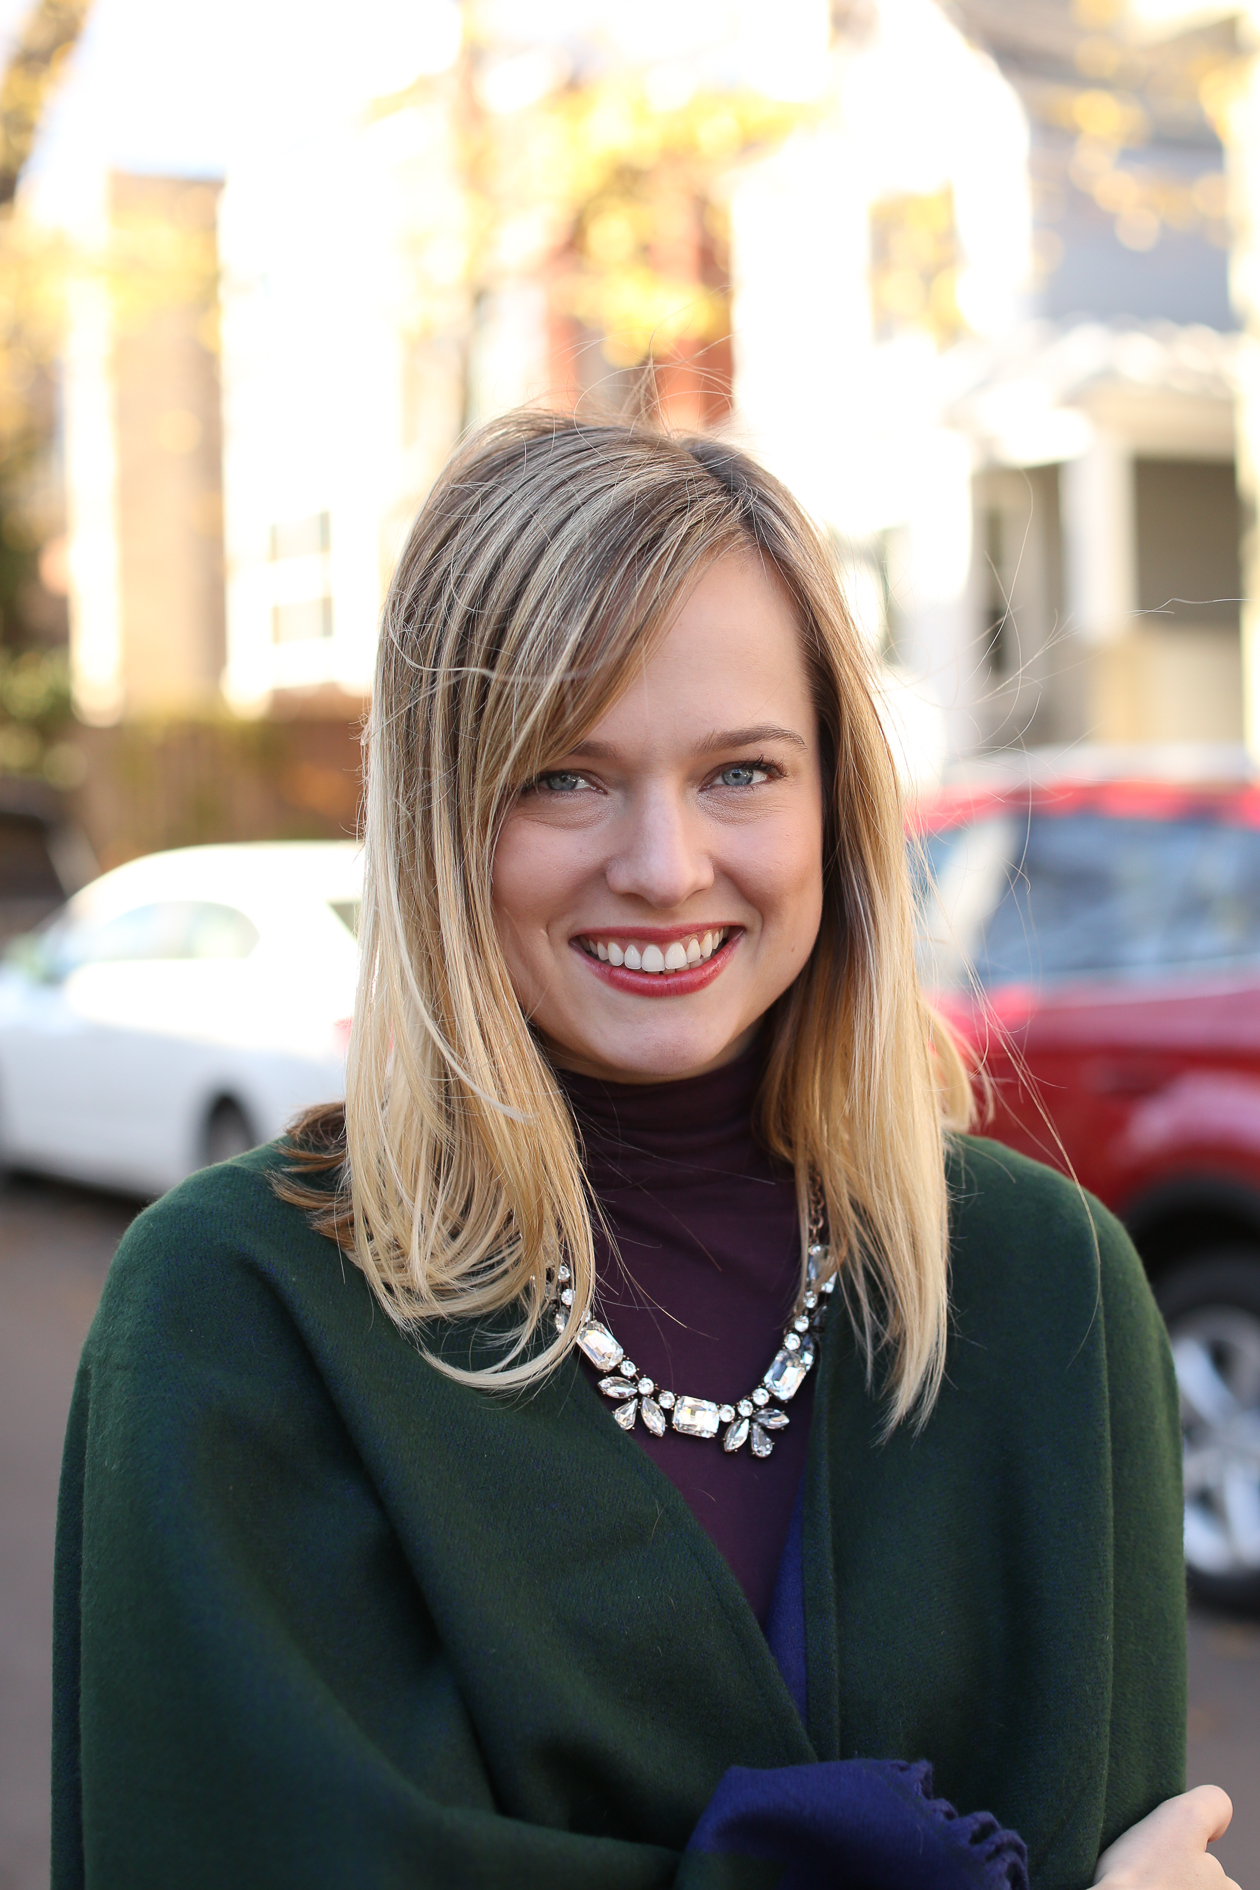
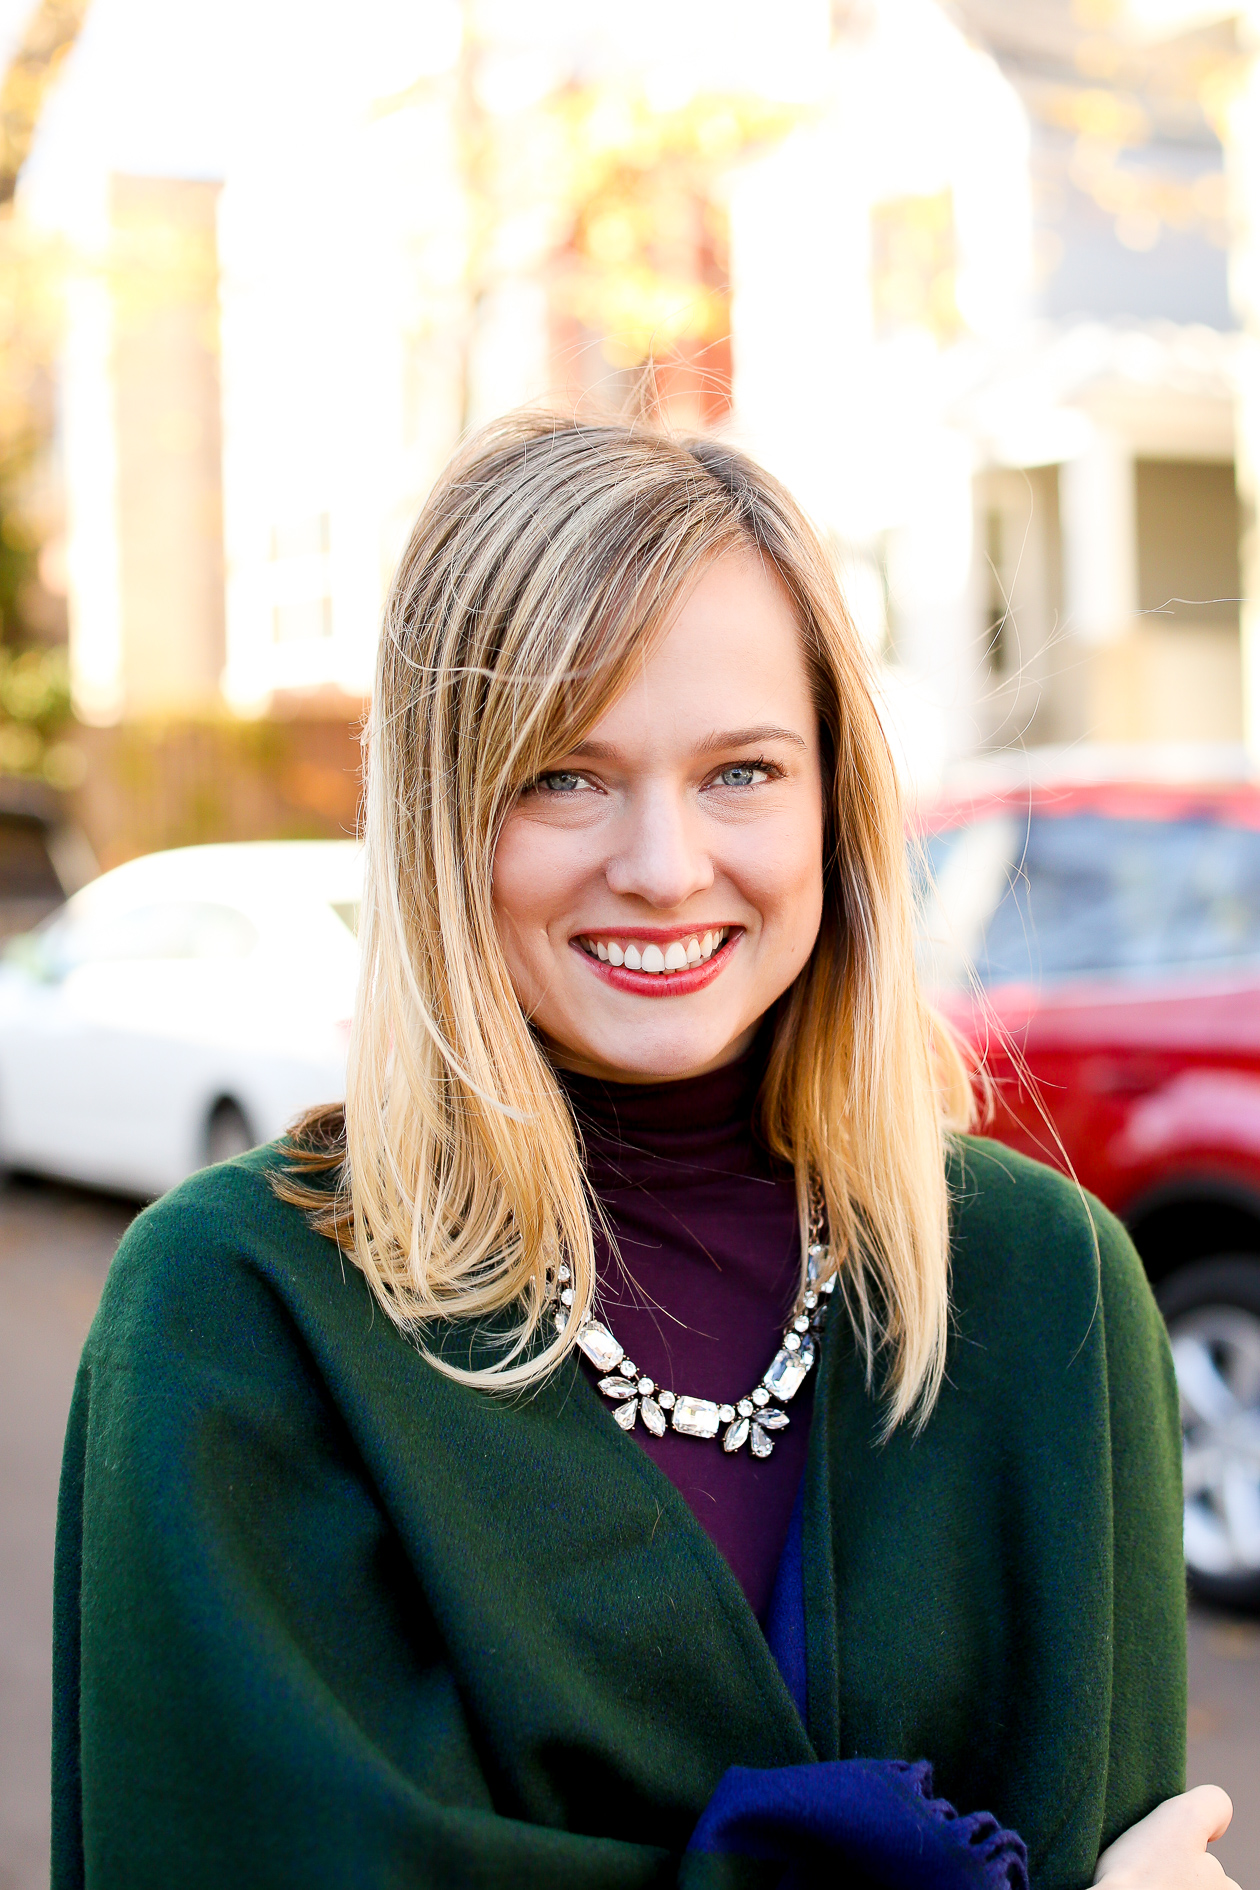
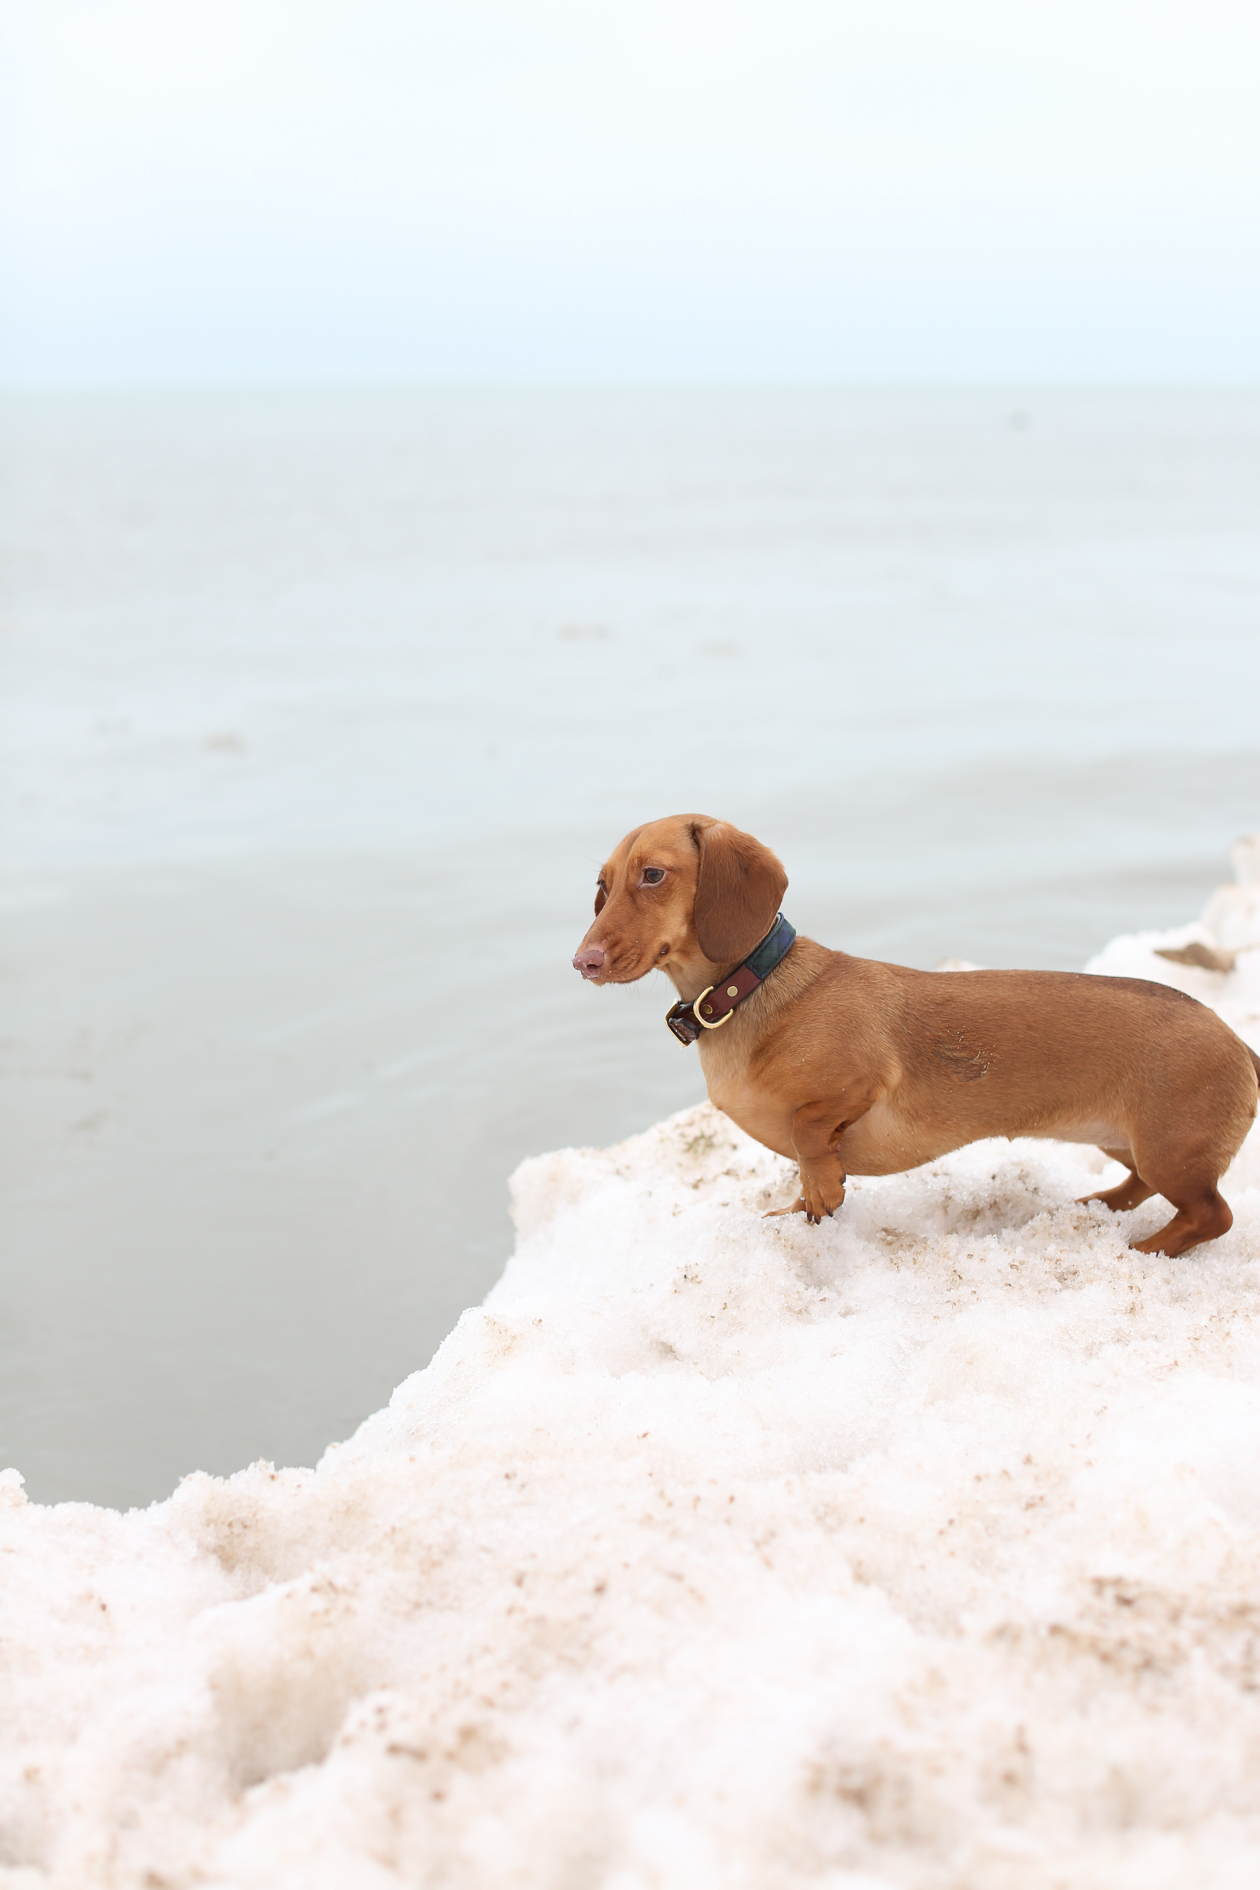
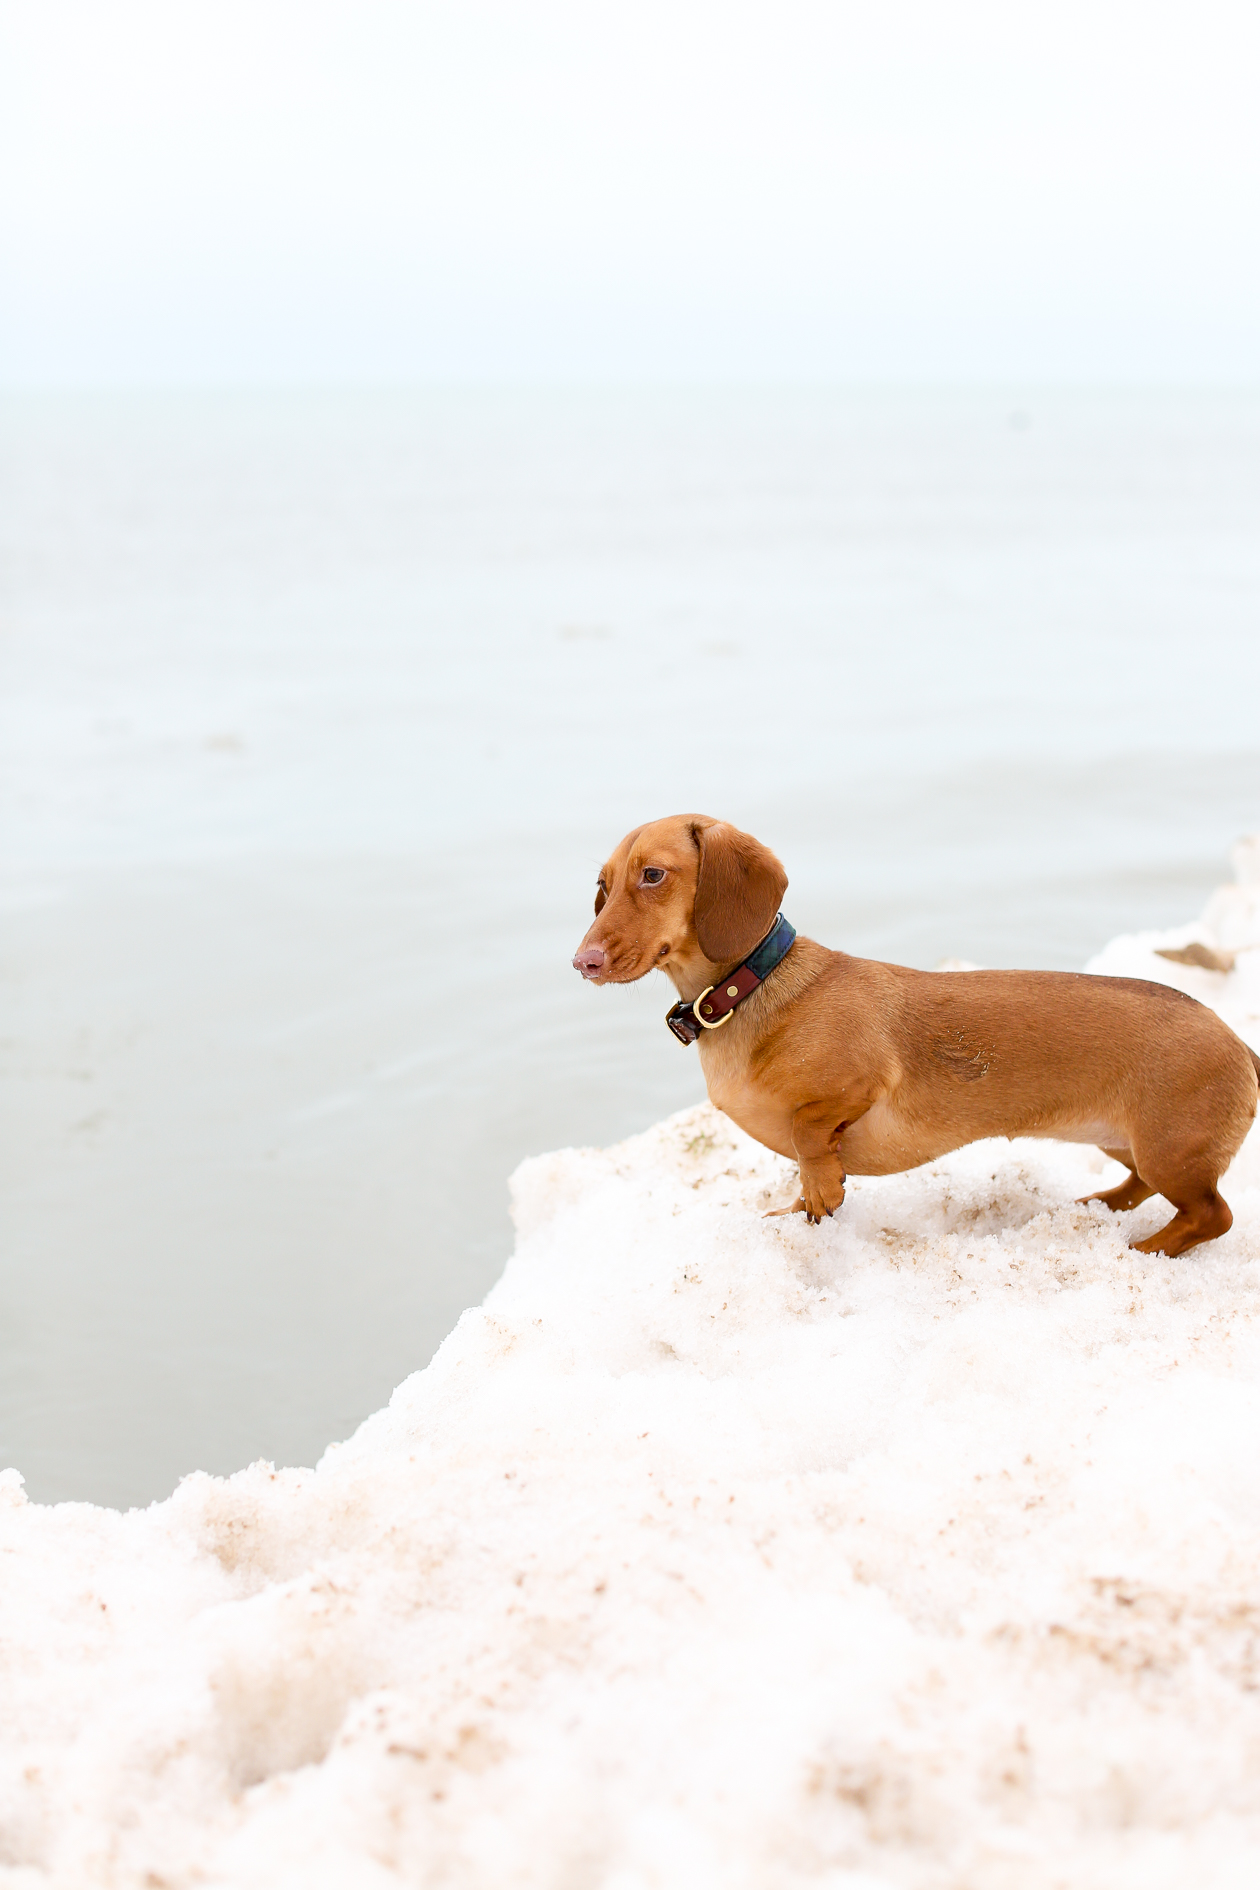
Slightly underexpose your photos in-camera. Slightly underexposed photos retain more detail, whereas overexposed photos lose detail. As you can see from many of the below images, my photos are typically a little darker in-camera compared to the final product. That’s because I like working with as much RAW detail as possible while in Lightroom. (Also note that you might like your photos even brighter than my end results. In which case, don’t underexpose as much as I do!)
So, without further ado, my extremely easy editing process, in this order:
Note: Click on the photos to enlarge them.
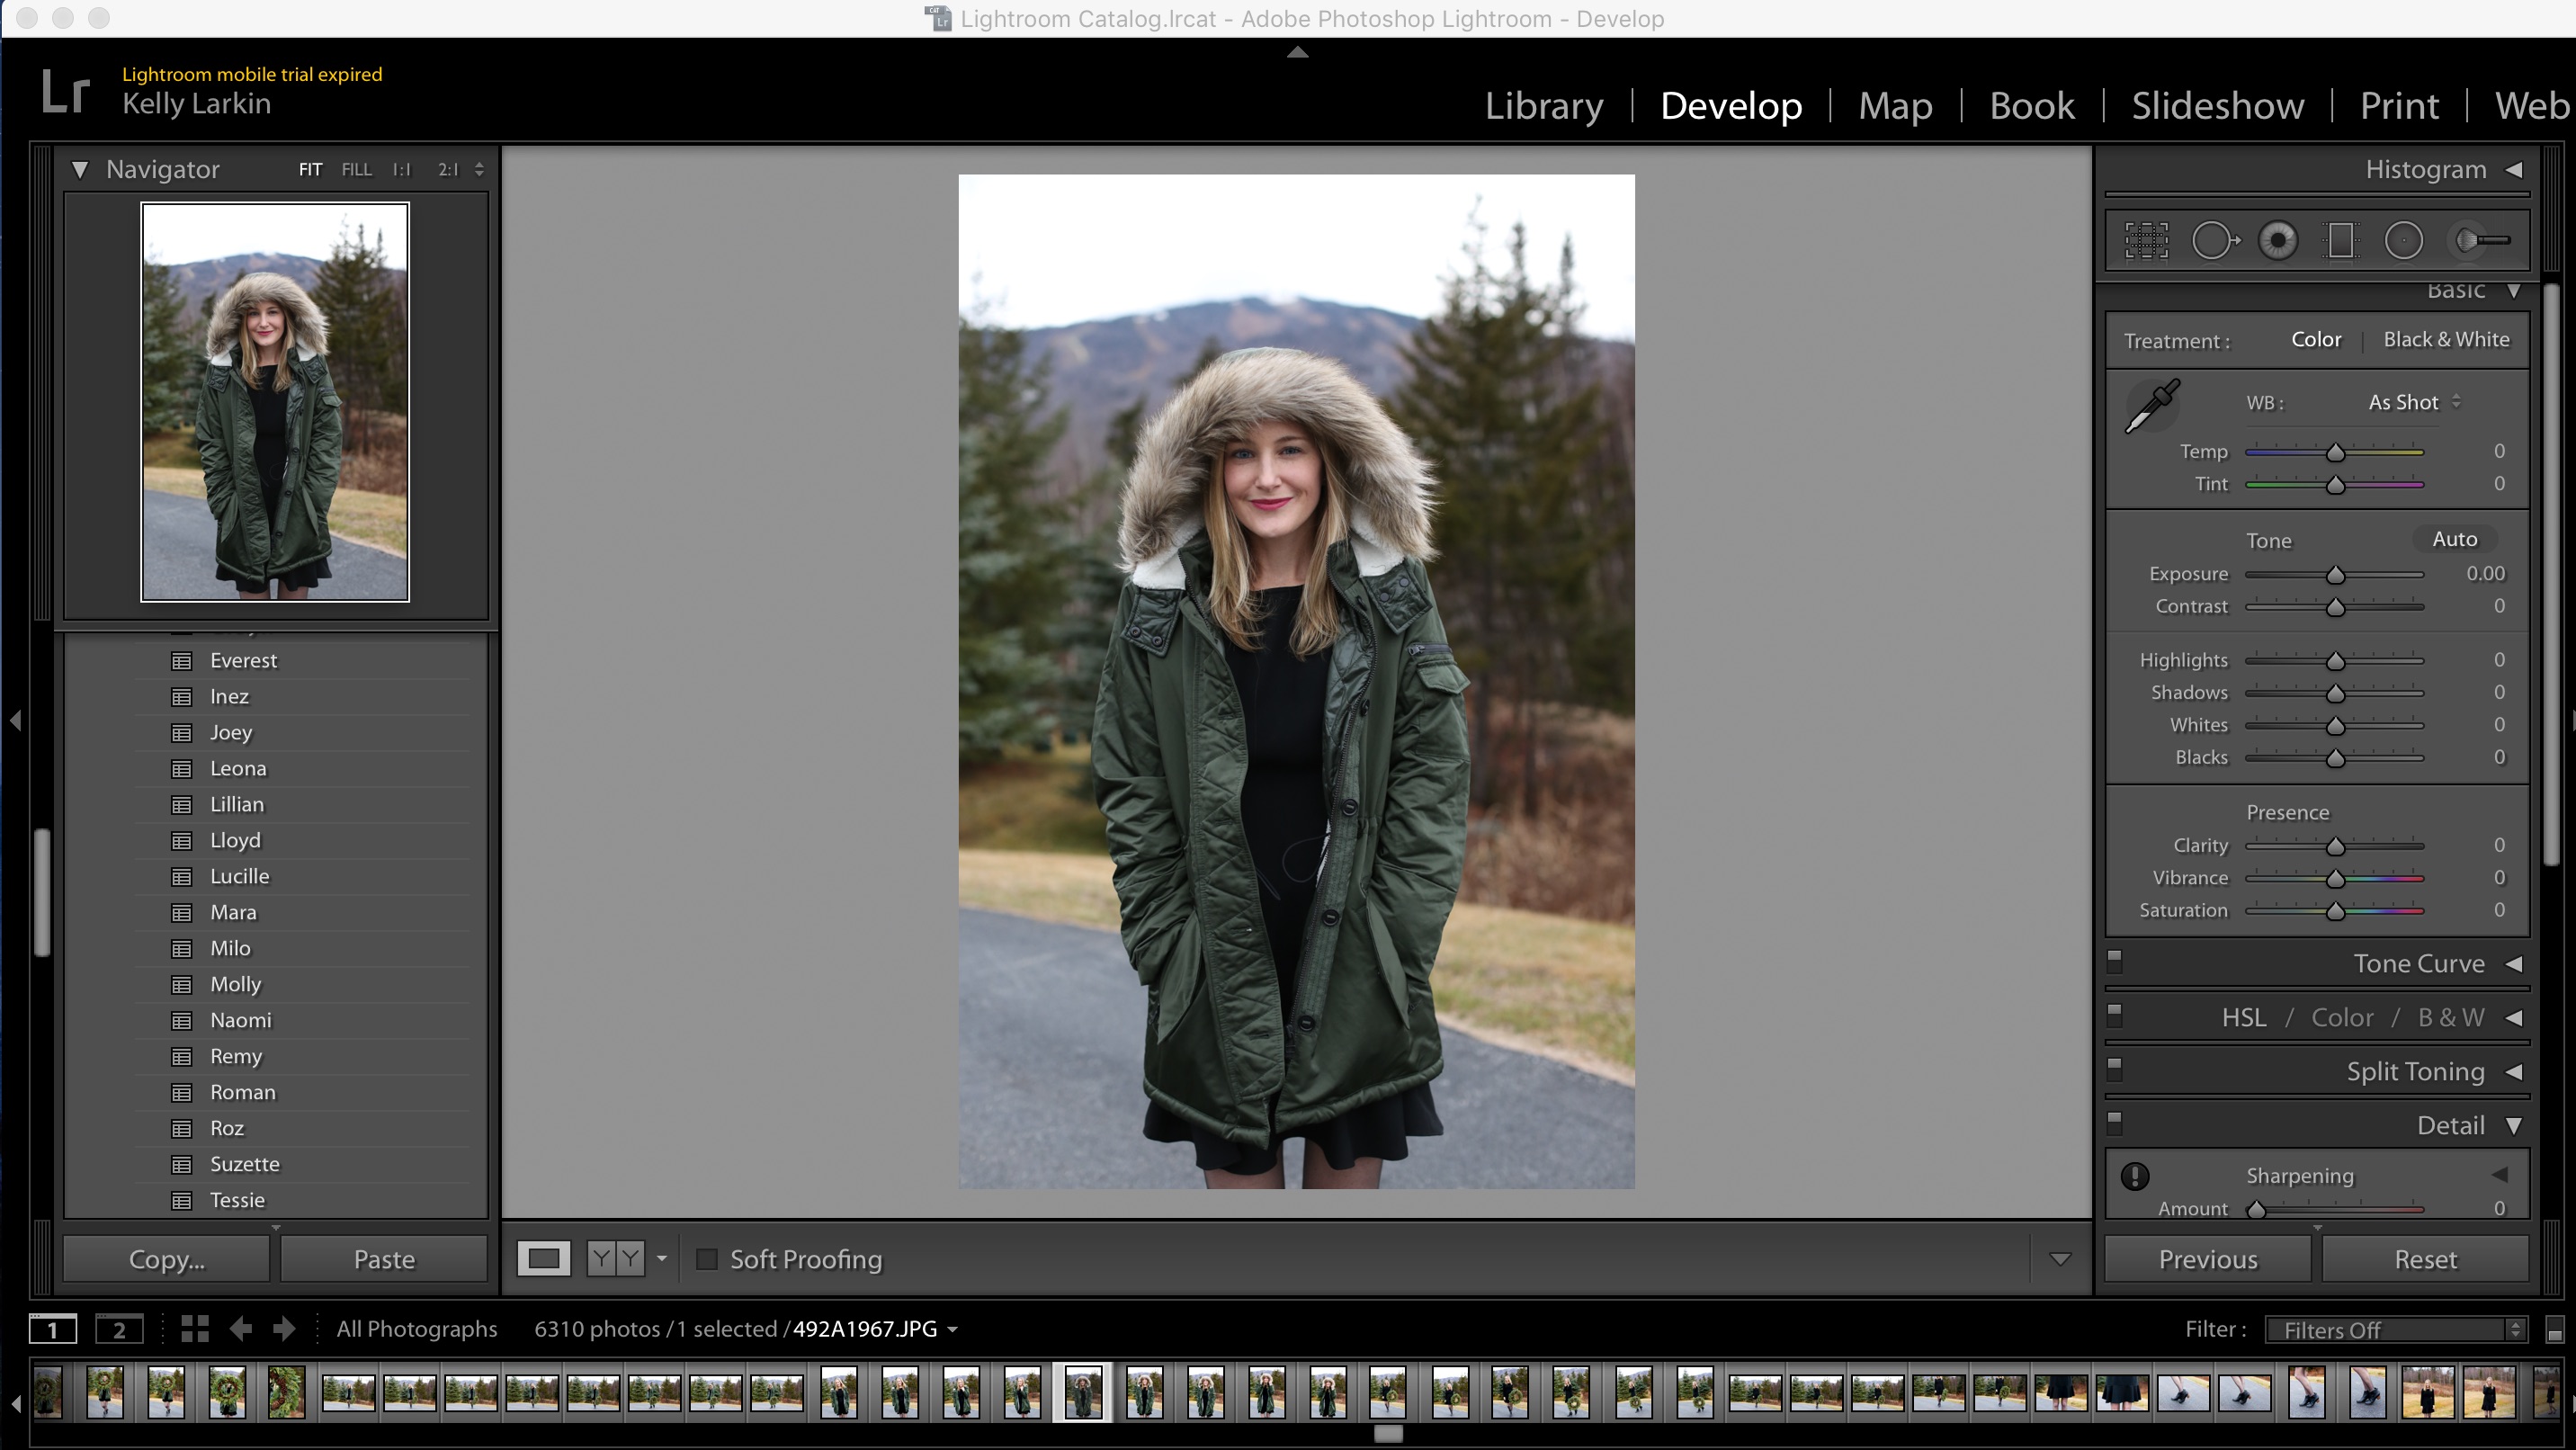
1. Import RAW files into Lightroom.
To do this, I go to “File,” select “Import photos and videos,” and click on my SD card. Once the photos have been imported, I click “Develop” on the black bar, located on the upper right-hand side of the screen. After that, I weed through the photos, delete the ones in which I look like a lunatic, and straighten the ones I want to keep. Straightening is located on the right-hand toolbar under “Histogram.” It’s the rectangle shape all the way to the left.
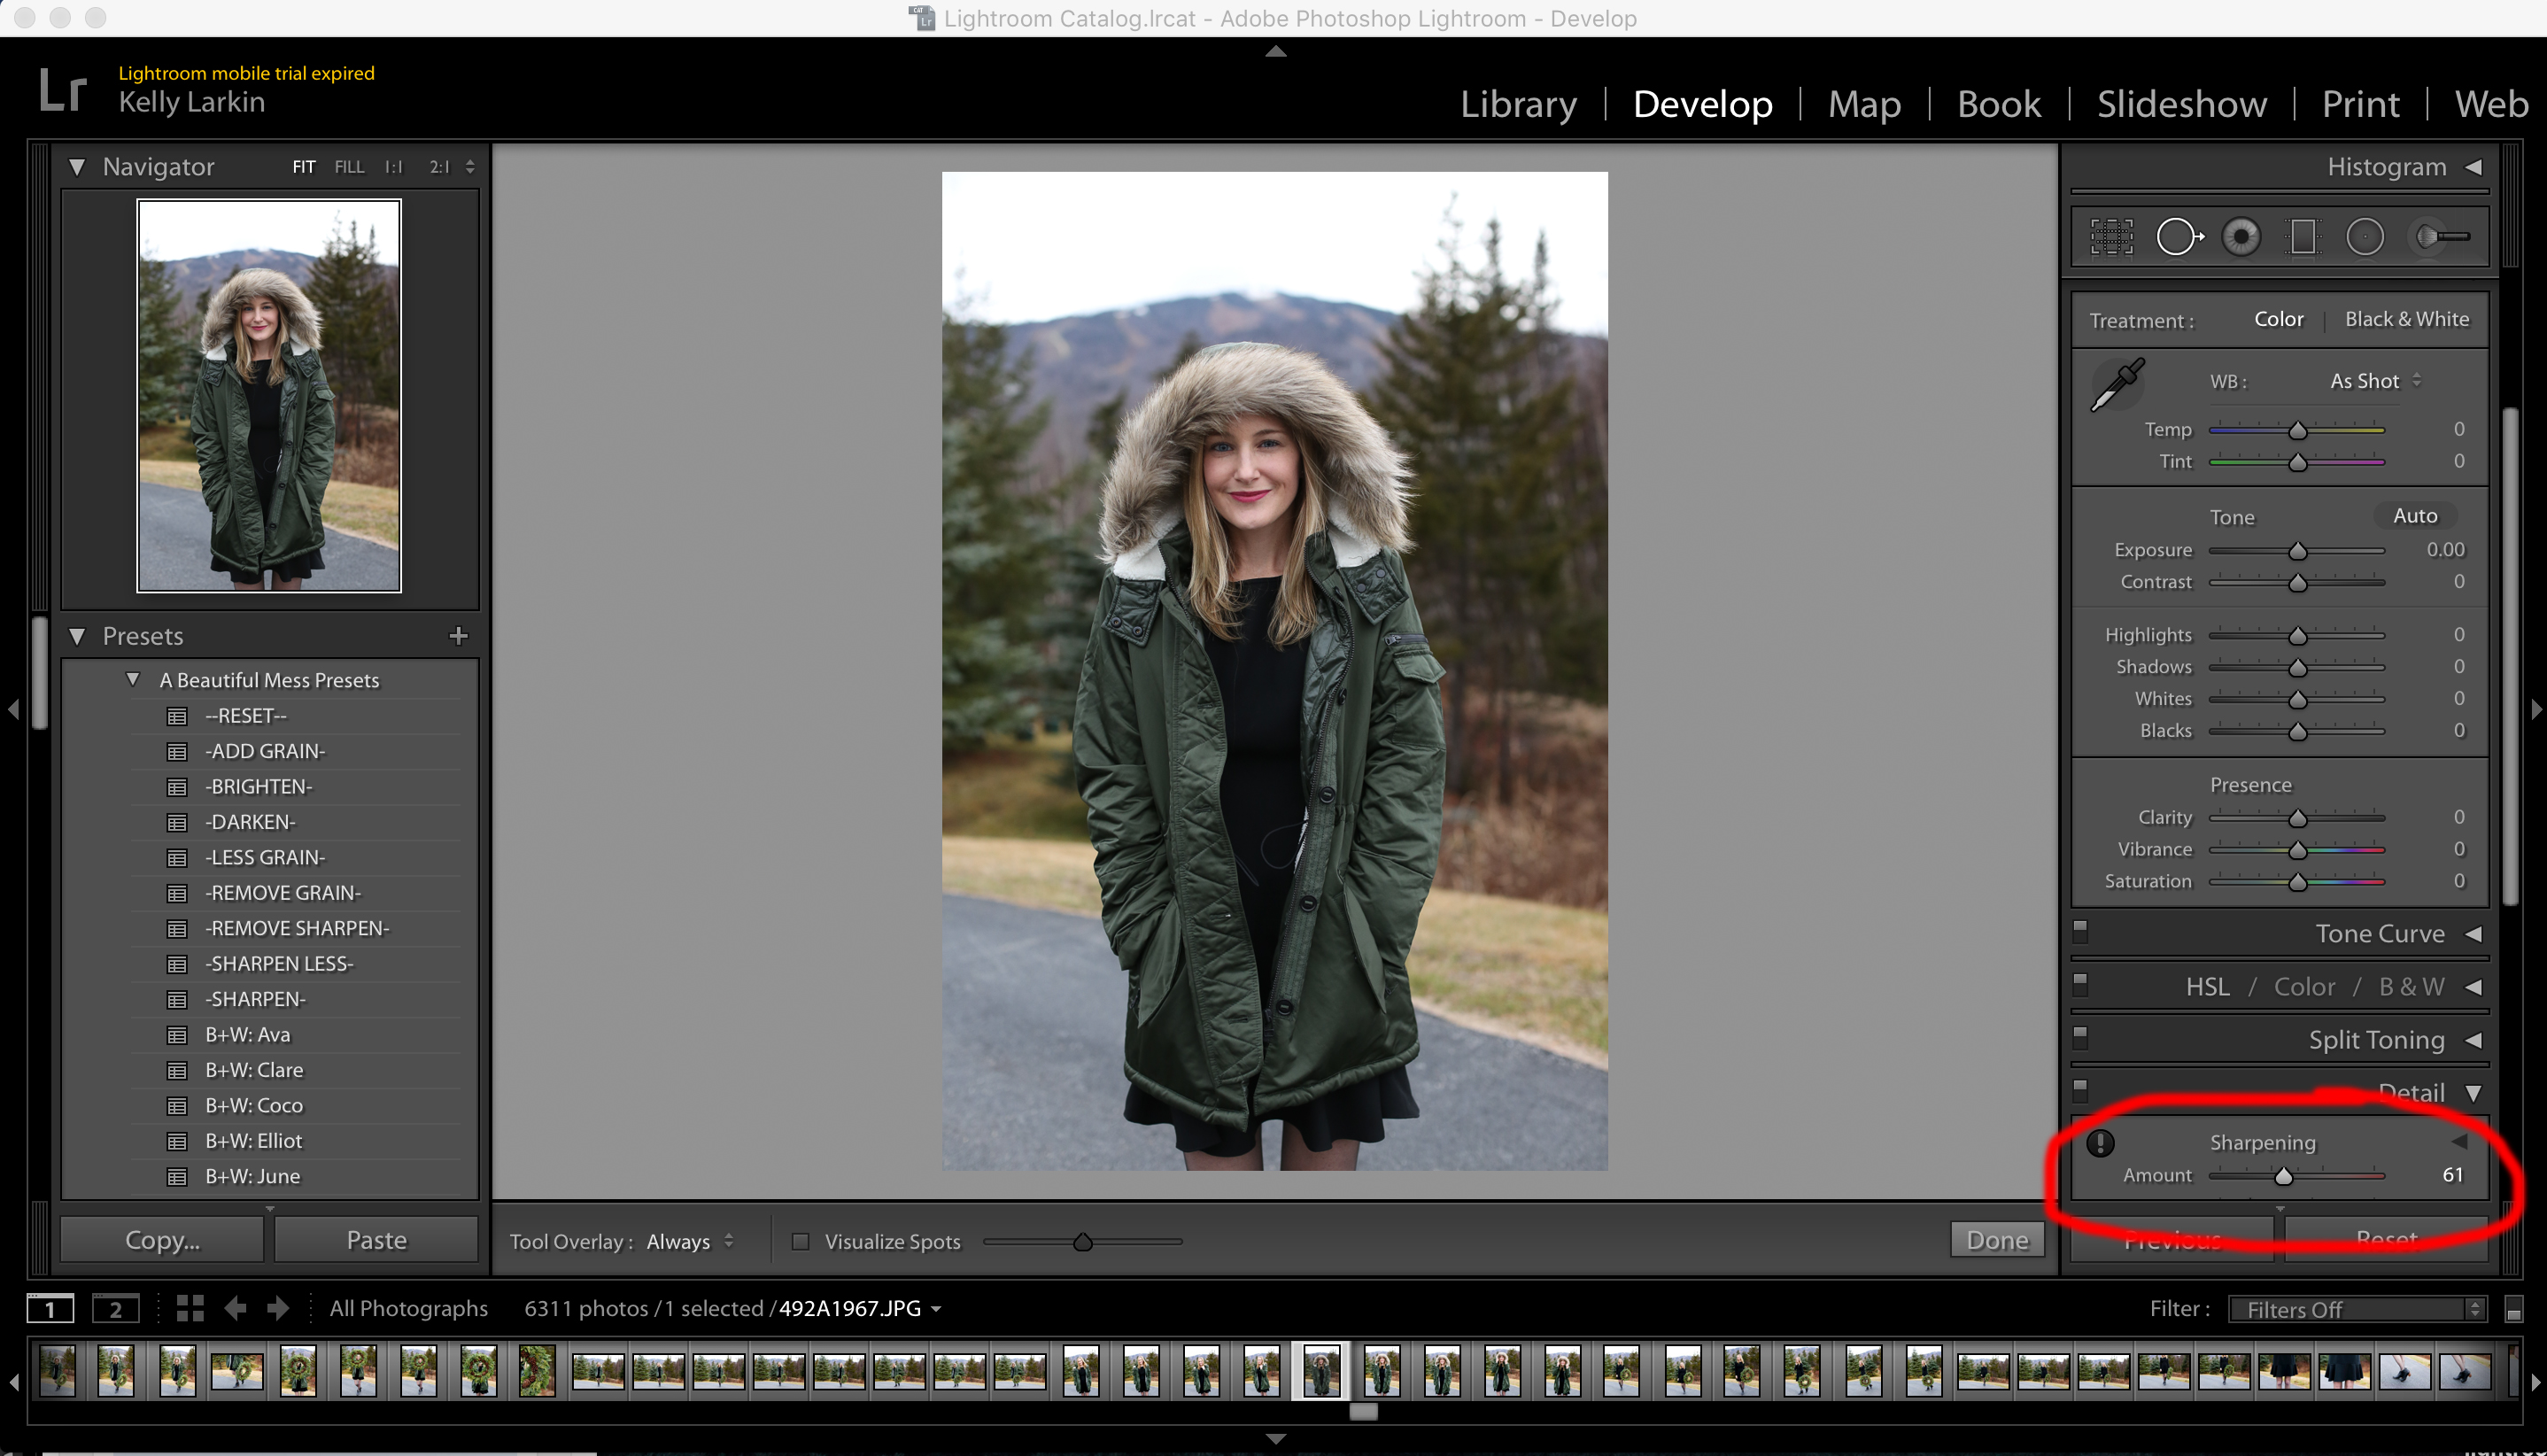
2. I sharpen.
Again, this might not be for you, but I love sharp photos. Not too sharp, though. I’ve found that once I head into the 80+ range, things start to look a little off. Typically, I’m in the 50 to 75 range. Sharpening is located on the right-hand toolbar under “Detail.”
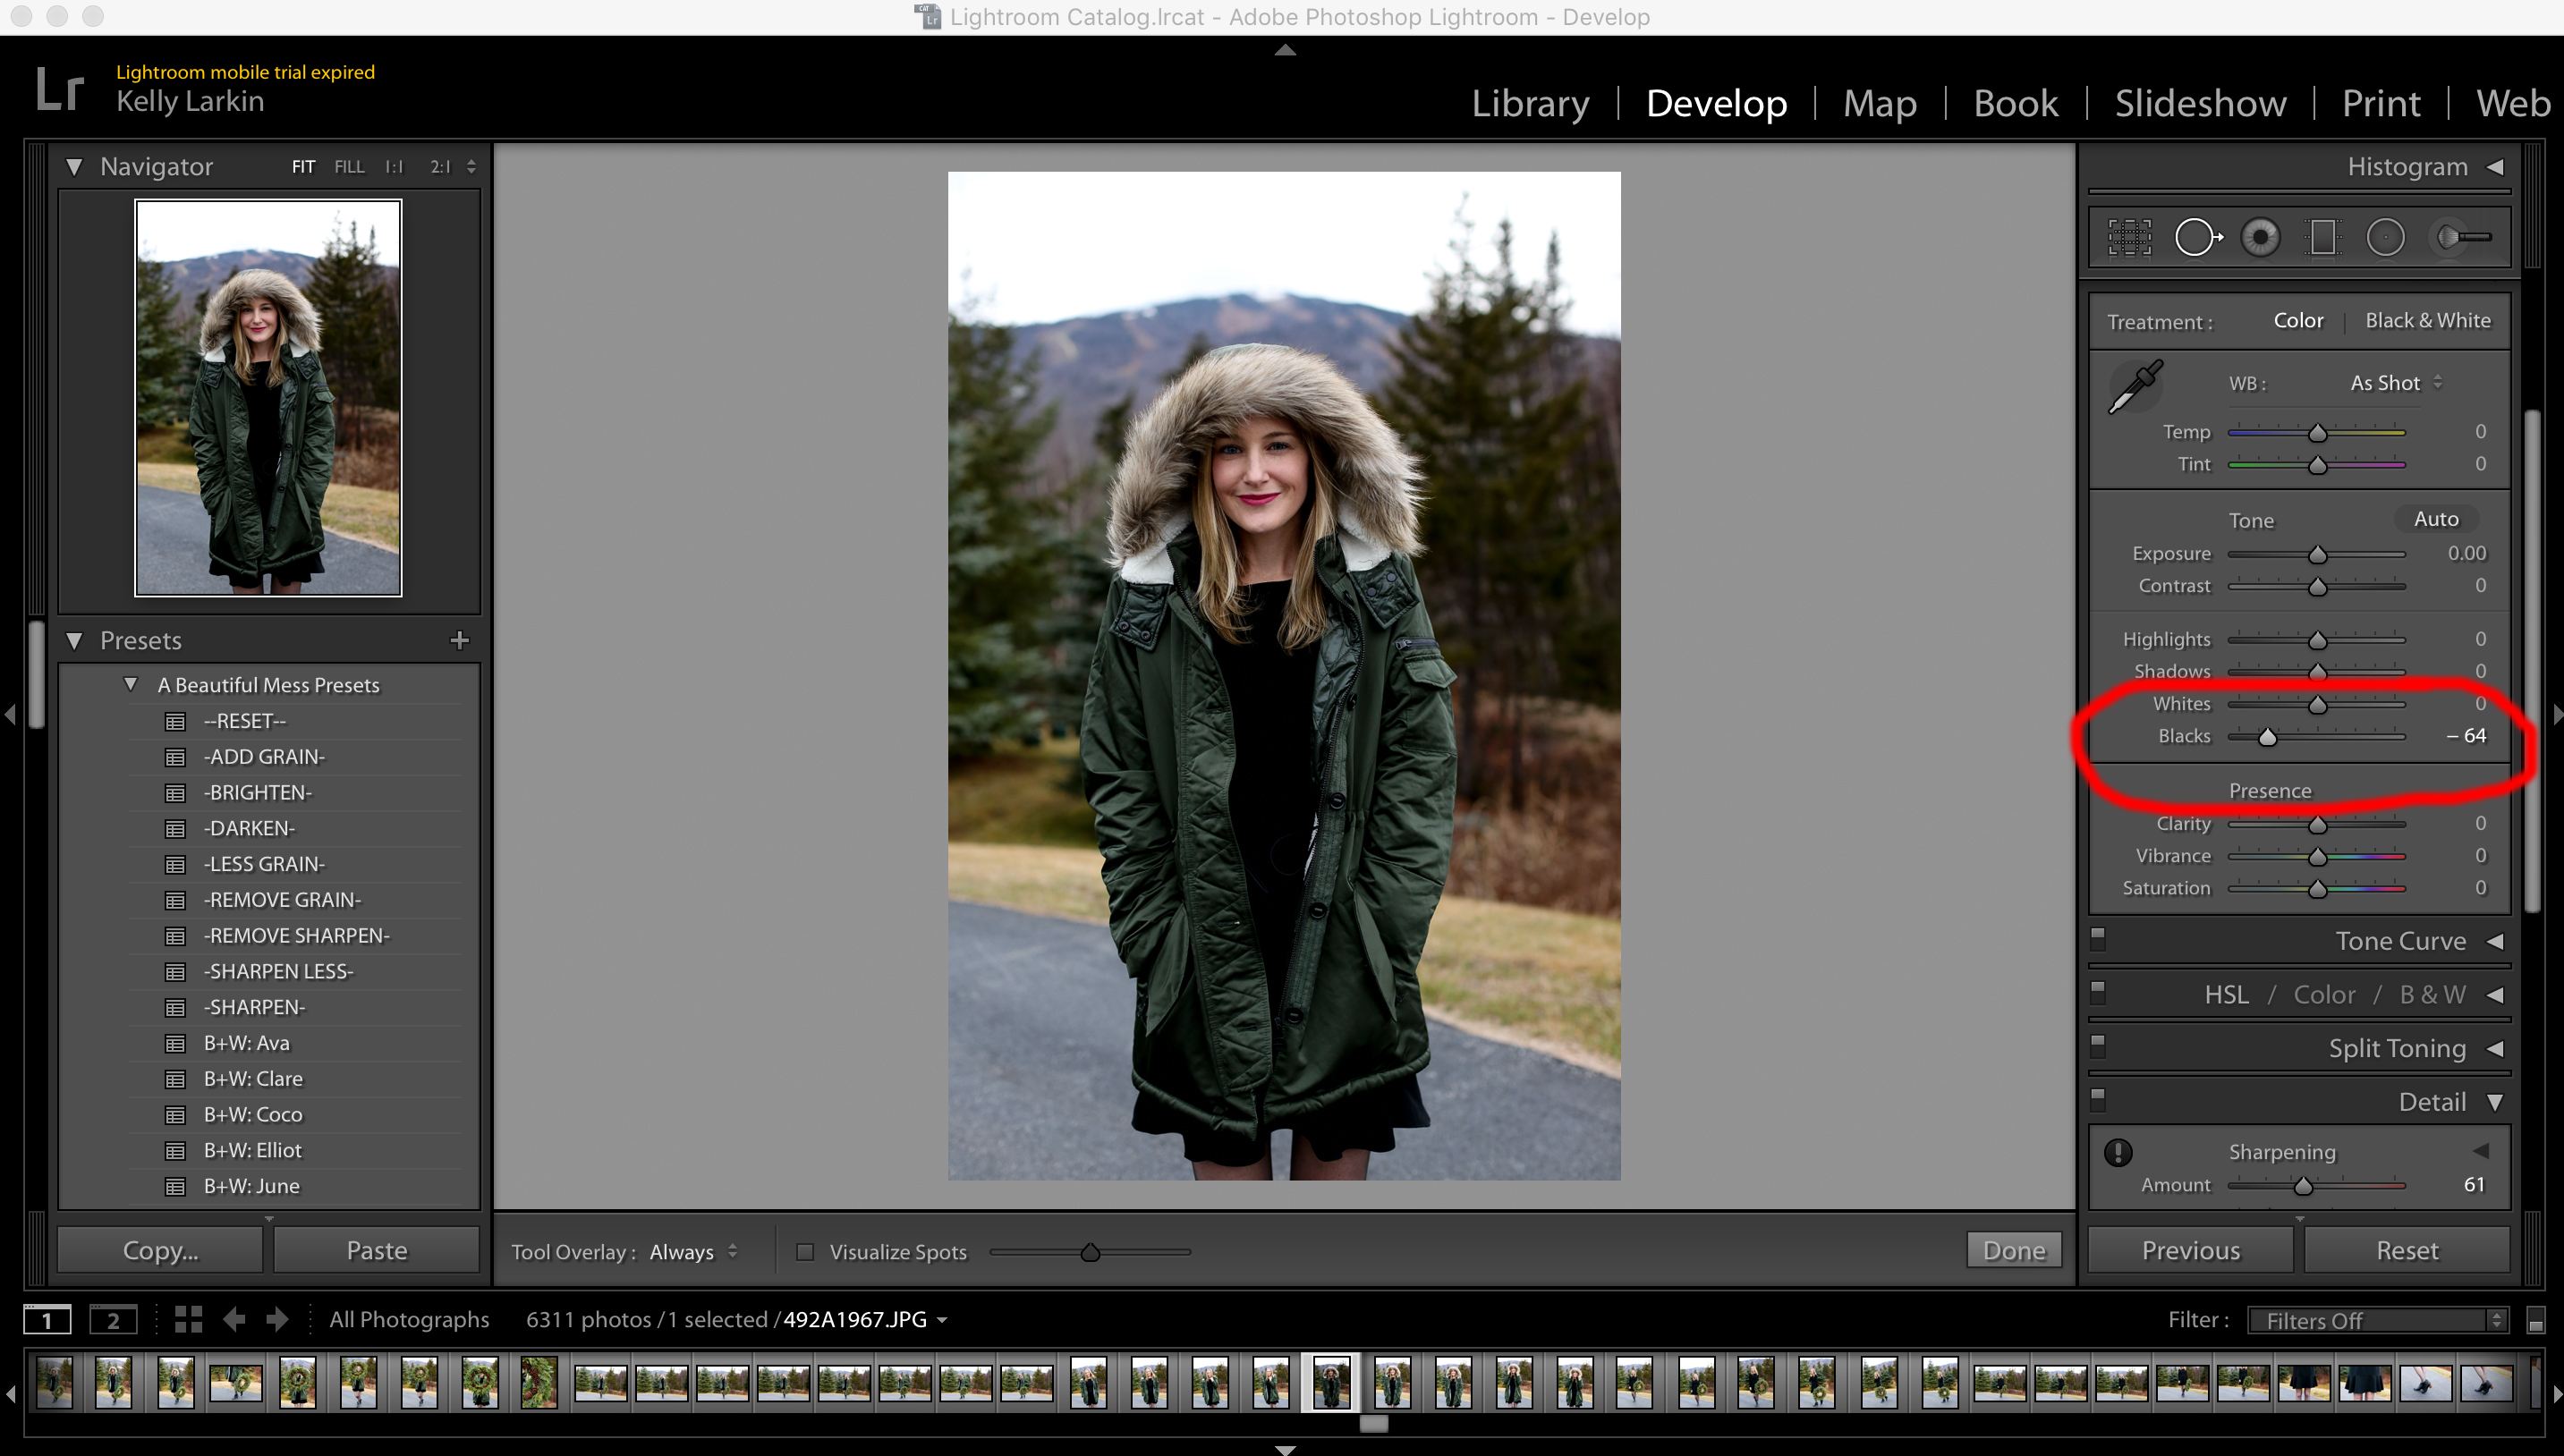
3. I drag the “Blacks” setting down.
As I mentioned in this recent post, I can’t get enough of photos that pop, and I love the effect that the “Blacks” setting can make. Generally, I drag my blacks down to -50 as a starting point, but I almost always drag it down further later on. In the above photo, for example, I end up with a -64 setting in the end. The “Blacks” setting is located on the right-hand toolbar under “Basic.”
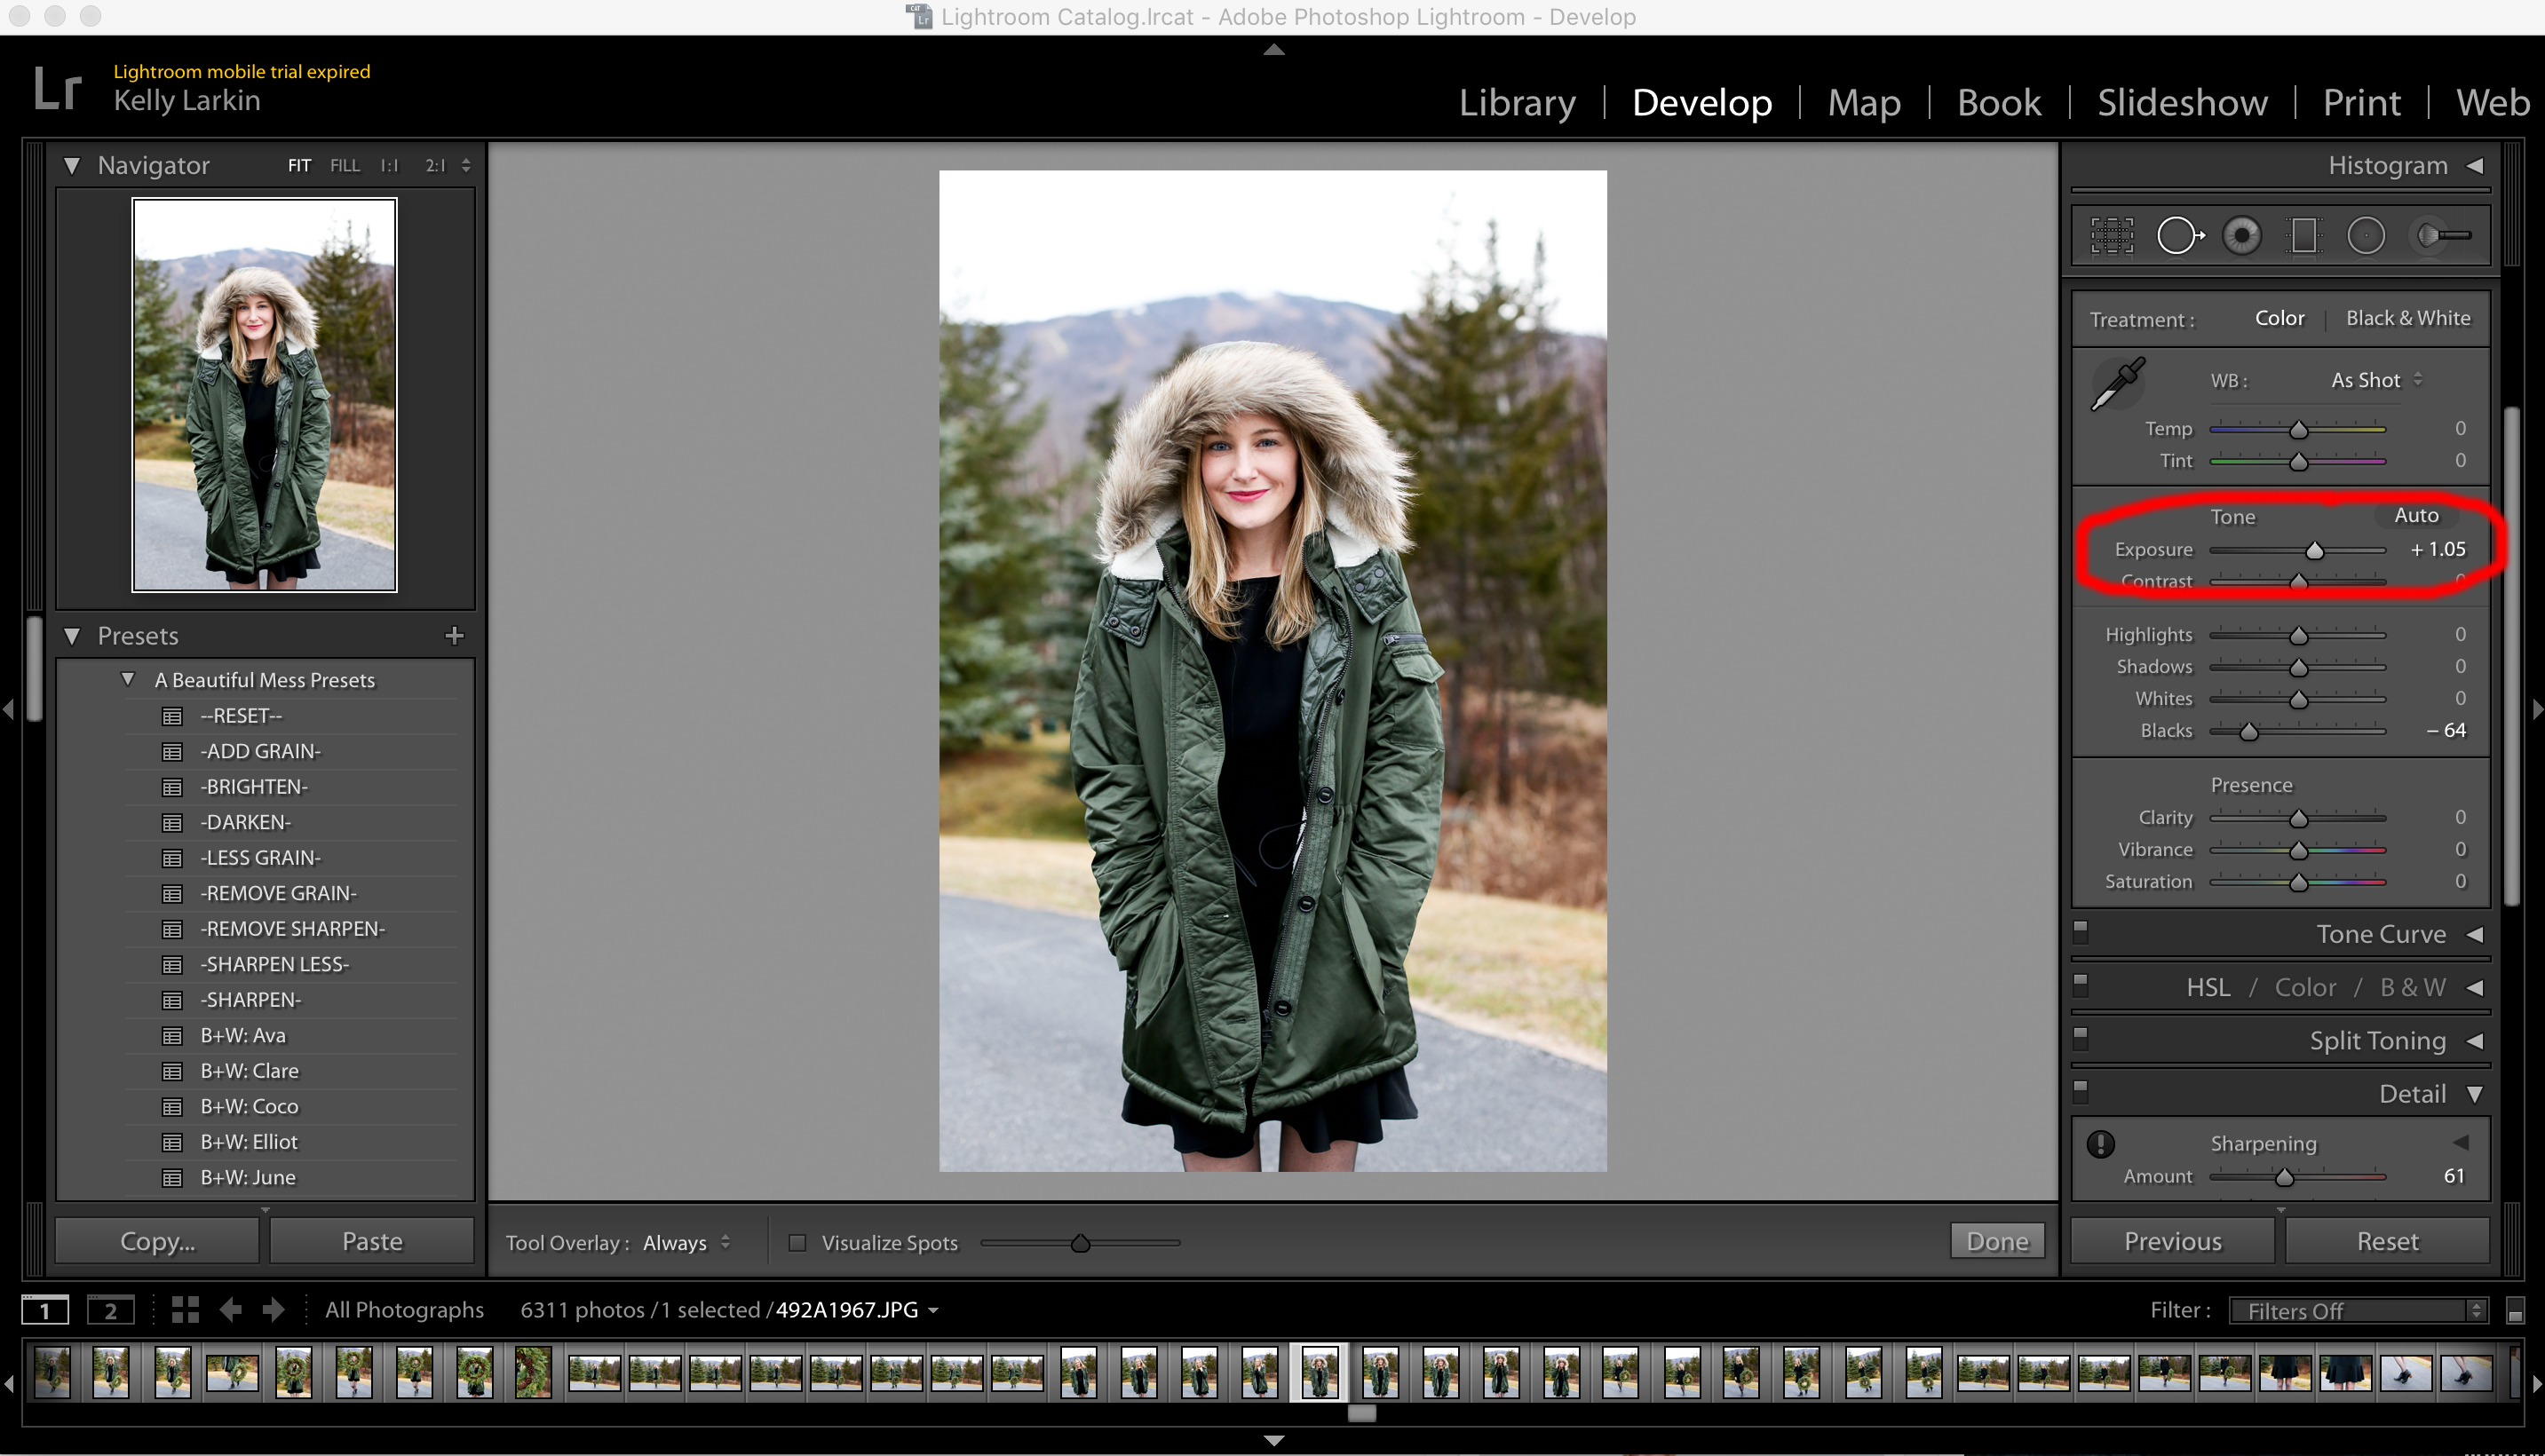
4. I jump to Exposure, and hike it up.
More often than not, I’m in the +.05 to +1.50 range, but sometimes I misjudge and need to go higher. With the above photo, I end up having to hike it up to +1.05. Exposure is located on the right-hand toolbar under “Basic.”
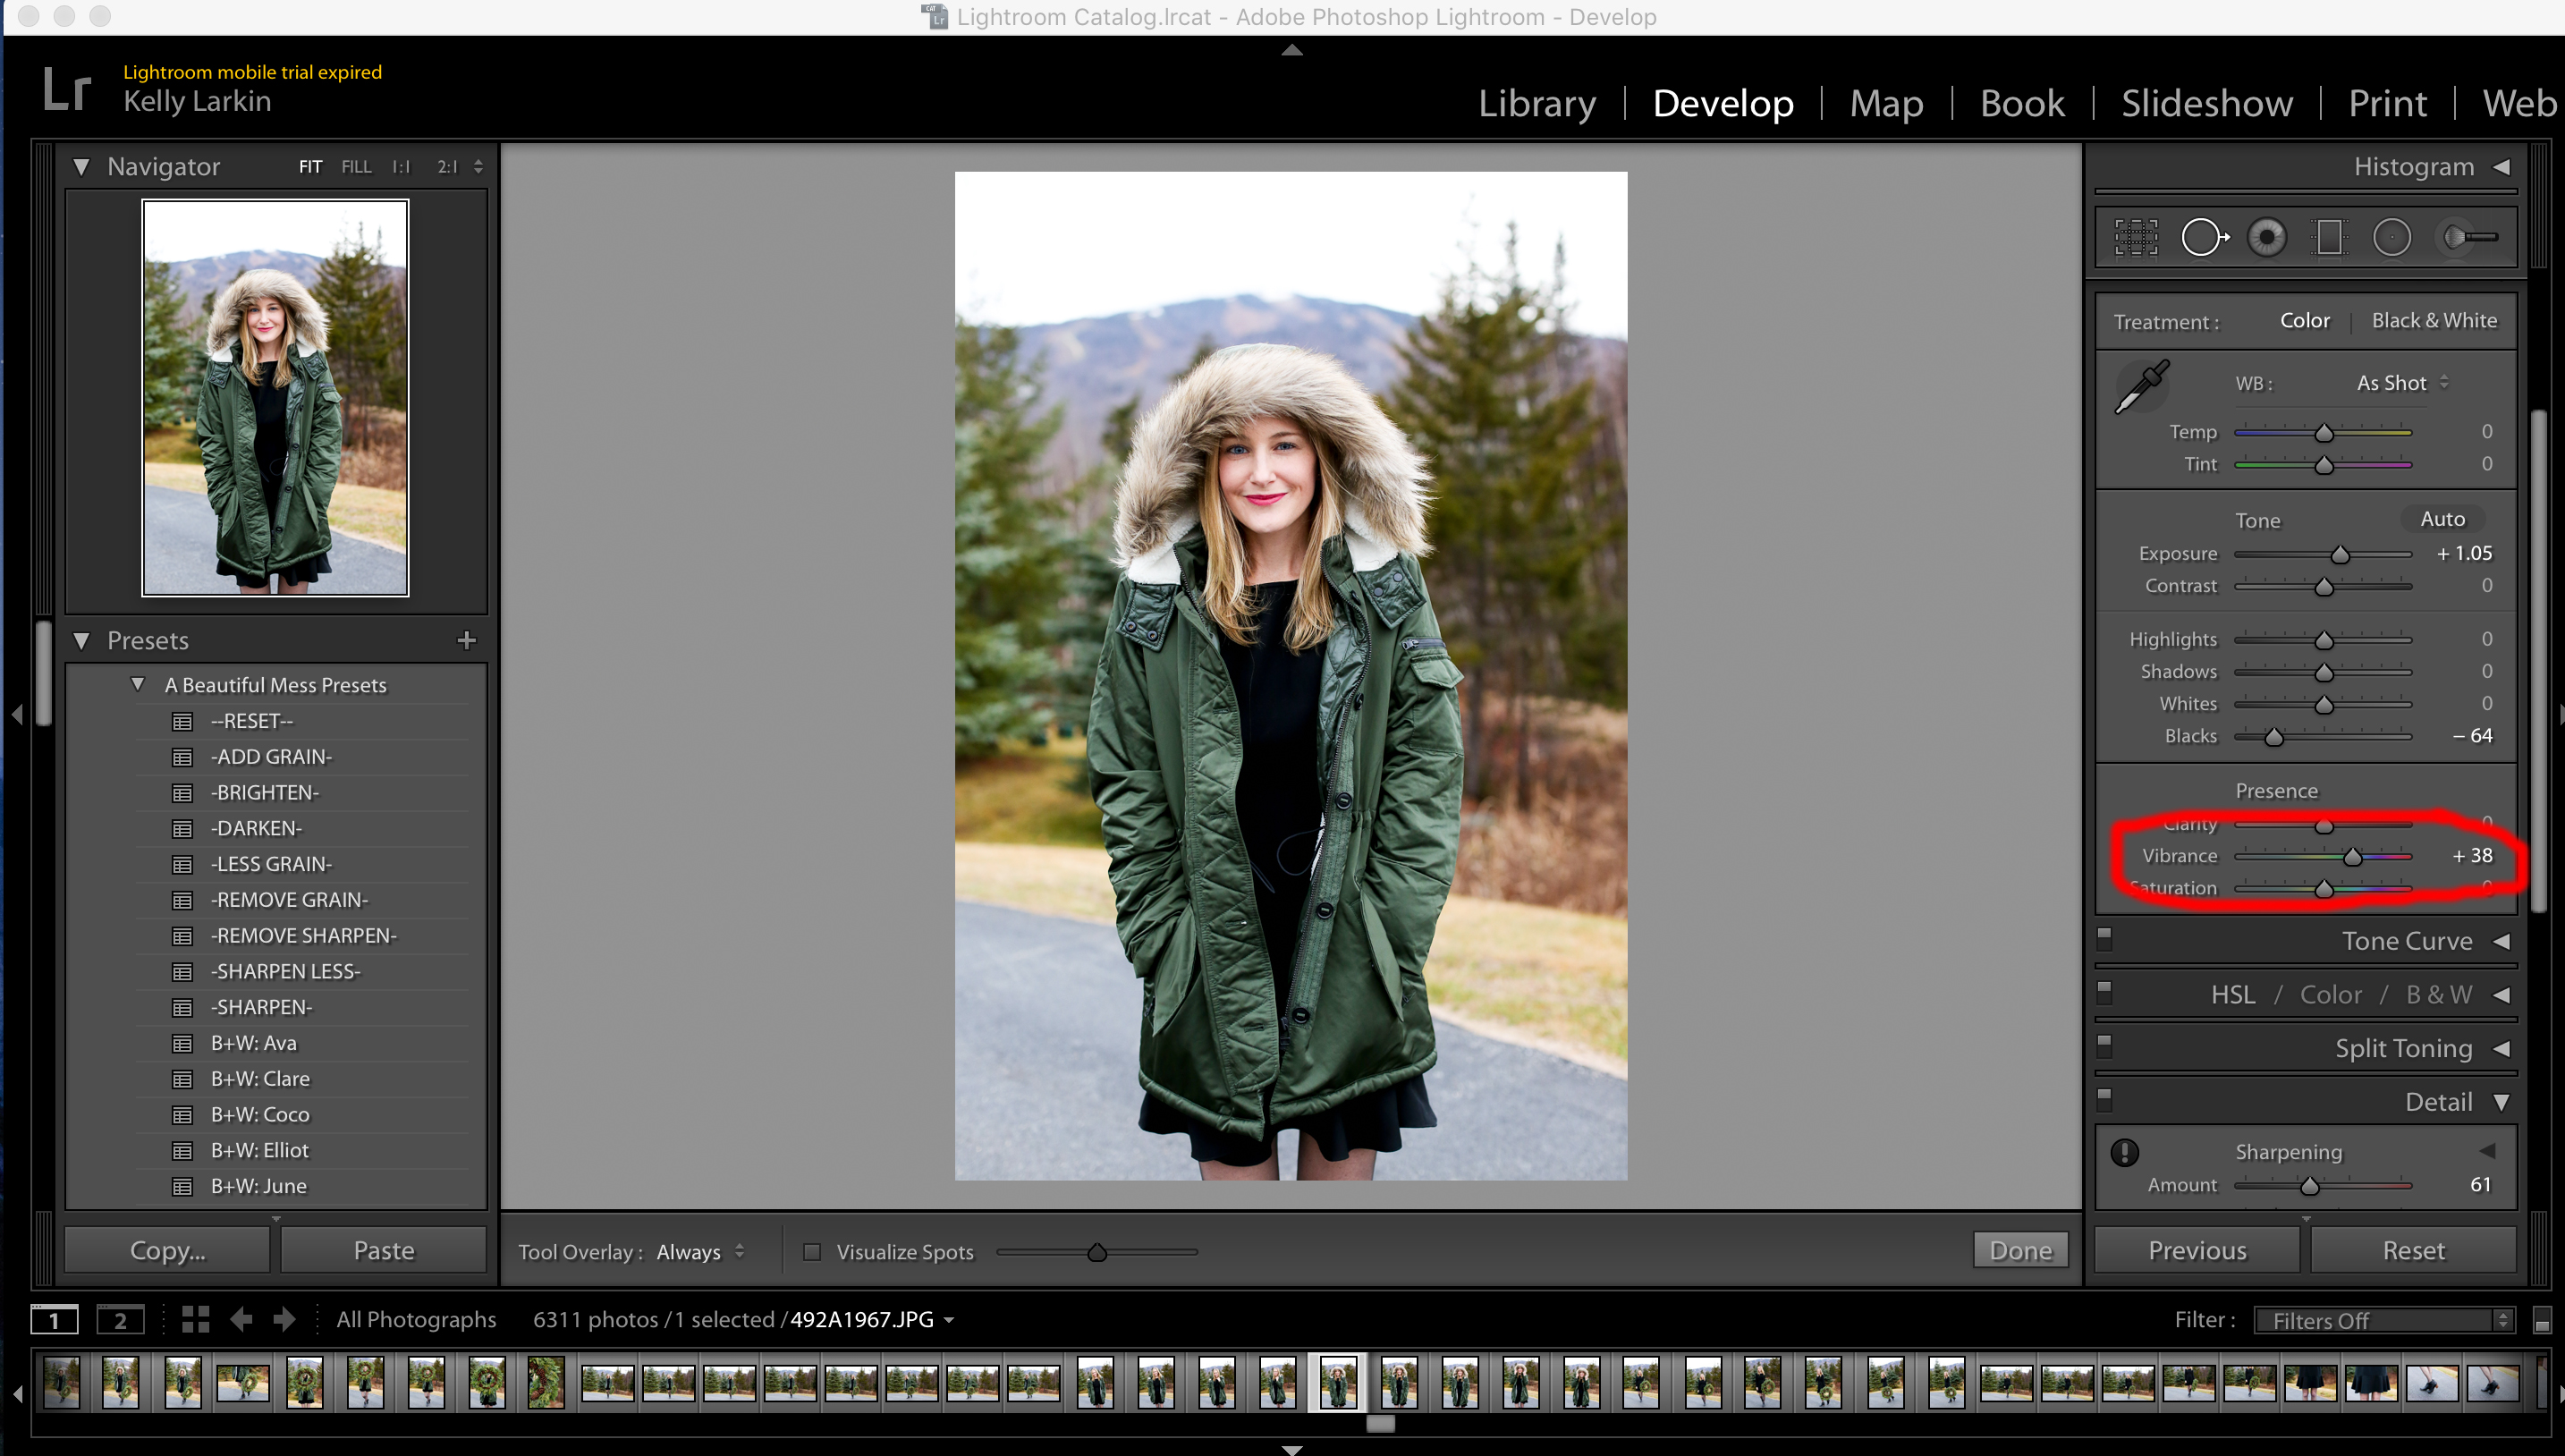
5. I up Vibrance.
I’m usually in the +20 to +40 range. Once in a while, I’ll up the saturation, which is located right below “Vibrance,” somewhere between +1 and +5. But I’m careful about making sure the colors don’t look fake. In the above photo, I end up going with +38 for Vibrance, and 0 for Saturation. Vibrance and Saturation are located on the right-hand toolbar under “Basic.”
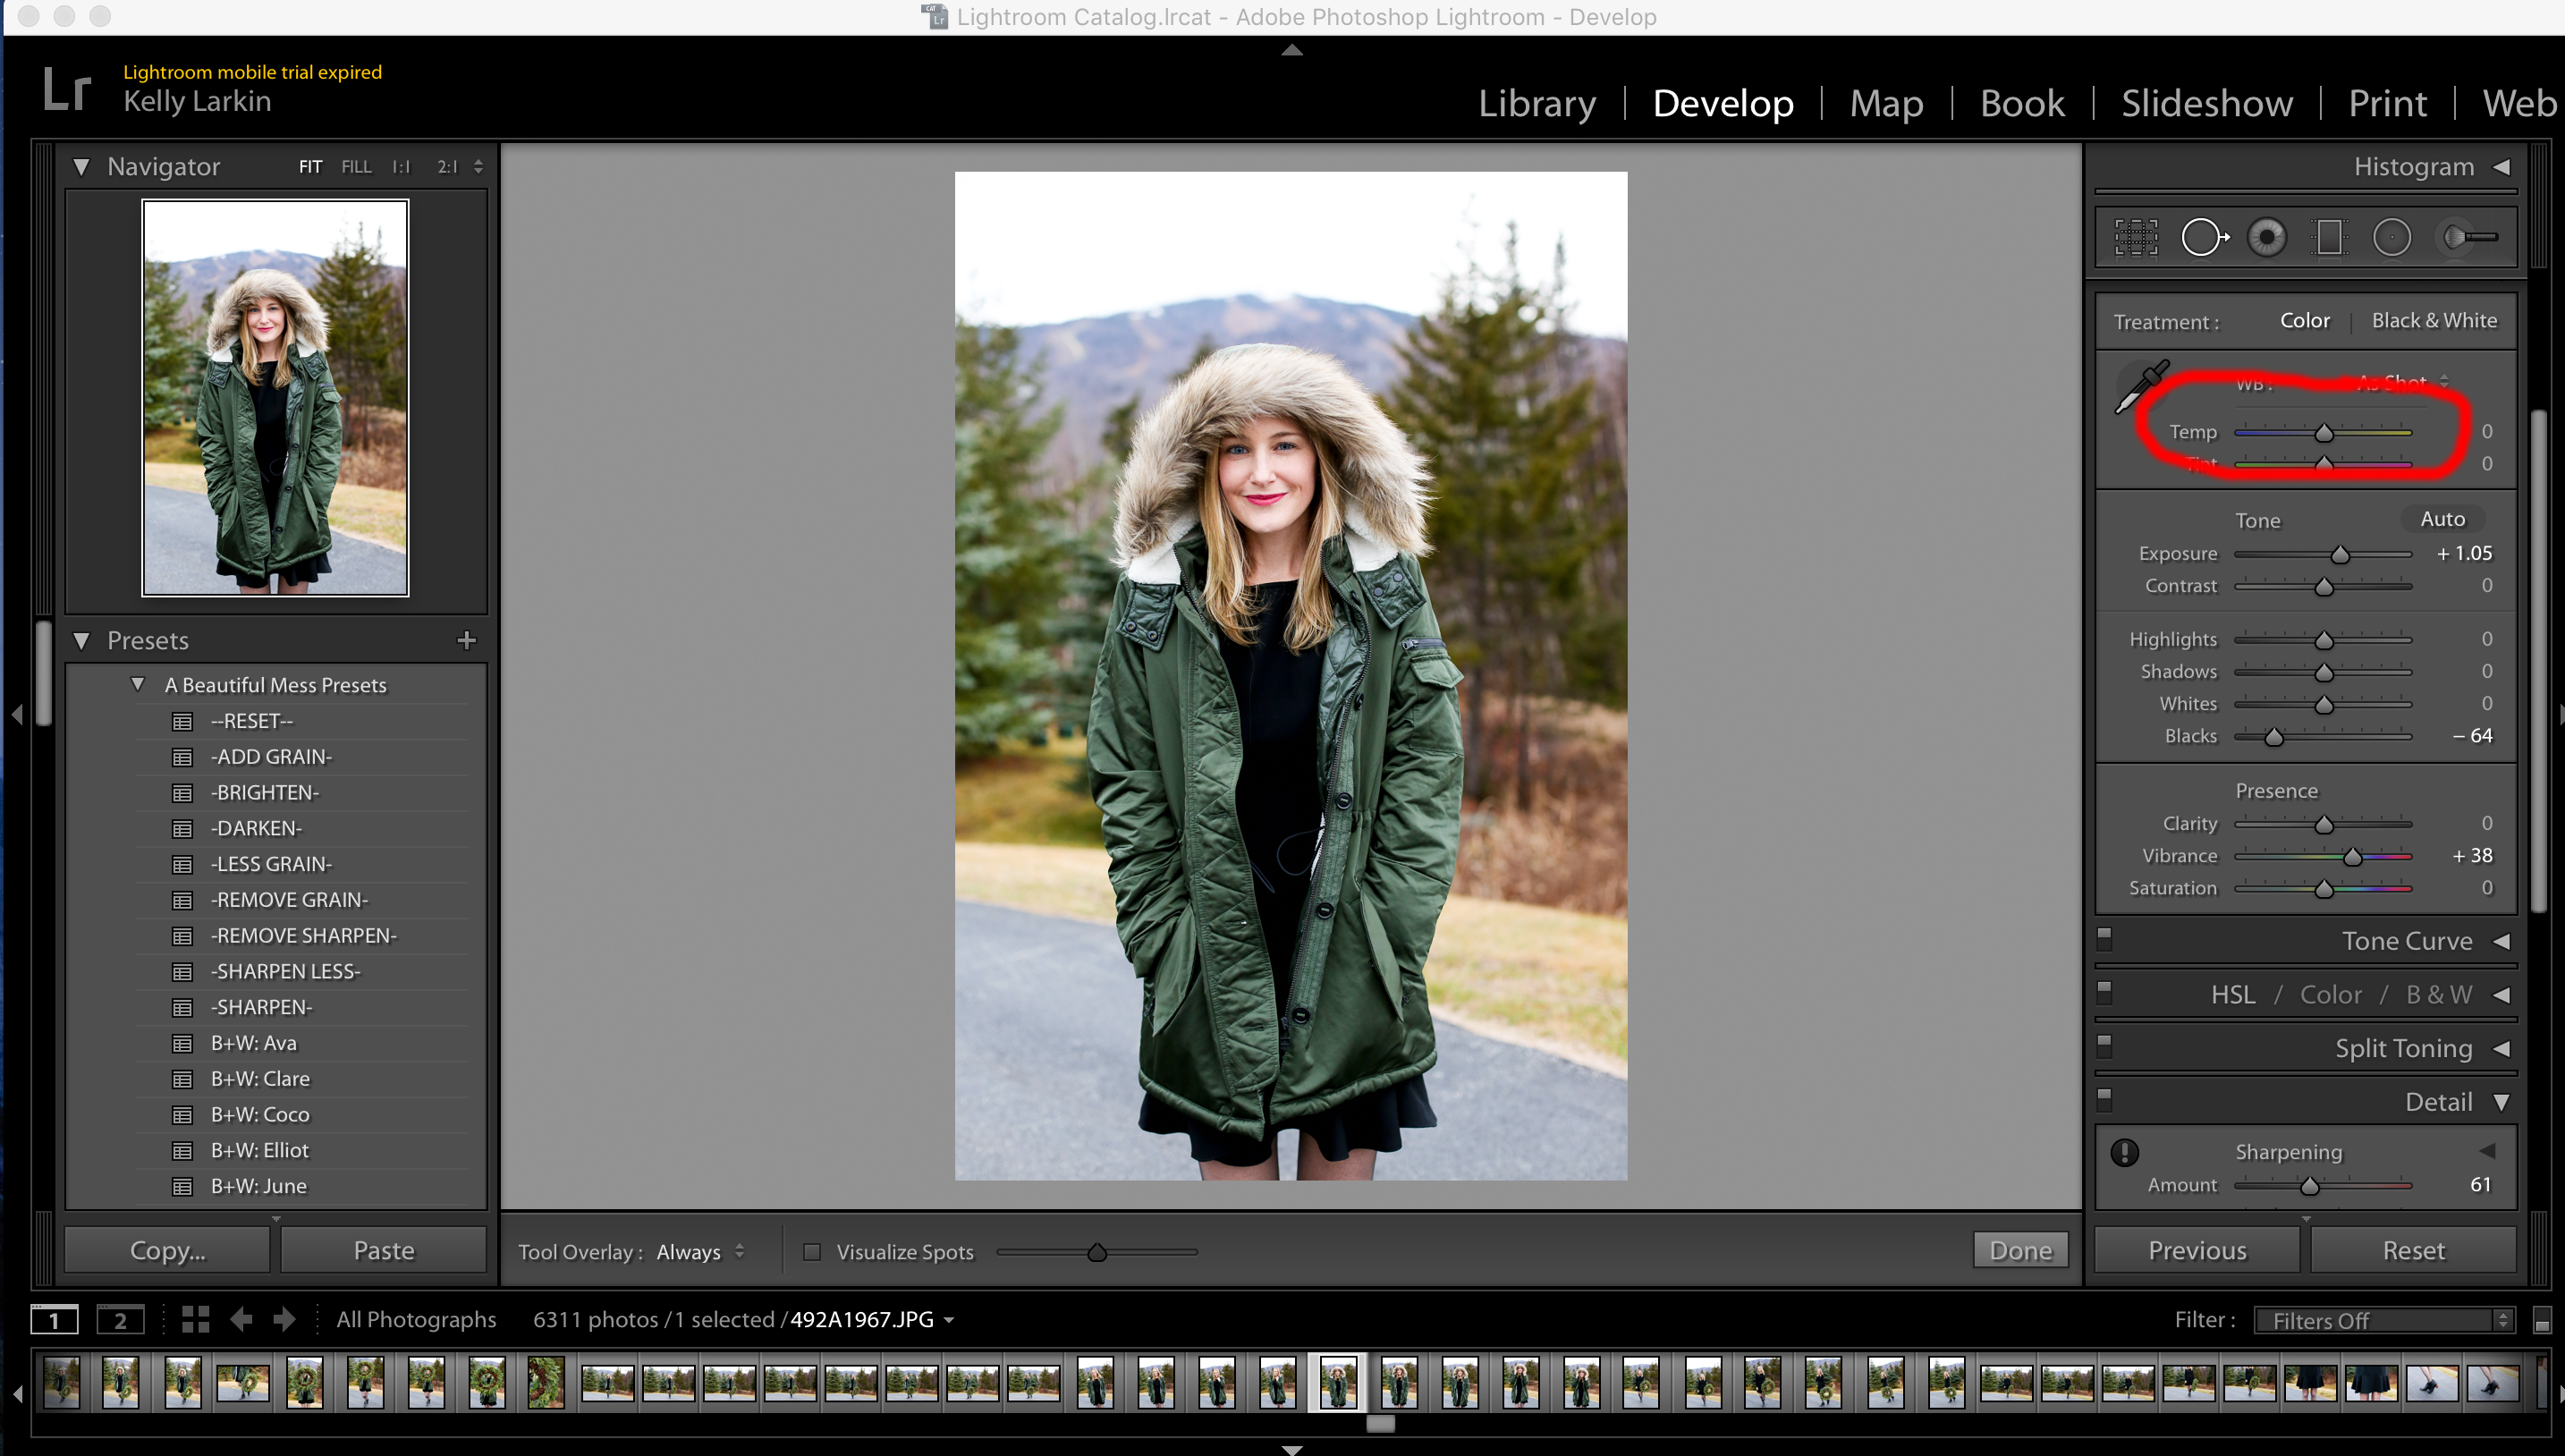
6. I adjust Temperature if necessary.
I usually don’t do this, but once in a while, it’s needed. For example, perhaps I didn’t get my white balance completely right in-camera, and my photo is a little too cool or a little too warm. Other times, I’m looking for a certain “feel” that can be achieved by warming up or cooling down a photo. The Temperature setting helps with this. For reference, I’m usually between -5 and +5. Temperature is located on the right-hand toolbar under “Basic.”
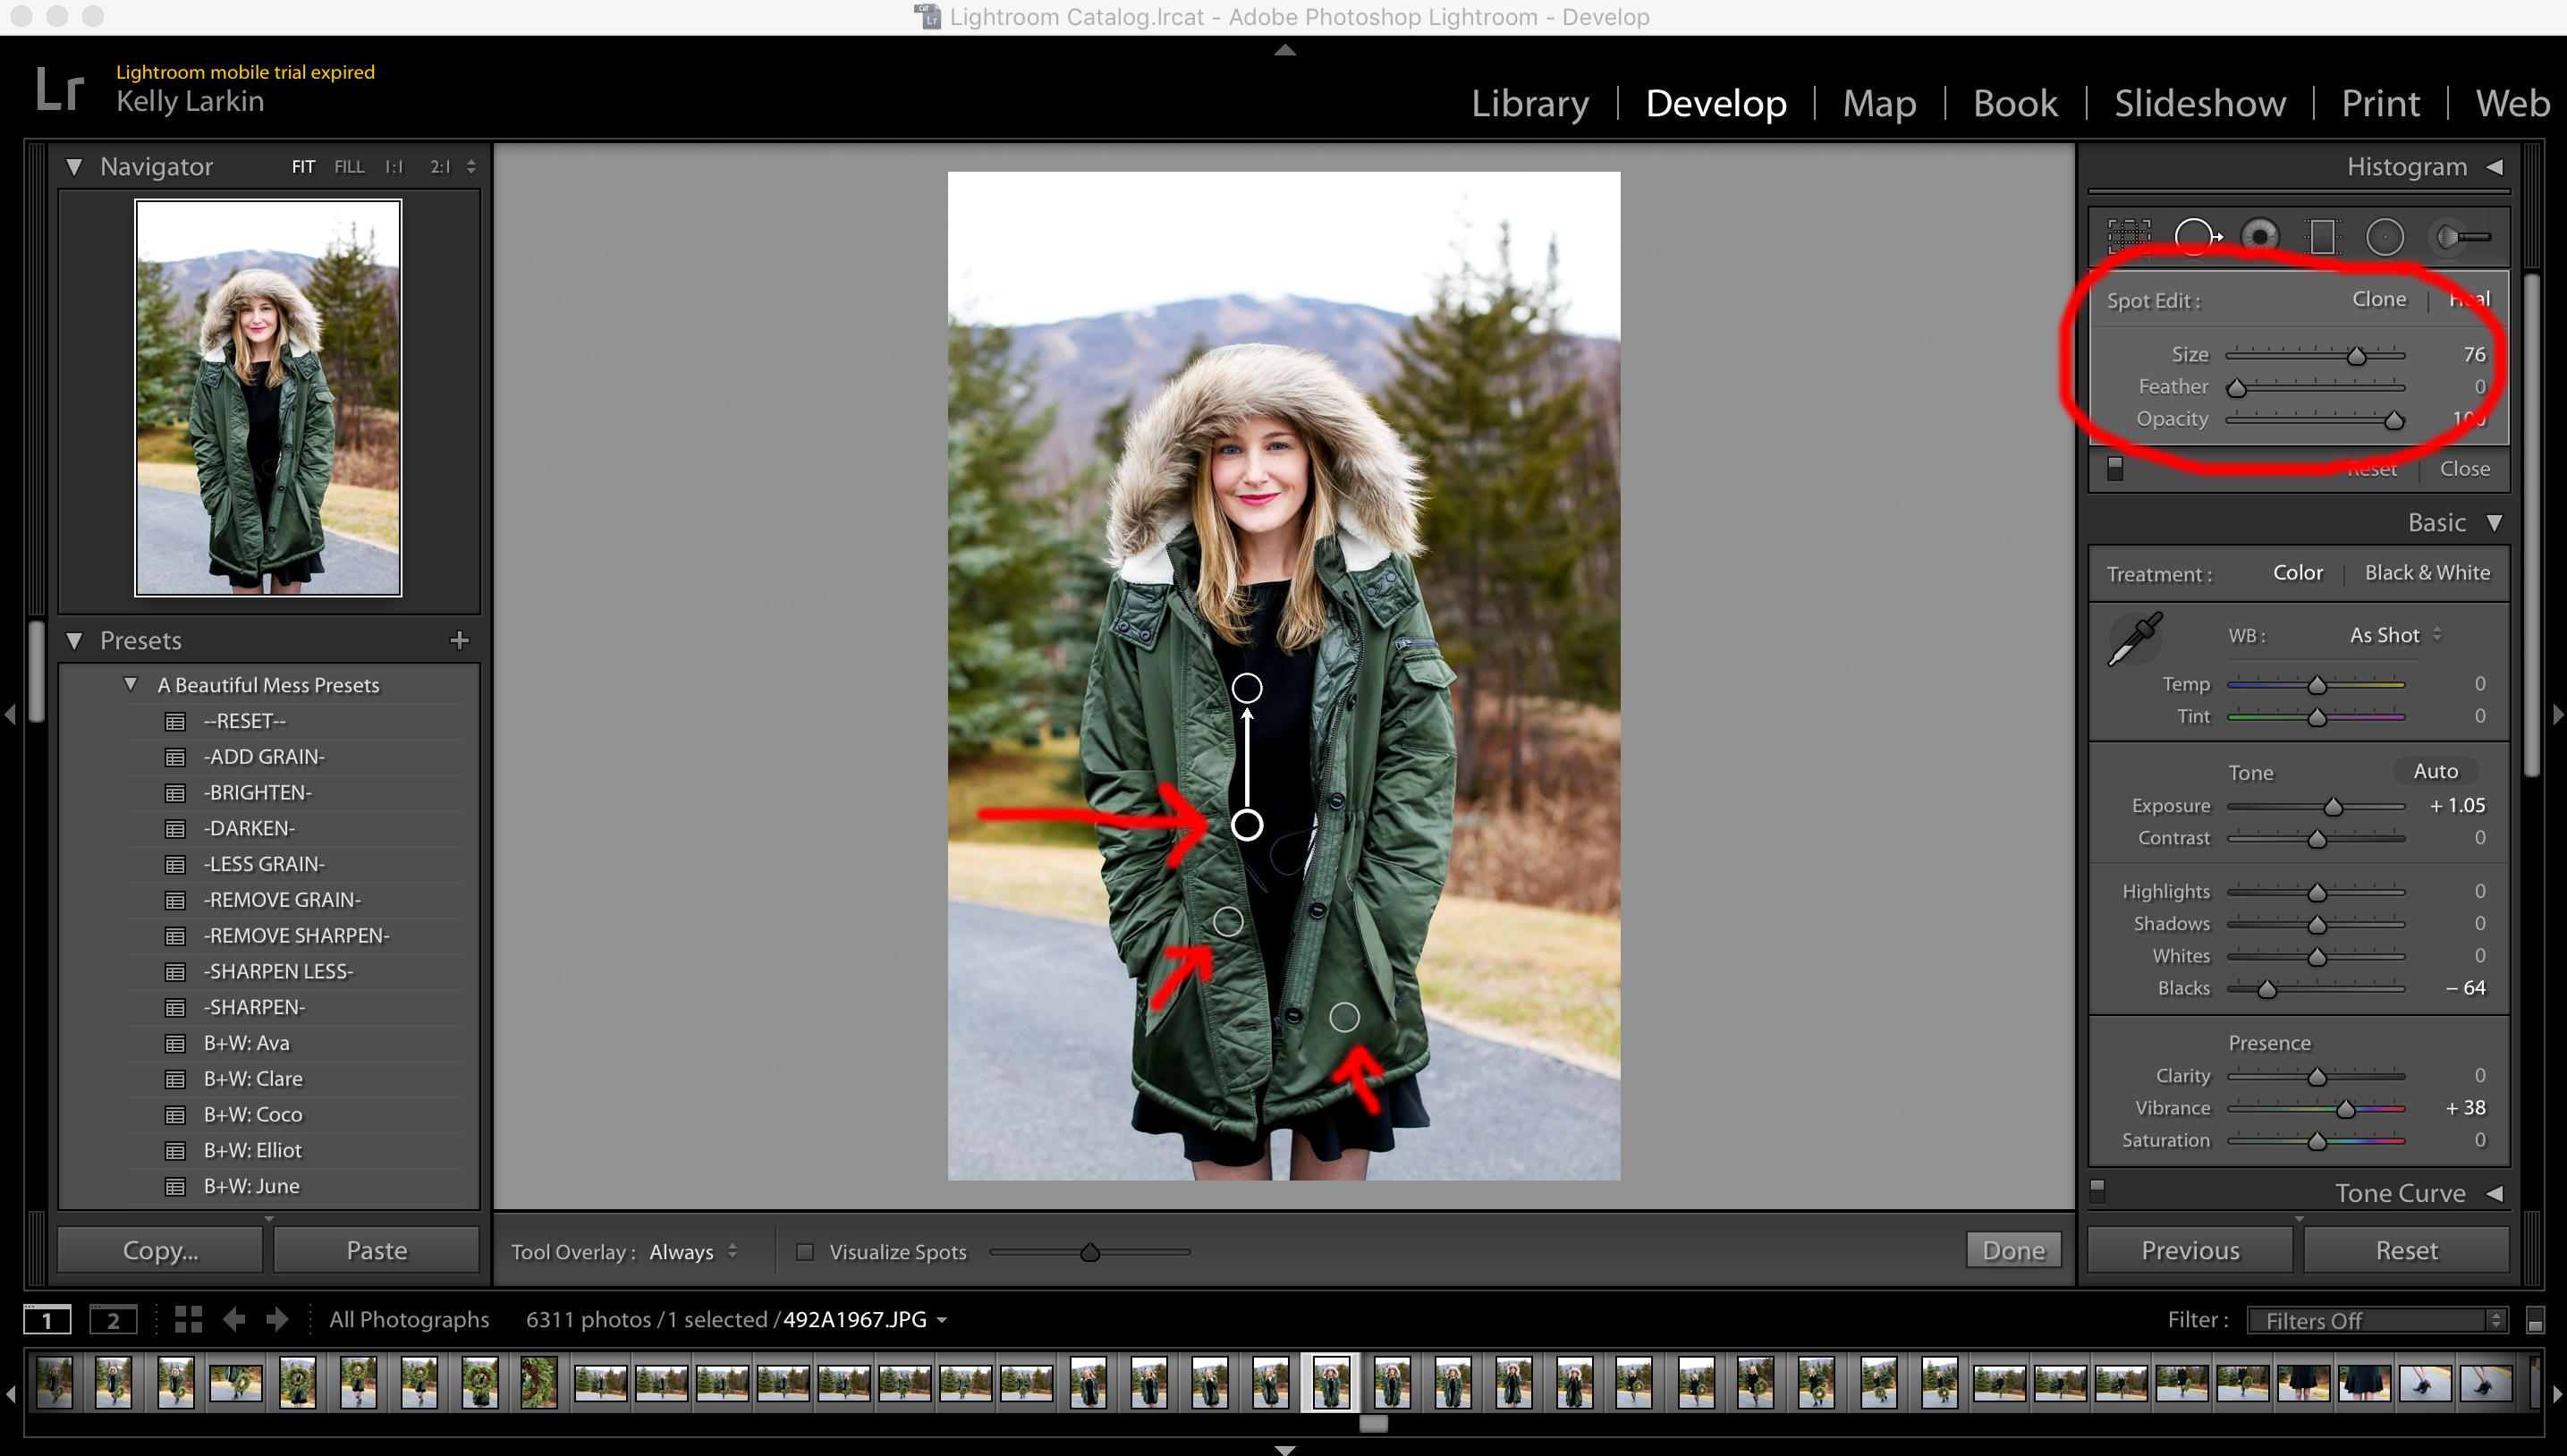
7. I use the “Spot Removal” Tool to Fix Problems.
This thing is a lifesaver, especially if you’re wearing black and have lint problems. Go to “Tools,” select “Spot Removal,” adjust the size of the spot you’re selecting via the right-hand toolbar, and click on the problem area. It requires a little tinkering, but IT’S MAGIC. Note that you can either select “Heal” or “Clone.” (I should also mention that I think Photoshop does a better job of this with its Clone tool, but exporting and reopening photo after photo in another program takes a lot of time. Lightroom’s tool is good enough!)
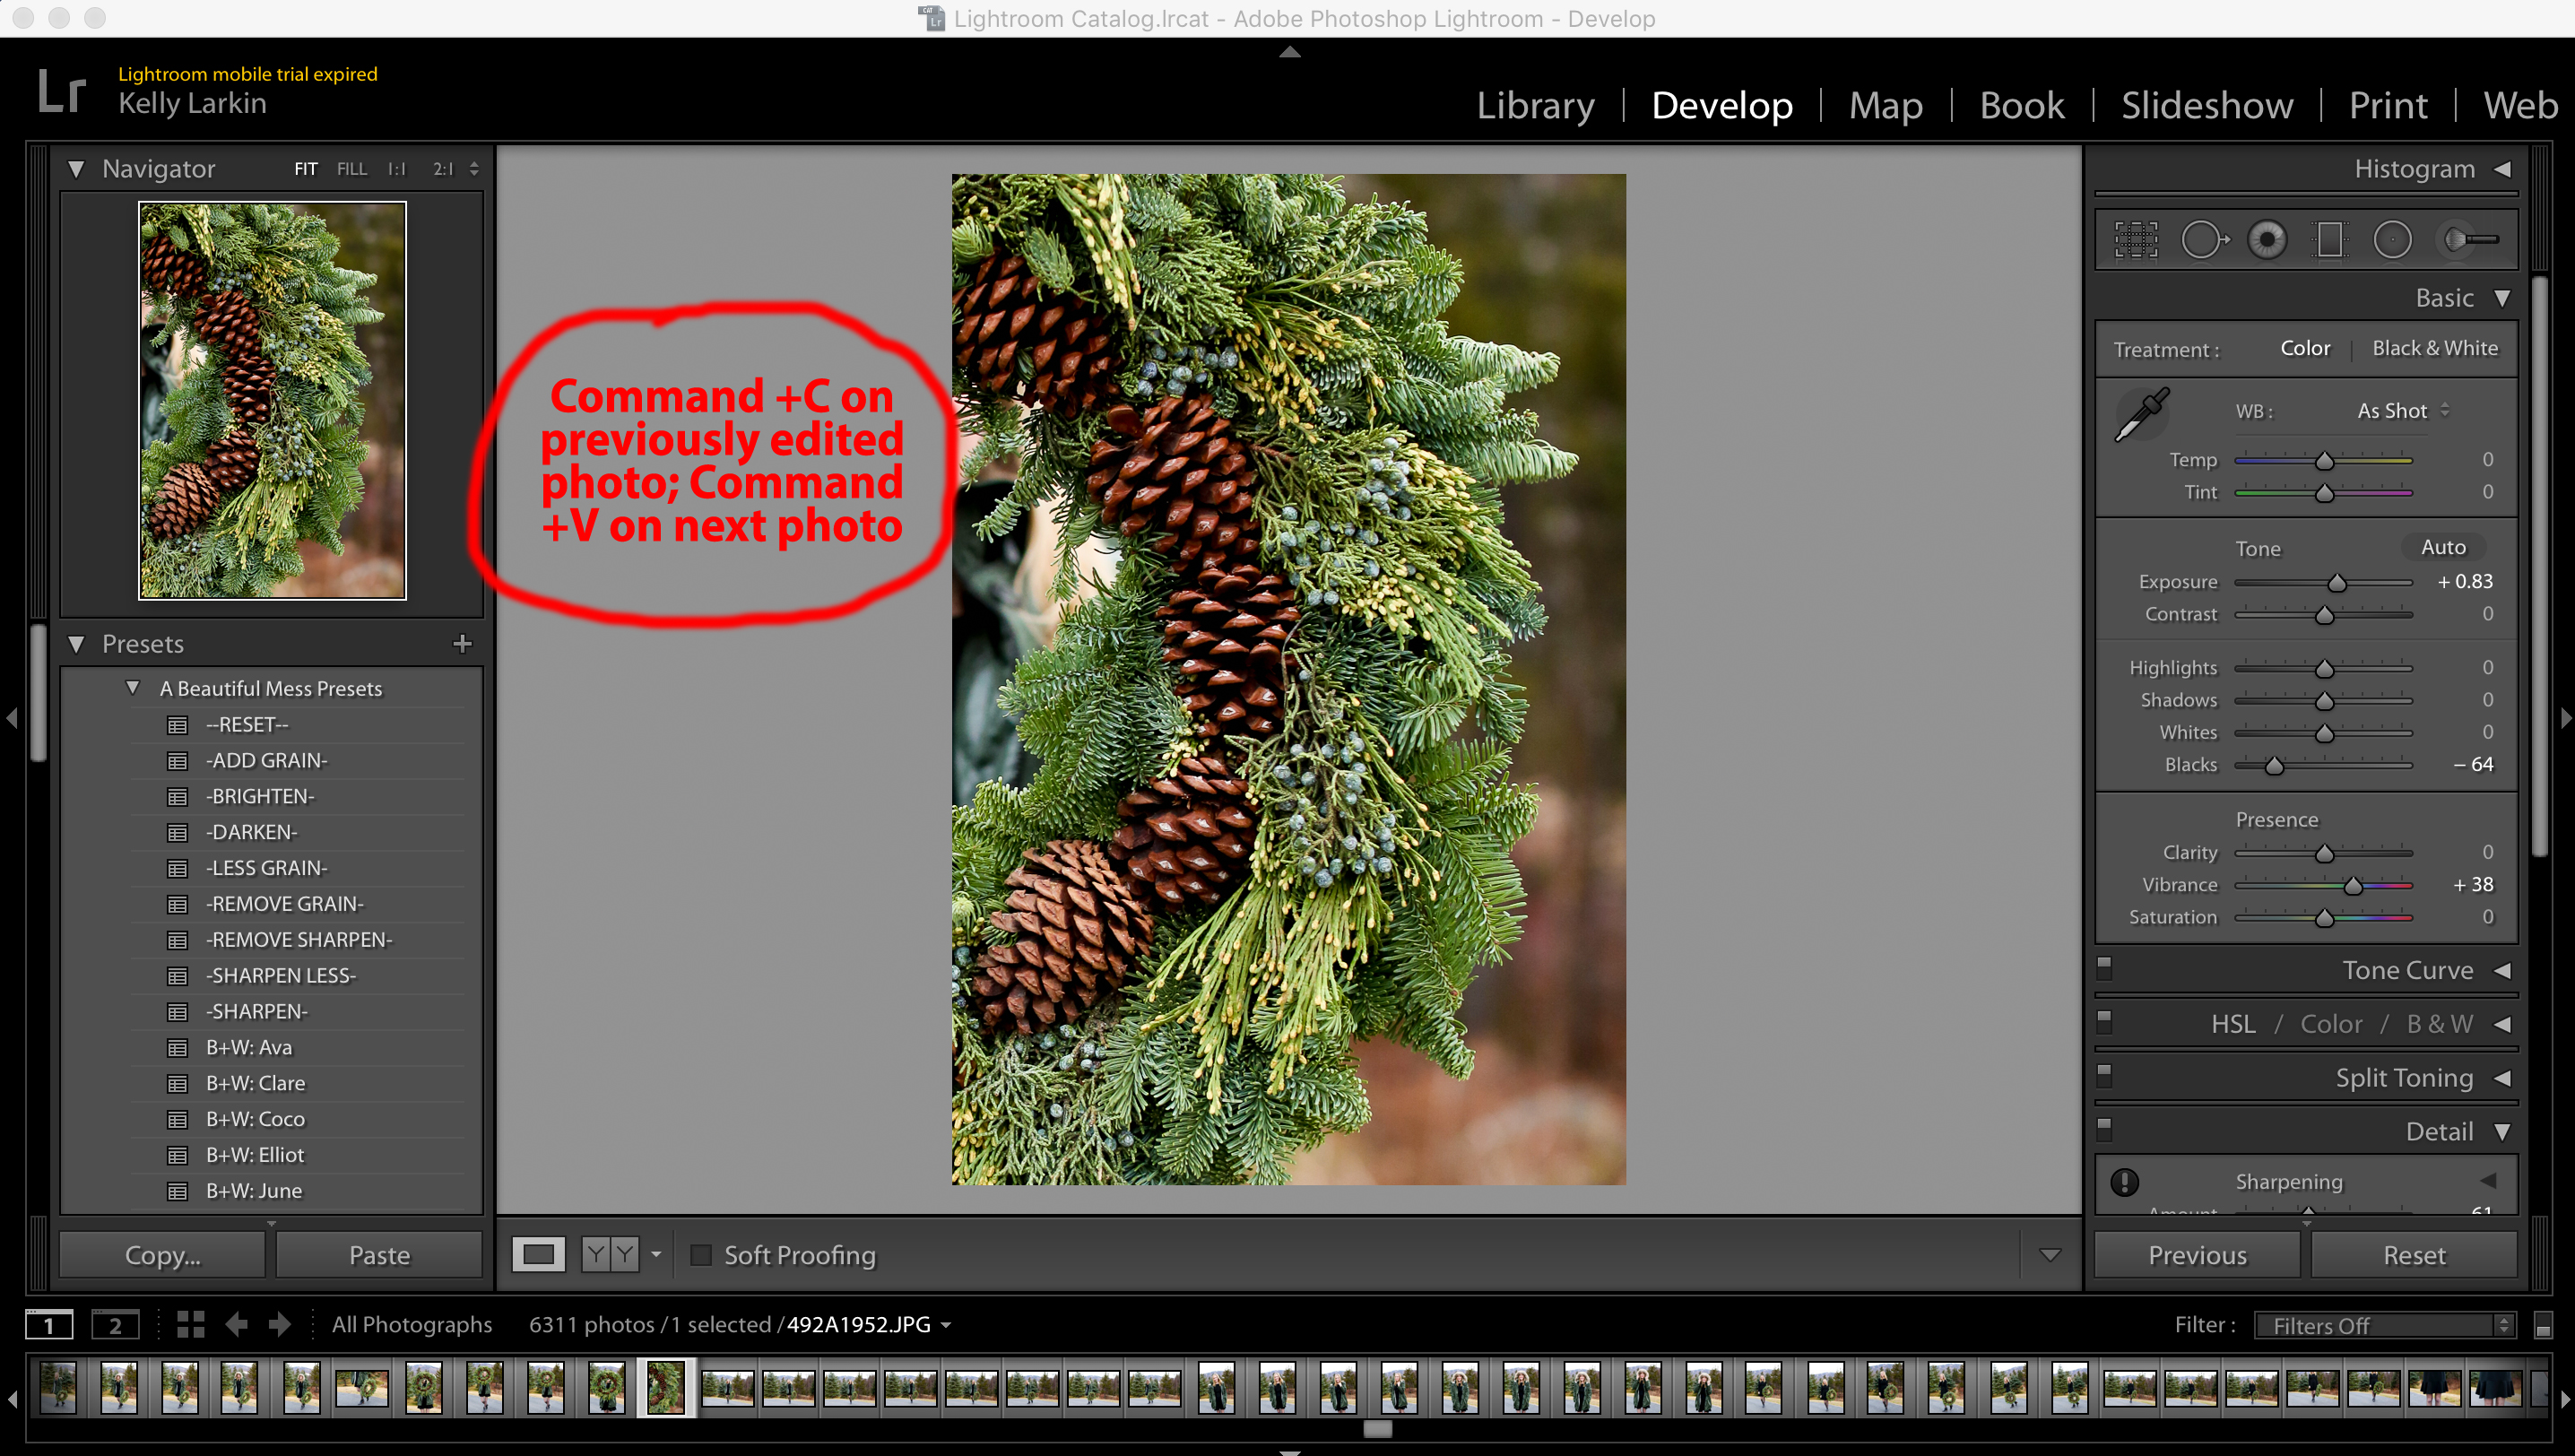
8. I copy and paste.
I copy (Command +C) my settings just as I would copy text, and paste (Command +V) my settings onto the next photo. I then slightly adjust the settings if necessary. You can also “batch edit” your photos, but I really enjoy editing, haha, and like to have a little more control over each individual photo.
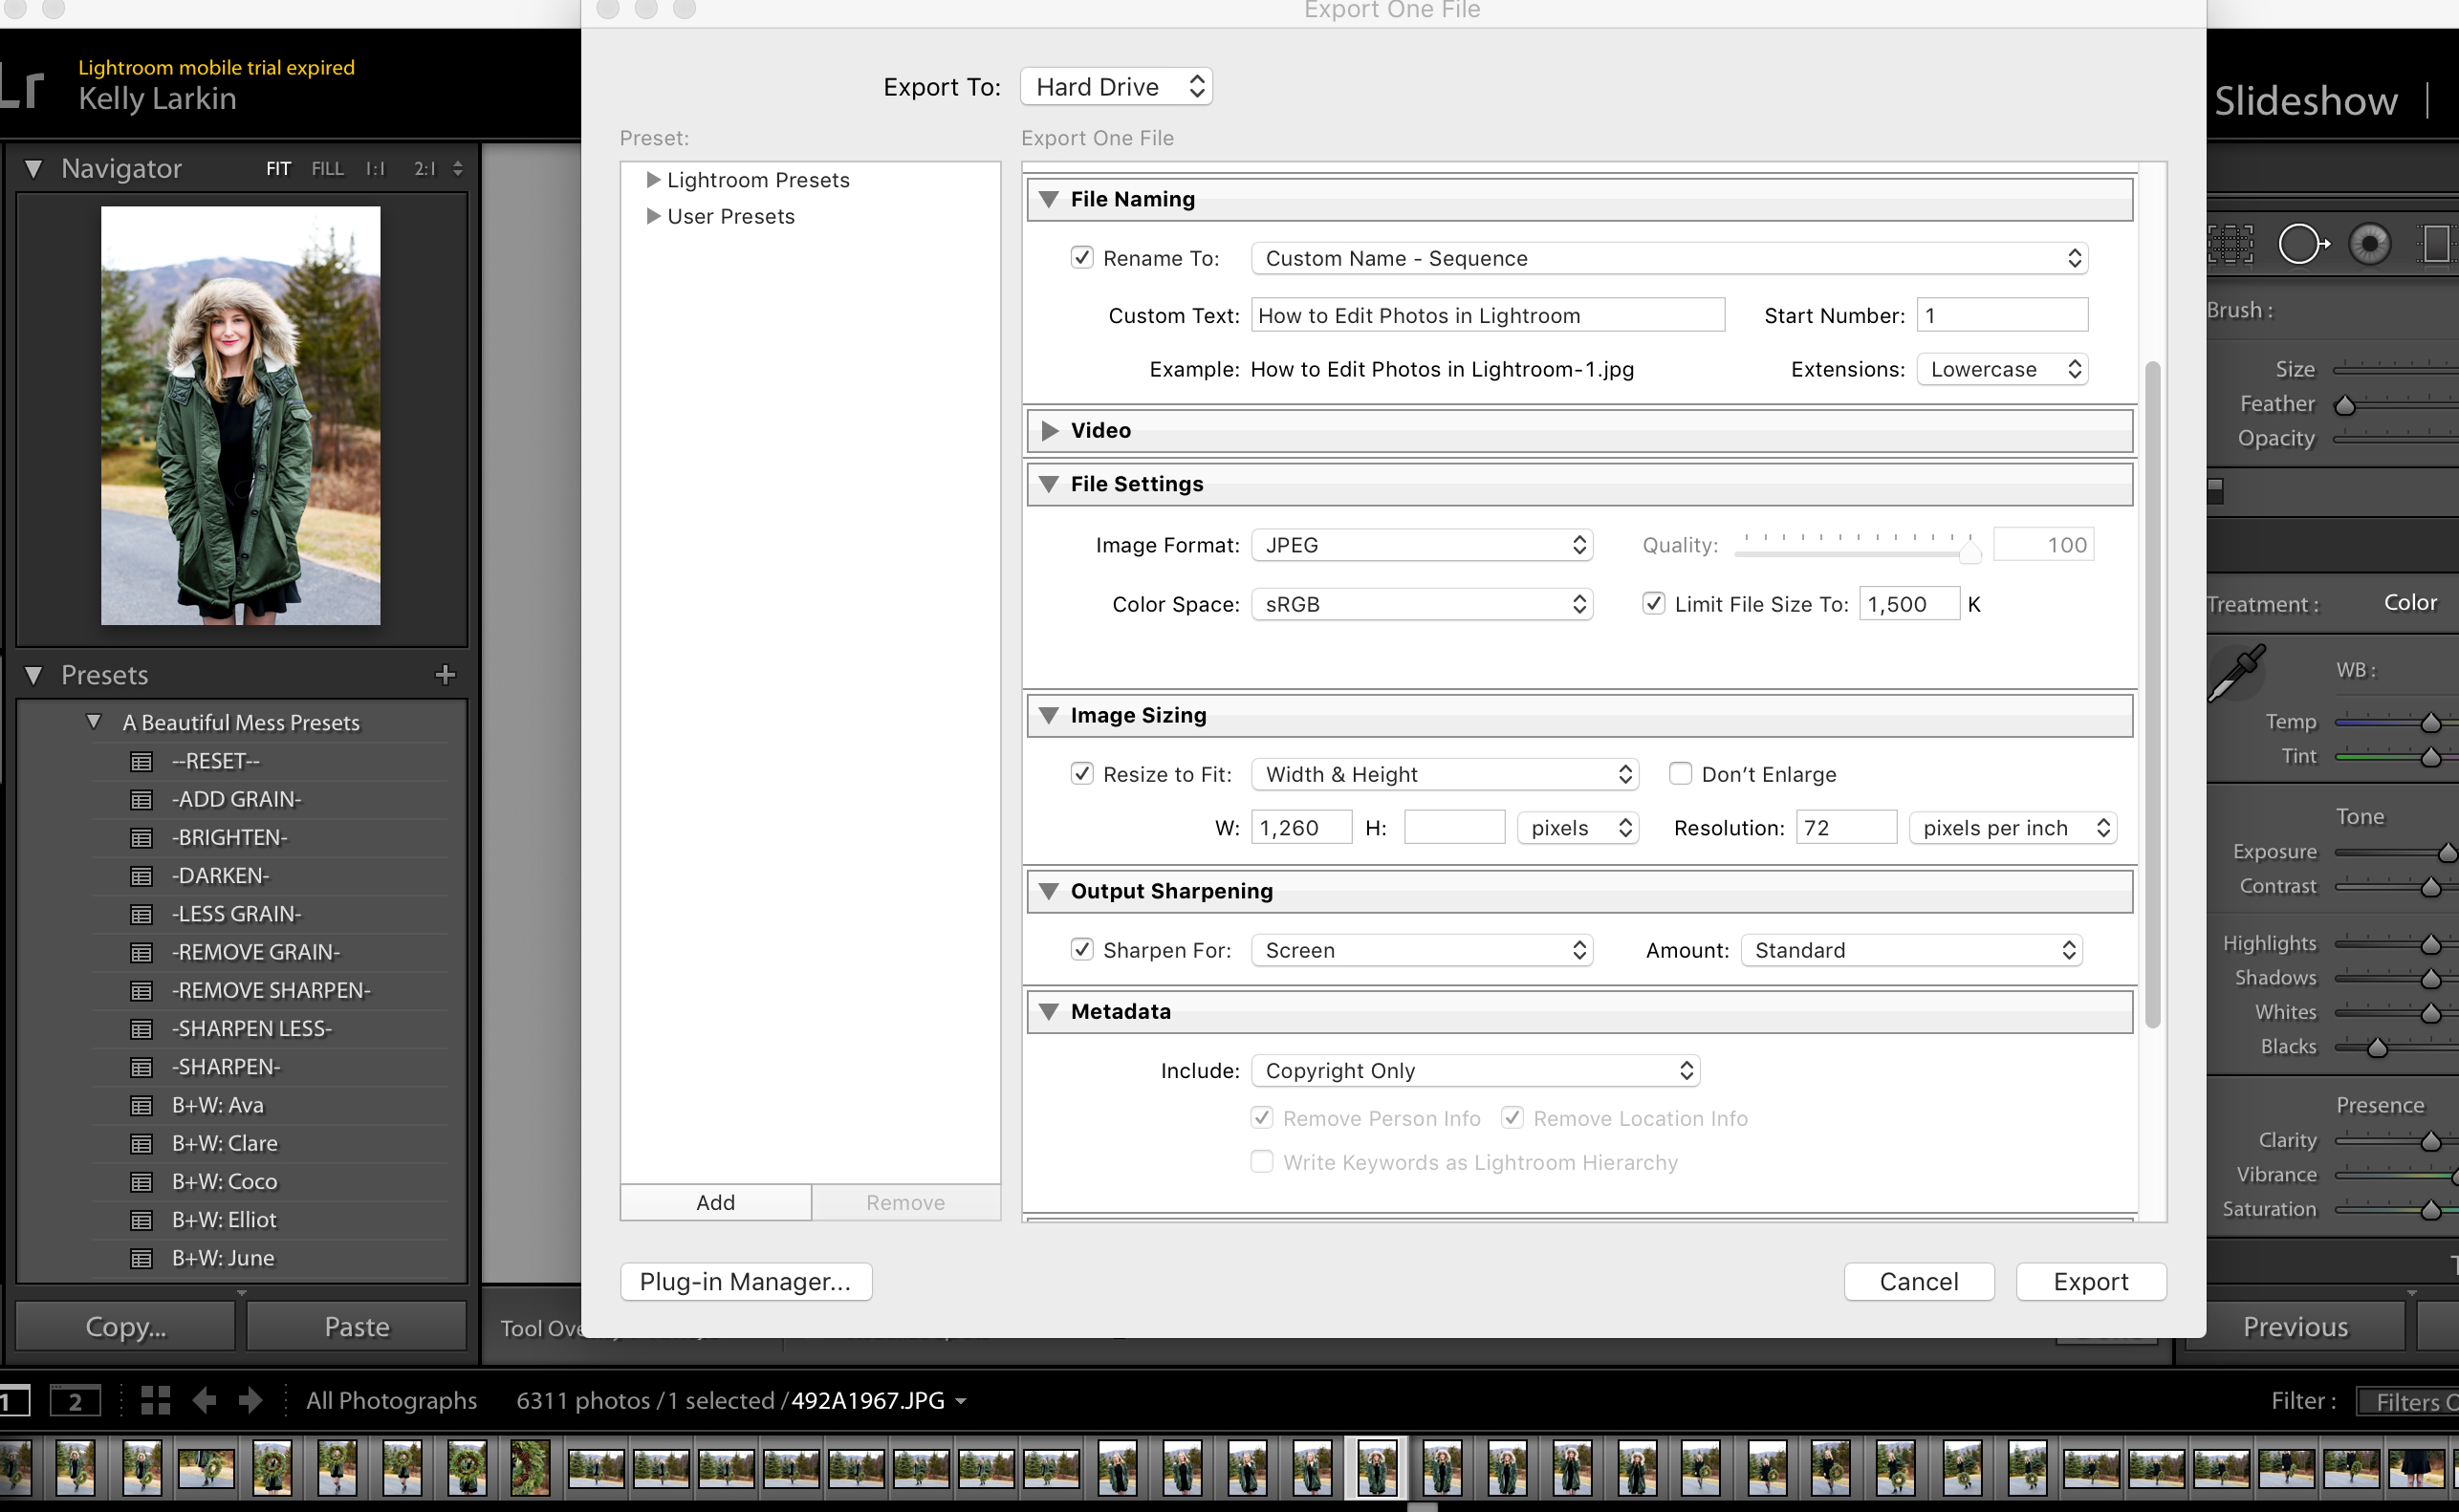
9. I export.
This is actually a bit more complicated than one would think, but once you have it down, it’s quick and easy.
- I rename the files for SEO optimization.
- I jump to “File Settings,” and select “JPEG” for “Format.” I also limit my file size to 1,500K, because I don’t want oversized photos to slow down my blog.
- I go “Image Sizing” and check “Resize to Fit: Width and Height” and enter my width value only. This is SO IMPORTANT. My blog’s main column (where the photos show up) is 630 pixels wide, so I double it, and put in 1,260 pixels so my photos are crisp and clear on retina displays. (Going with 630 pixels shows up nicely on regular screens, but blurry on retinas… and so many people are making the switch to retina!) If I don’t resize my photos at all, they’ll be crisp and clear but their enormity will also slow my site down.
- I go to “Output Sharpening” and select “Sharpening for Screen”/”Amount: Standard.”
- Finally, I go to “Metadata,” and select “Include: Copyright Only.” This is because an image can store tons of information, like when and where the photo was taken, what camera and lens were used, and what settings were selected. CREEPY. Protect yourself and don’t include your metadata.
10. I celebrate, and pour myself another glass of wine.
Kidding. Kind of. (I just needed a #10.)
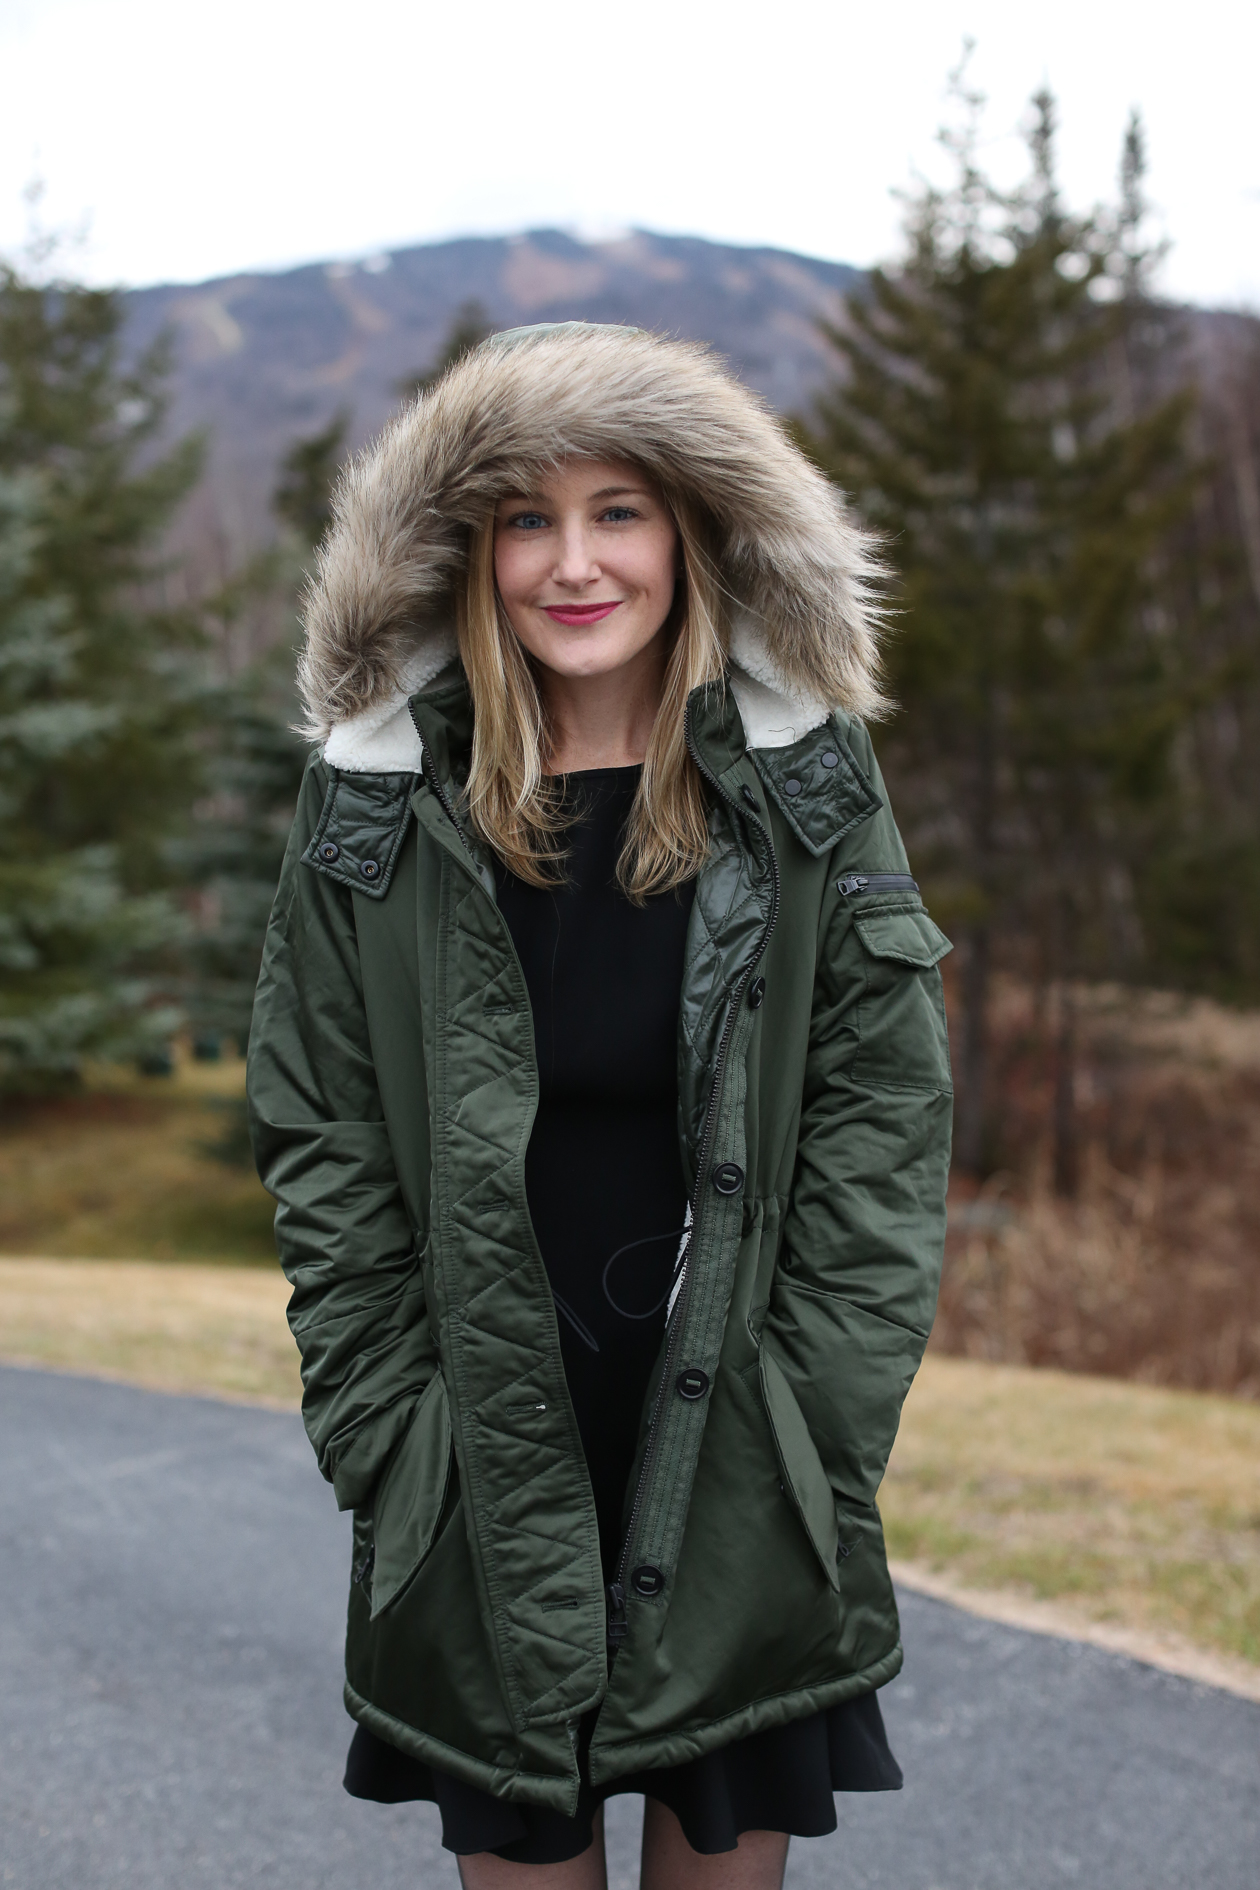
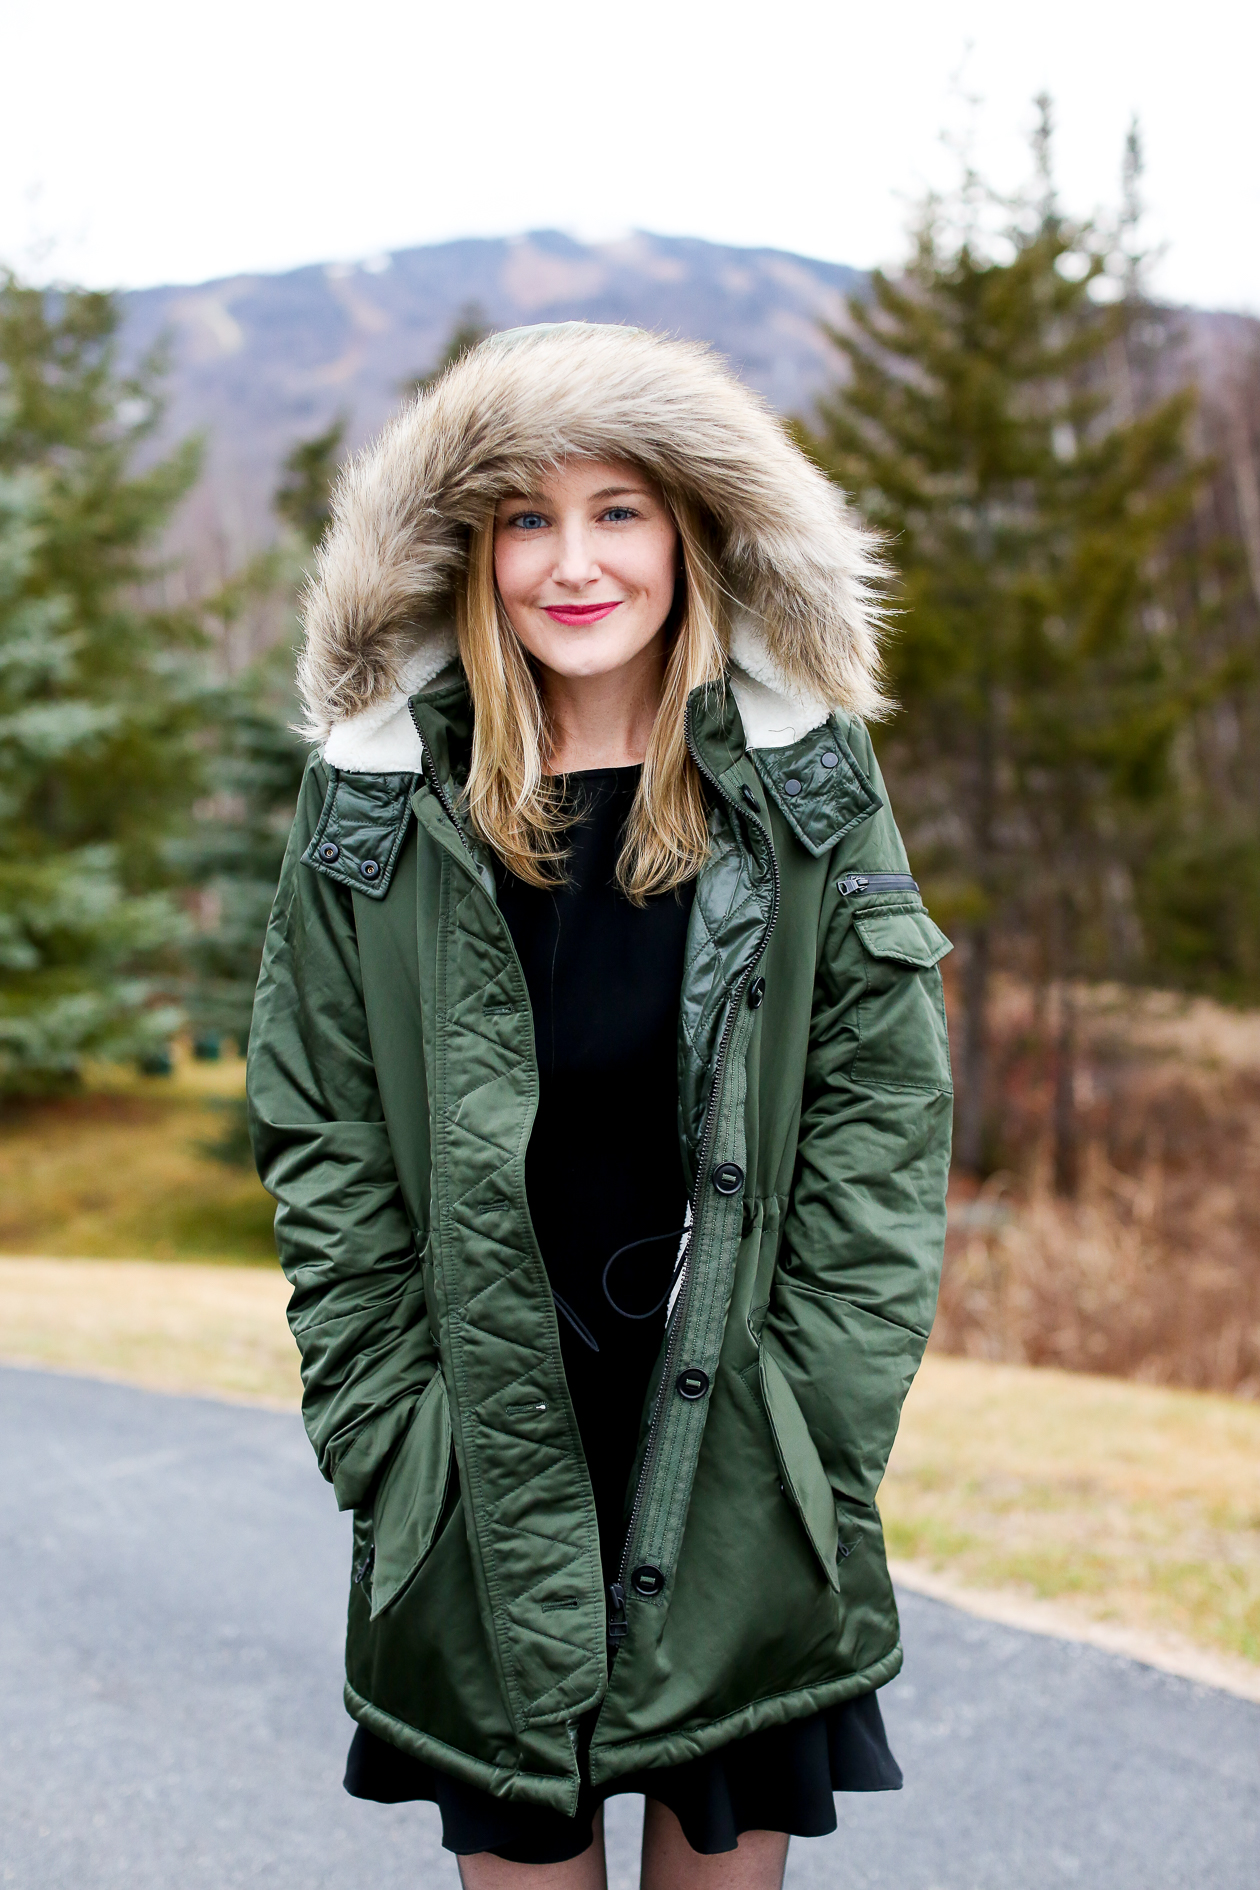
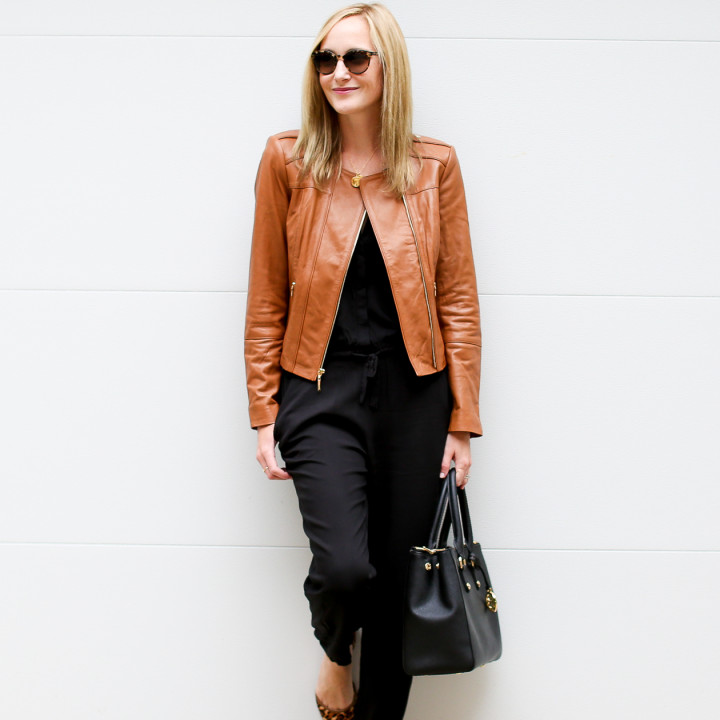
Settings:
Temp: 0
Exposure: +1.05
Blacks: -64
Vibrance: +38
Sharpening: +61
Questions? Leave them in the below comment section or email me at kelly@kellyinthecity.com! I’ll be responding pretty quickly today. :)
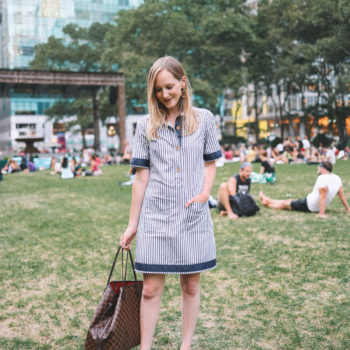
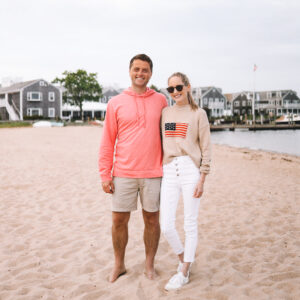
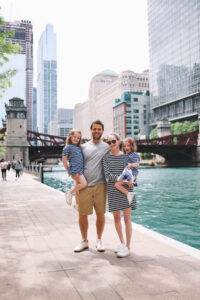
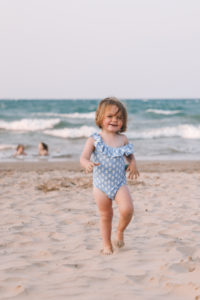
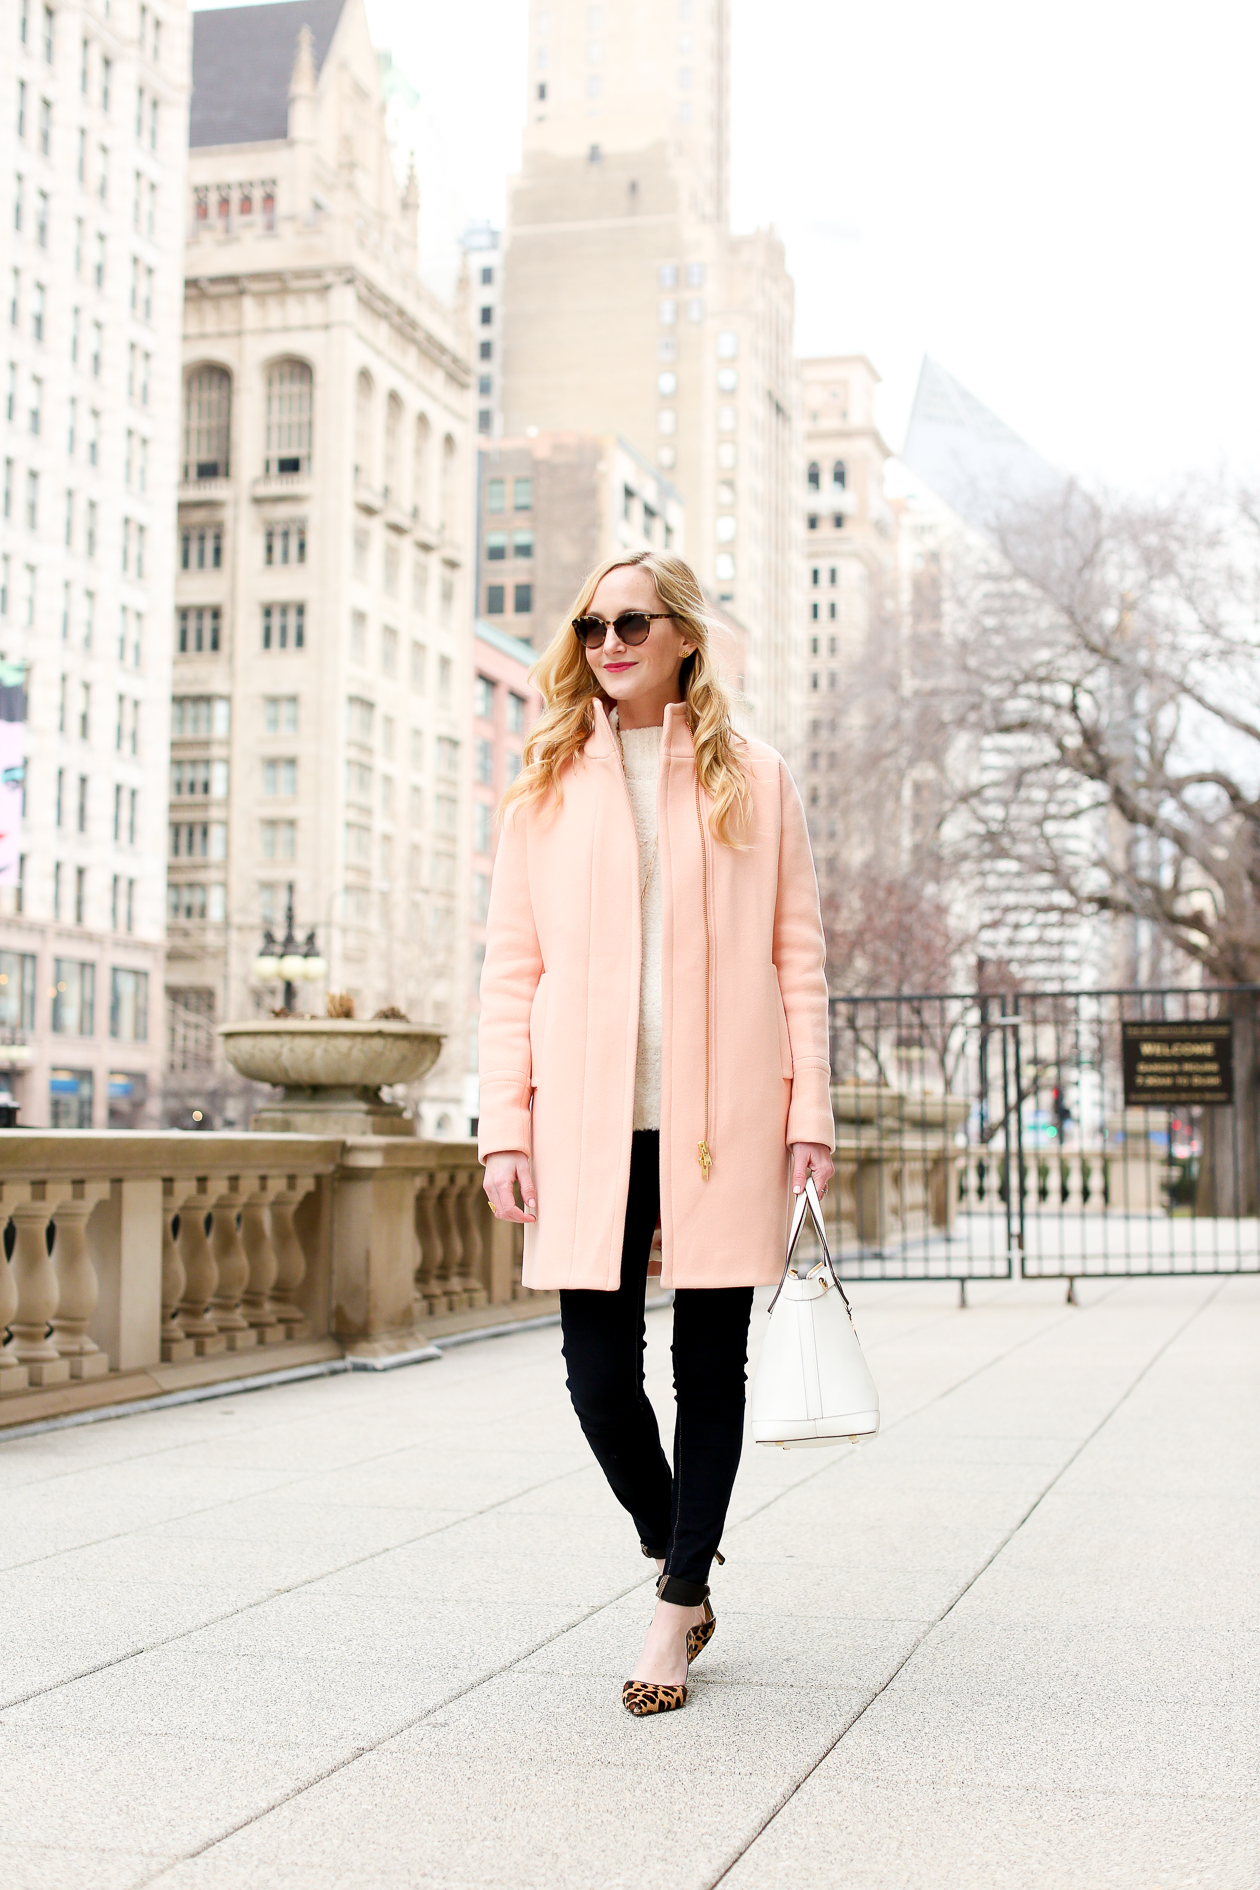
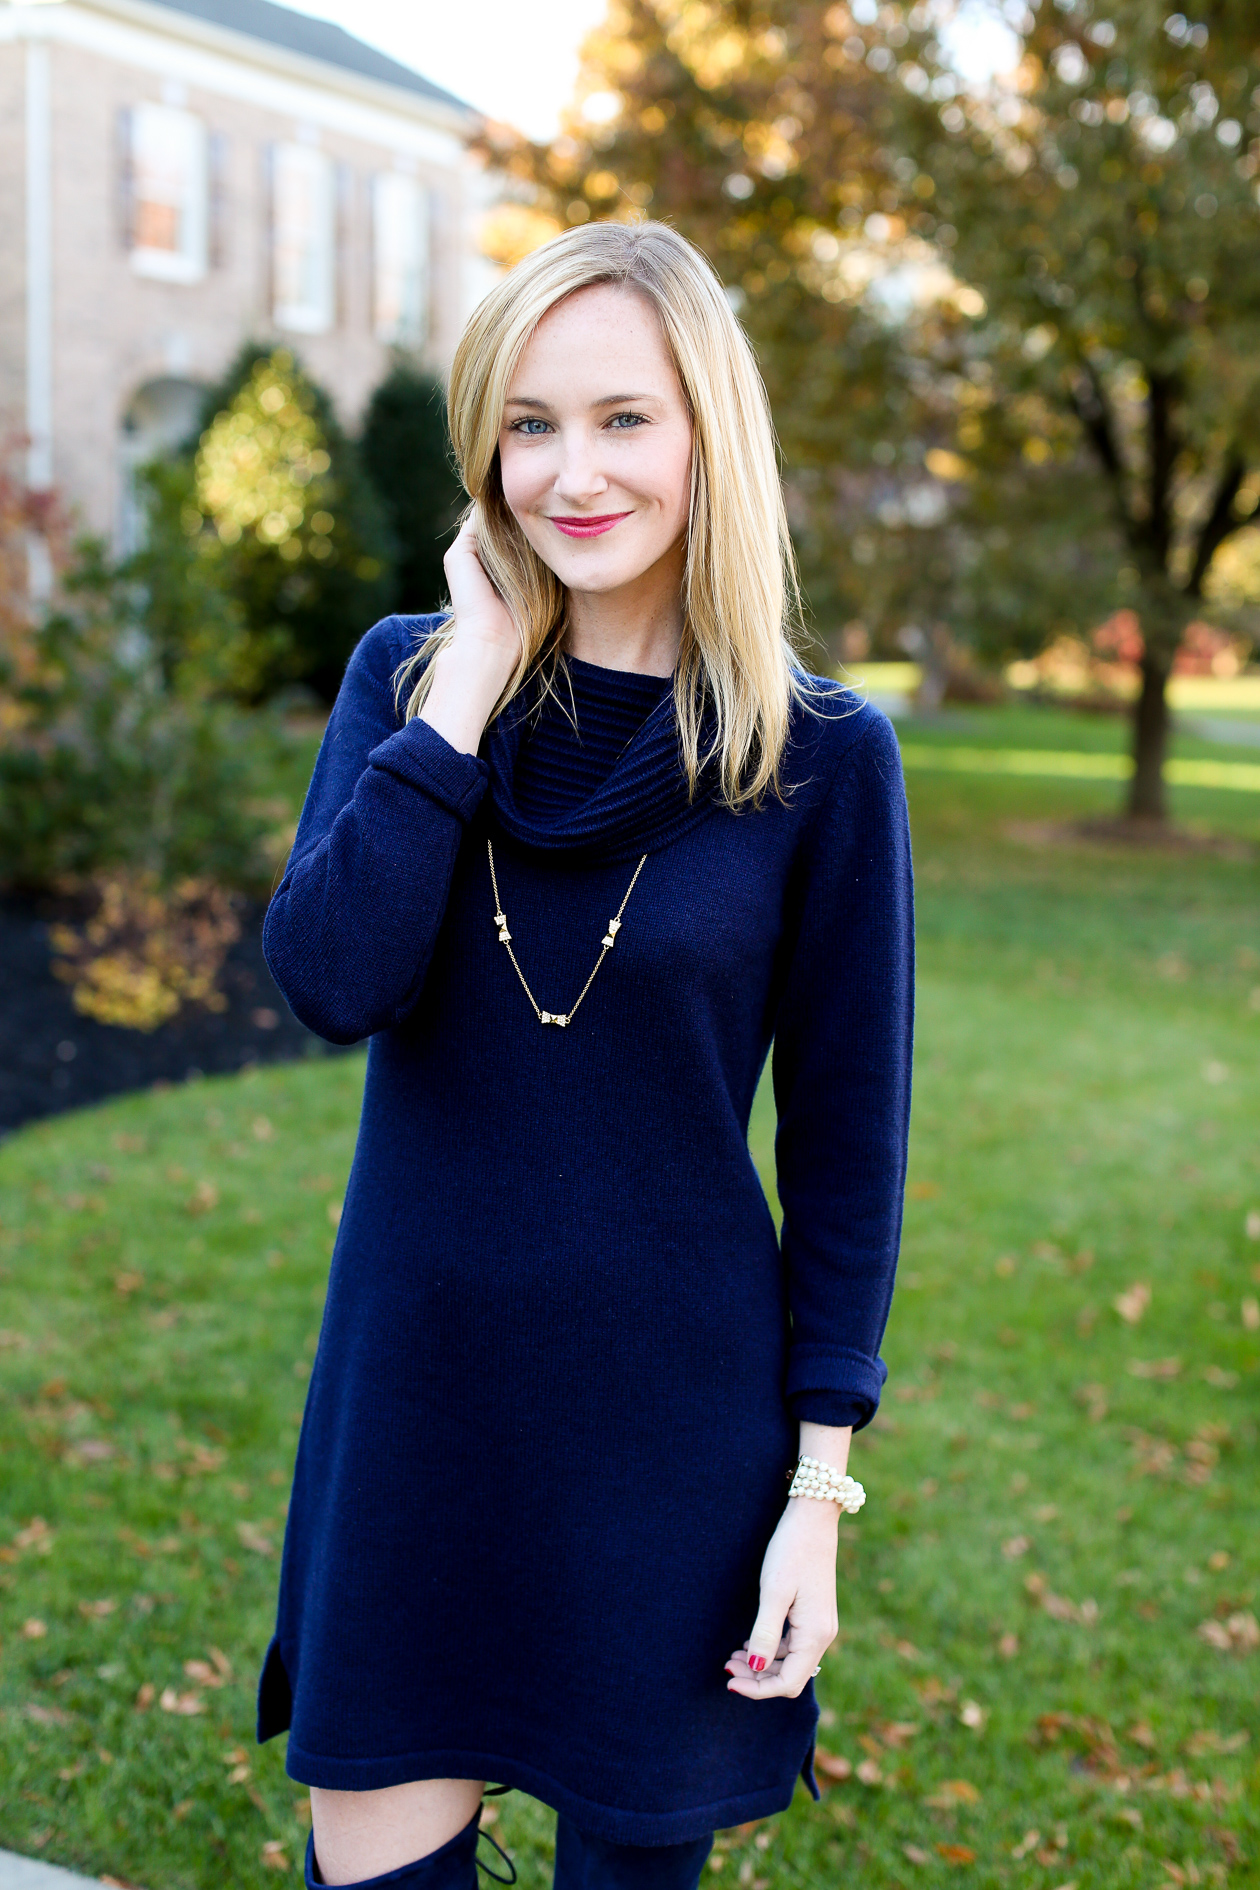
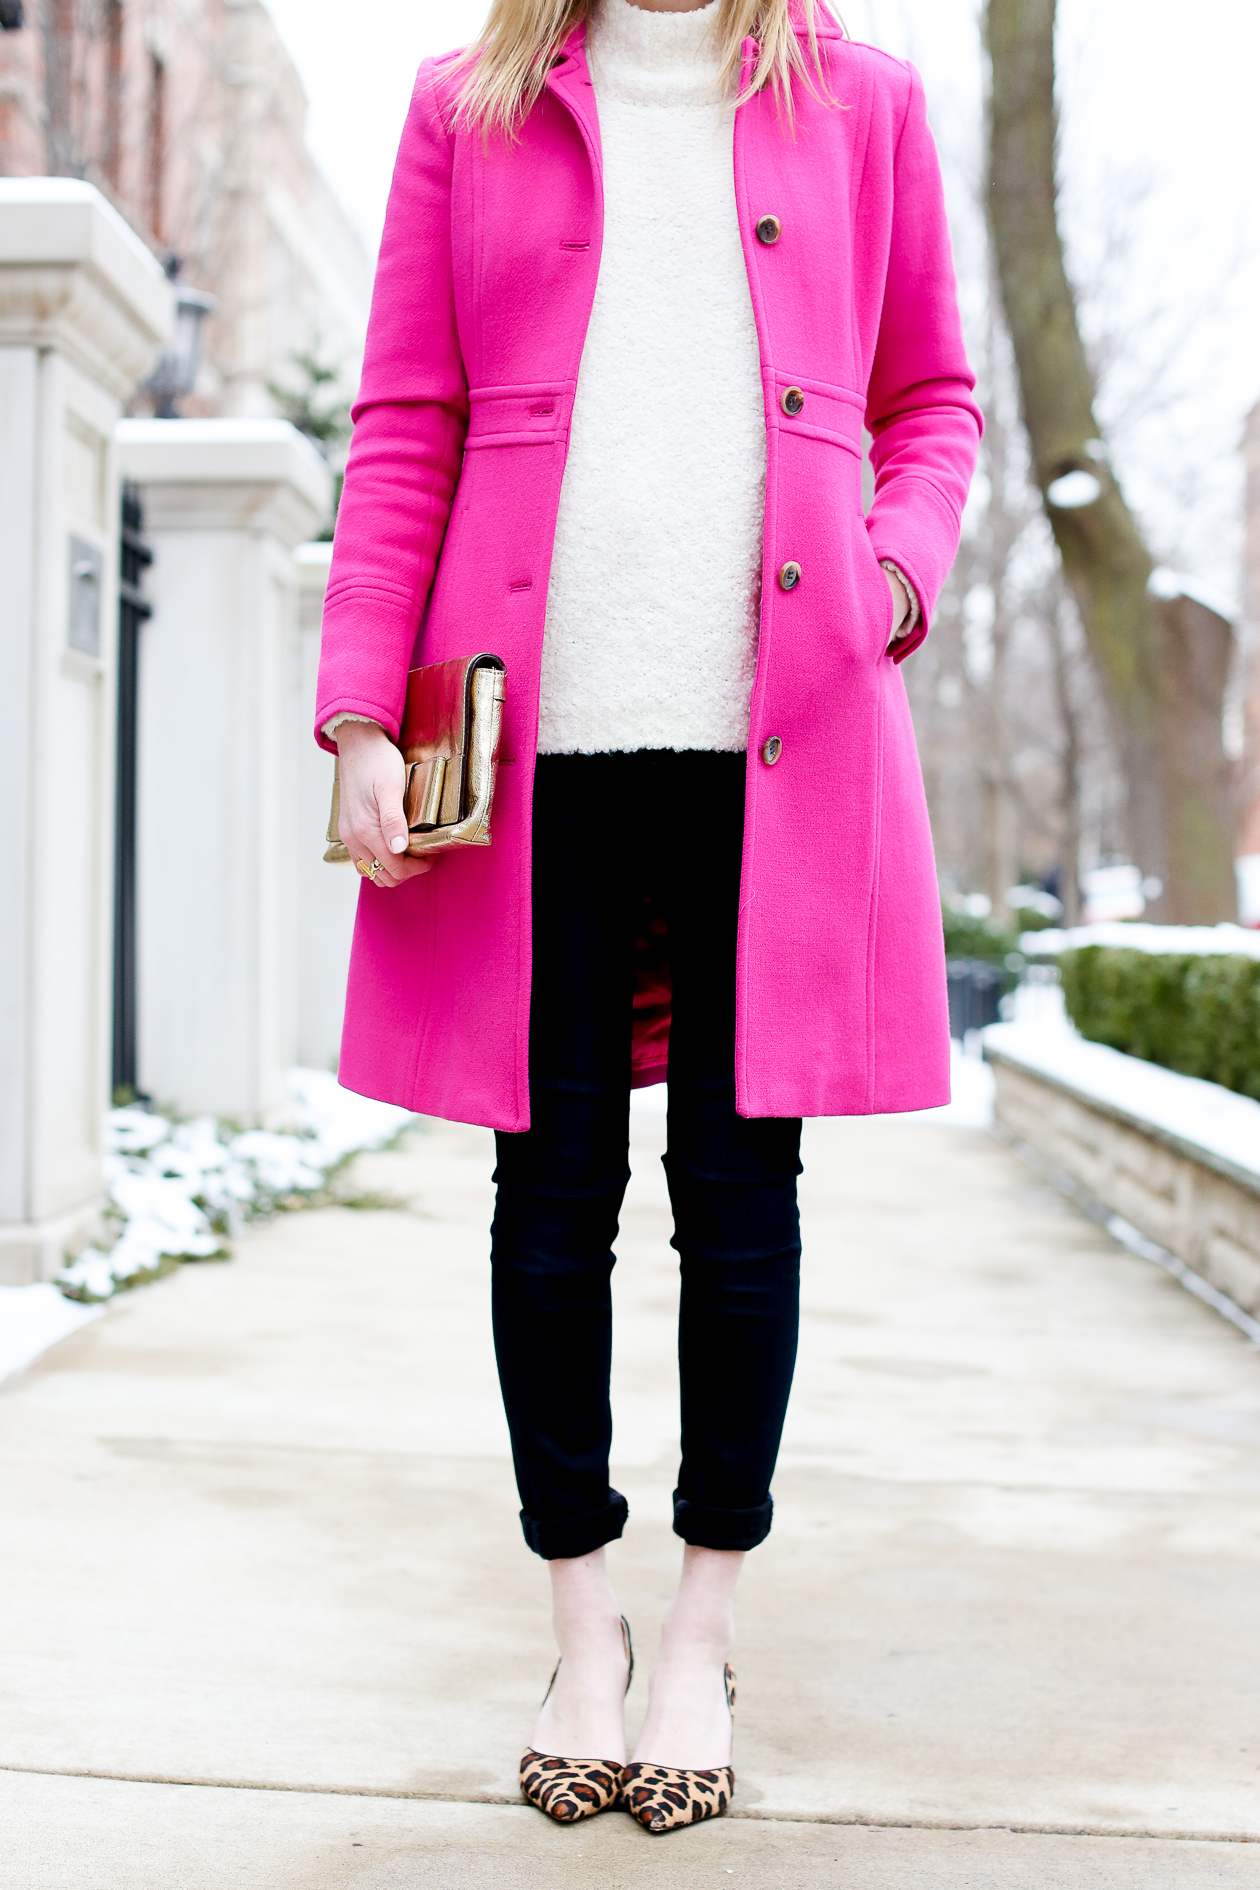
More Before + After Examples:
(That’s Maya from Charmingly Styled!)
Settings:
Temp: +4
Exposure: +0.80
Blacks: -71
Vibrance: +37
Sharpening: +78
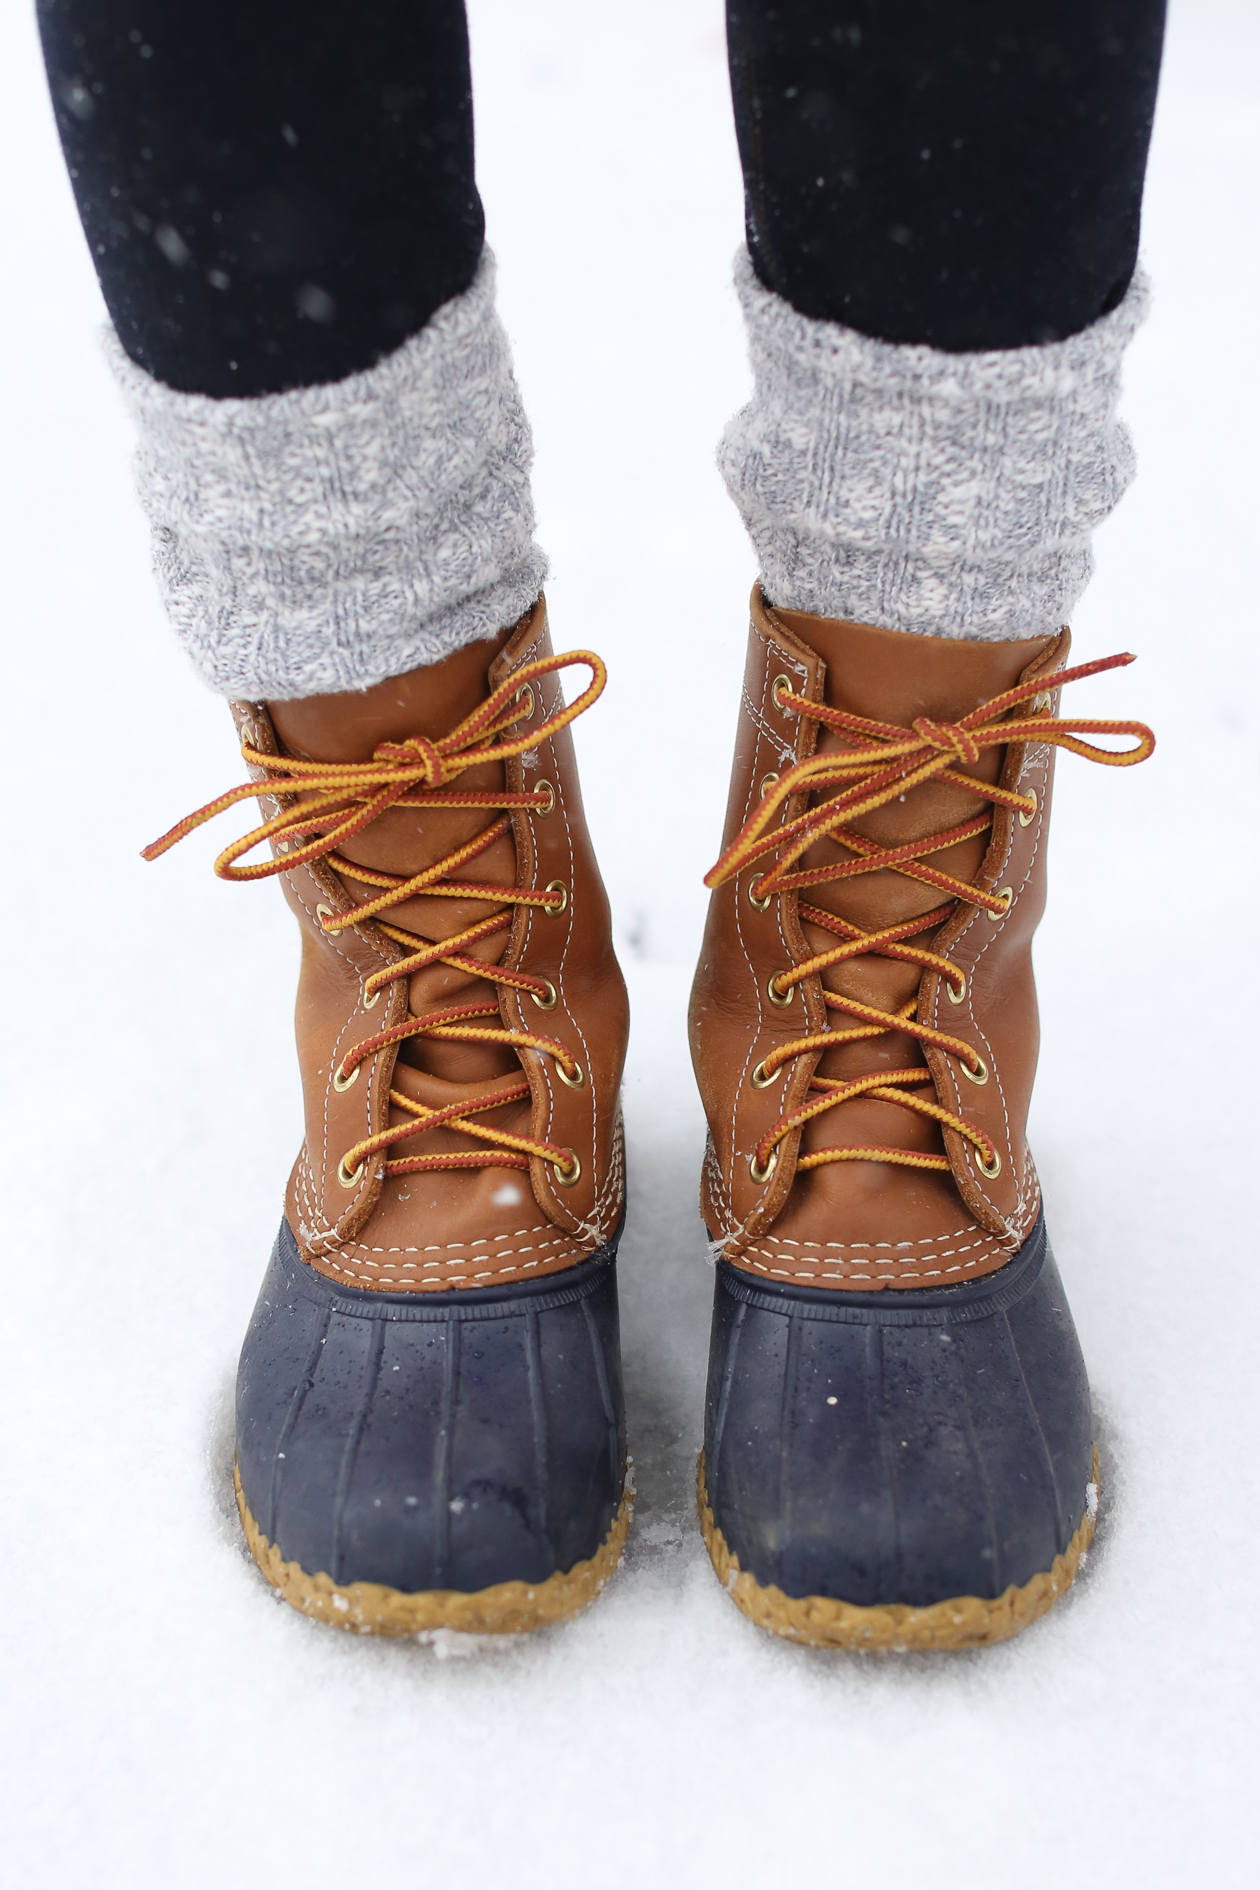
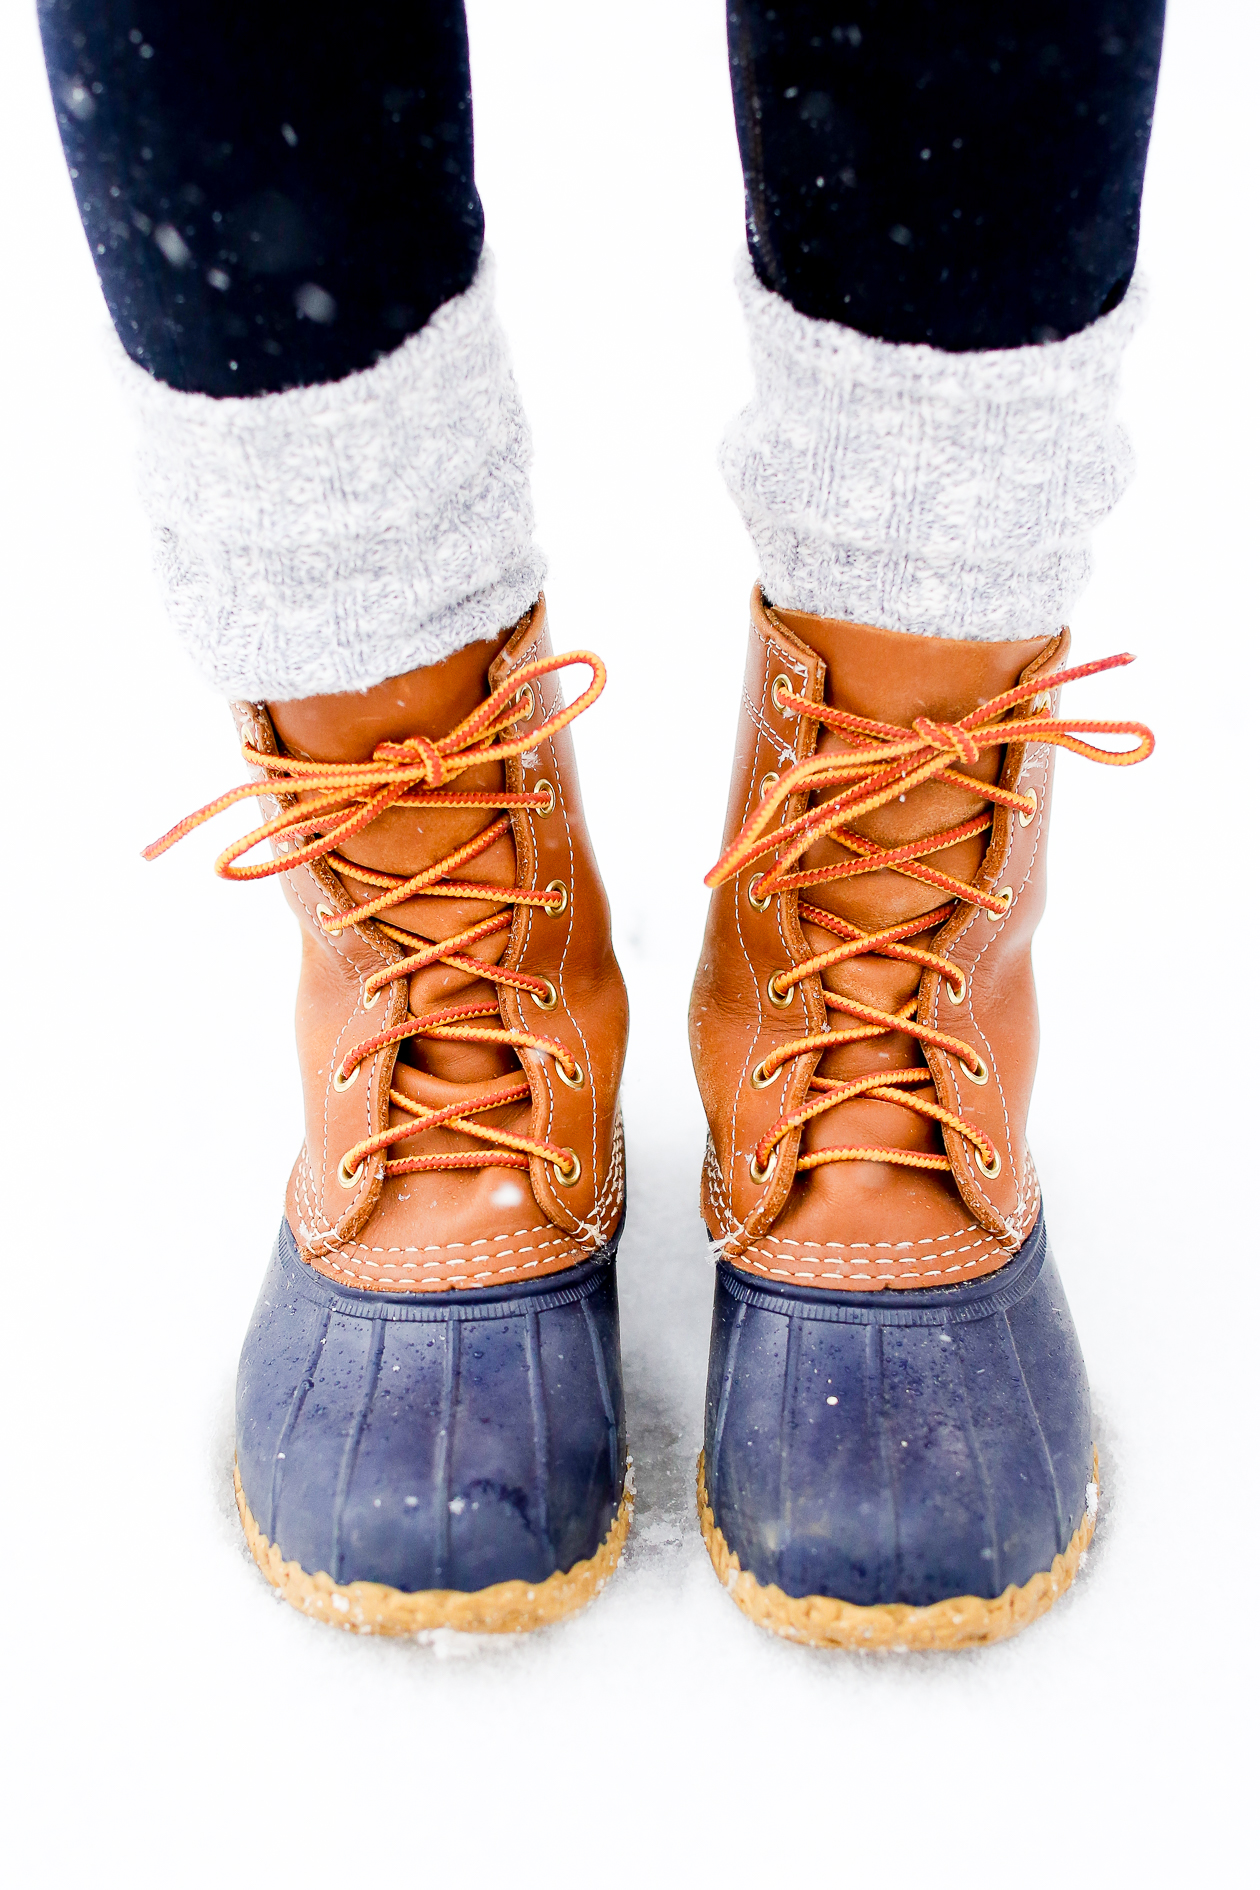
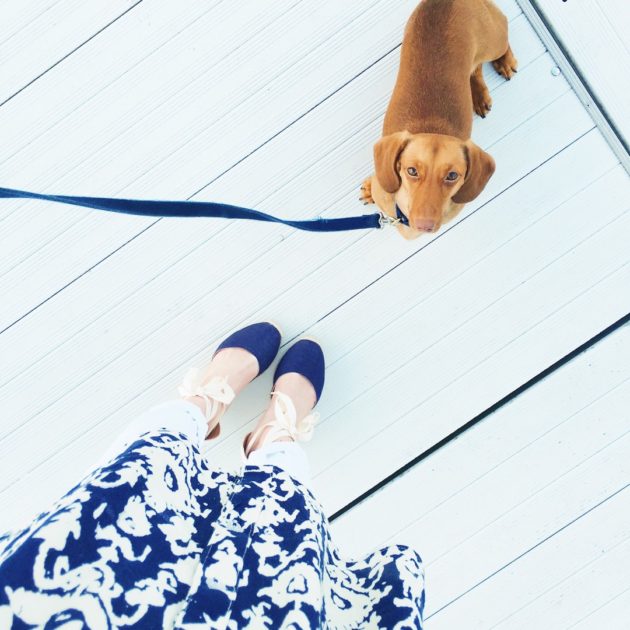
Settings:
Temp: 0
Exposure: +1.45
Blacks: -80
Vibrance: +29
Sharpening: +74
Settings:
Temp: 0
Exposure: +0.40
Blacks: -57
Vibrance: +31
Sharpening: +63

Settings:
Temp: 0
Exposure: +0.70
Blacks: -82
Vibrance: +31
Saturation: +5
Sharpening: +65
Settings:
Temp: 0
Exposure: +0.70
Blacks: -58
Vibrance: +37
Saturation: 0
Sharpening: +78

Settings:
Temp: +12
Exposure: +0.40
Blacks: -70
Vibrance: +32
Saturation: 0
Sharpening: +73

Settings:
Temp: +1
Exposure: +0.98
Blacks: -58
Vibrance: +30
Saturation: 0
Sharpening: +71
Questions? Leave them in the below comment section or email me at kelly@kellyinthecity.com! I’ll be responding pretty quickly today. :)
Also: Take a look at what’s inside my camera bag here, and read why every blogger needs a prime lens here.