


Mitch here!
Like most, we’re always looking for ways to make our home more functional. And without question, the most underused—and disastrous—part of our home was long the garage. We’re not really car people so last year I found myself daydreaming about turning it into a multifunctional space— a garage, yes, but also a studio where I could spend time on woodworking; Kelly could refinish her Marketplace furniture finds; and the girls could craft, exercise and put on dancing/singing shows.
And I’m very happy to report that I did just that, with the help of Modular Closets!

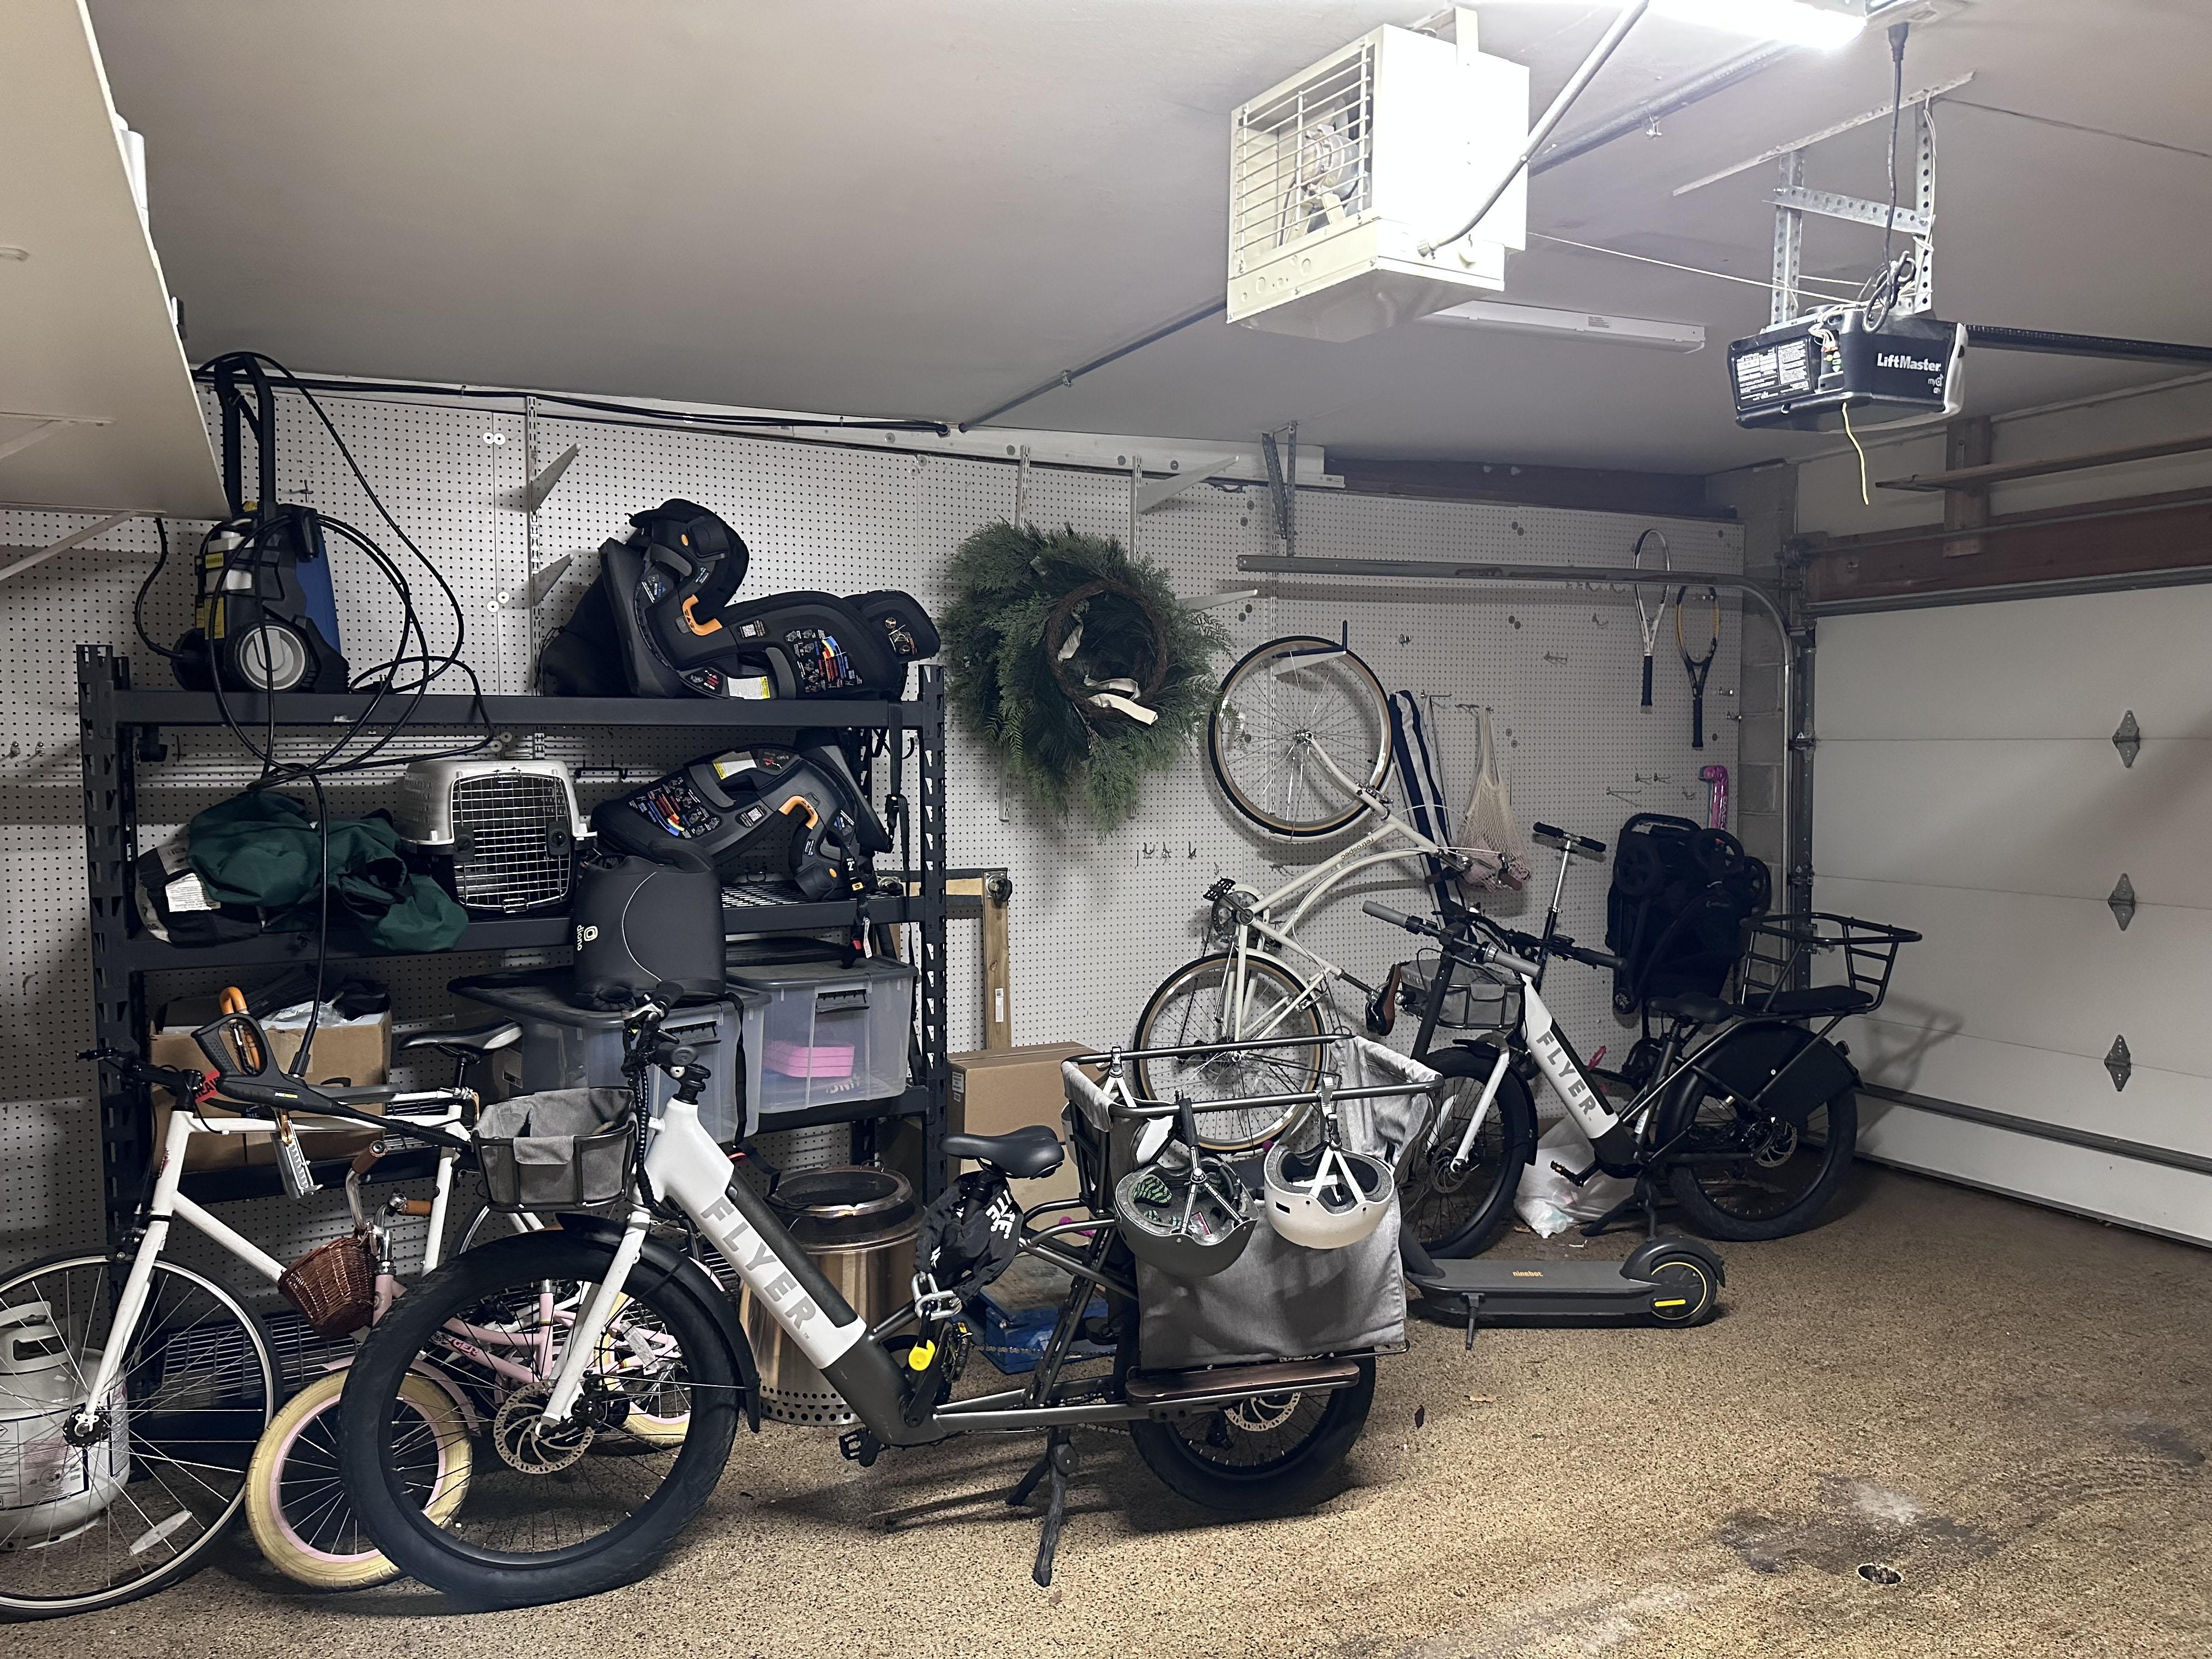
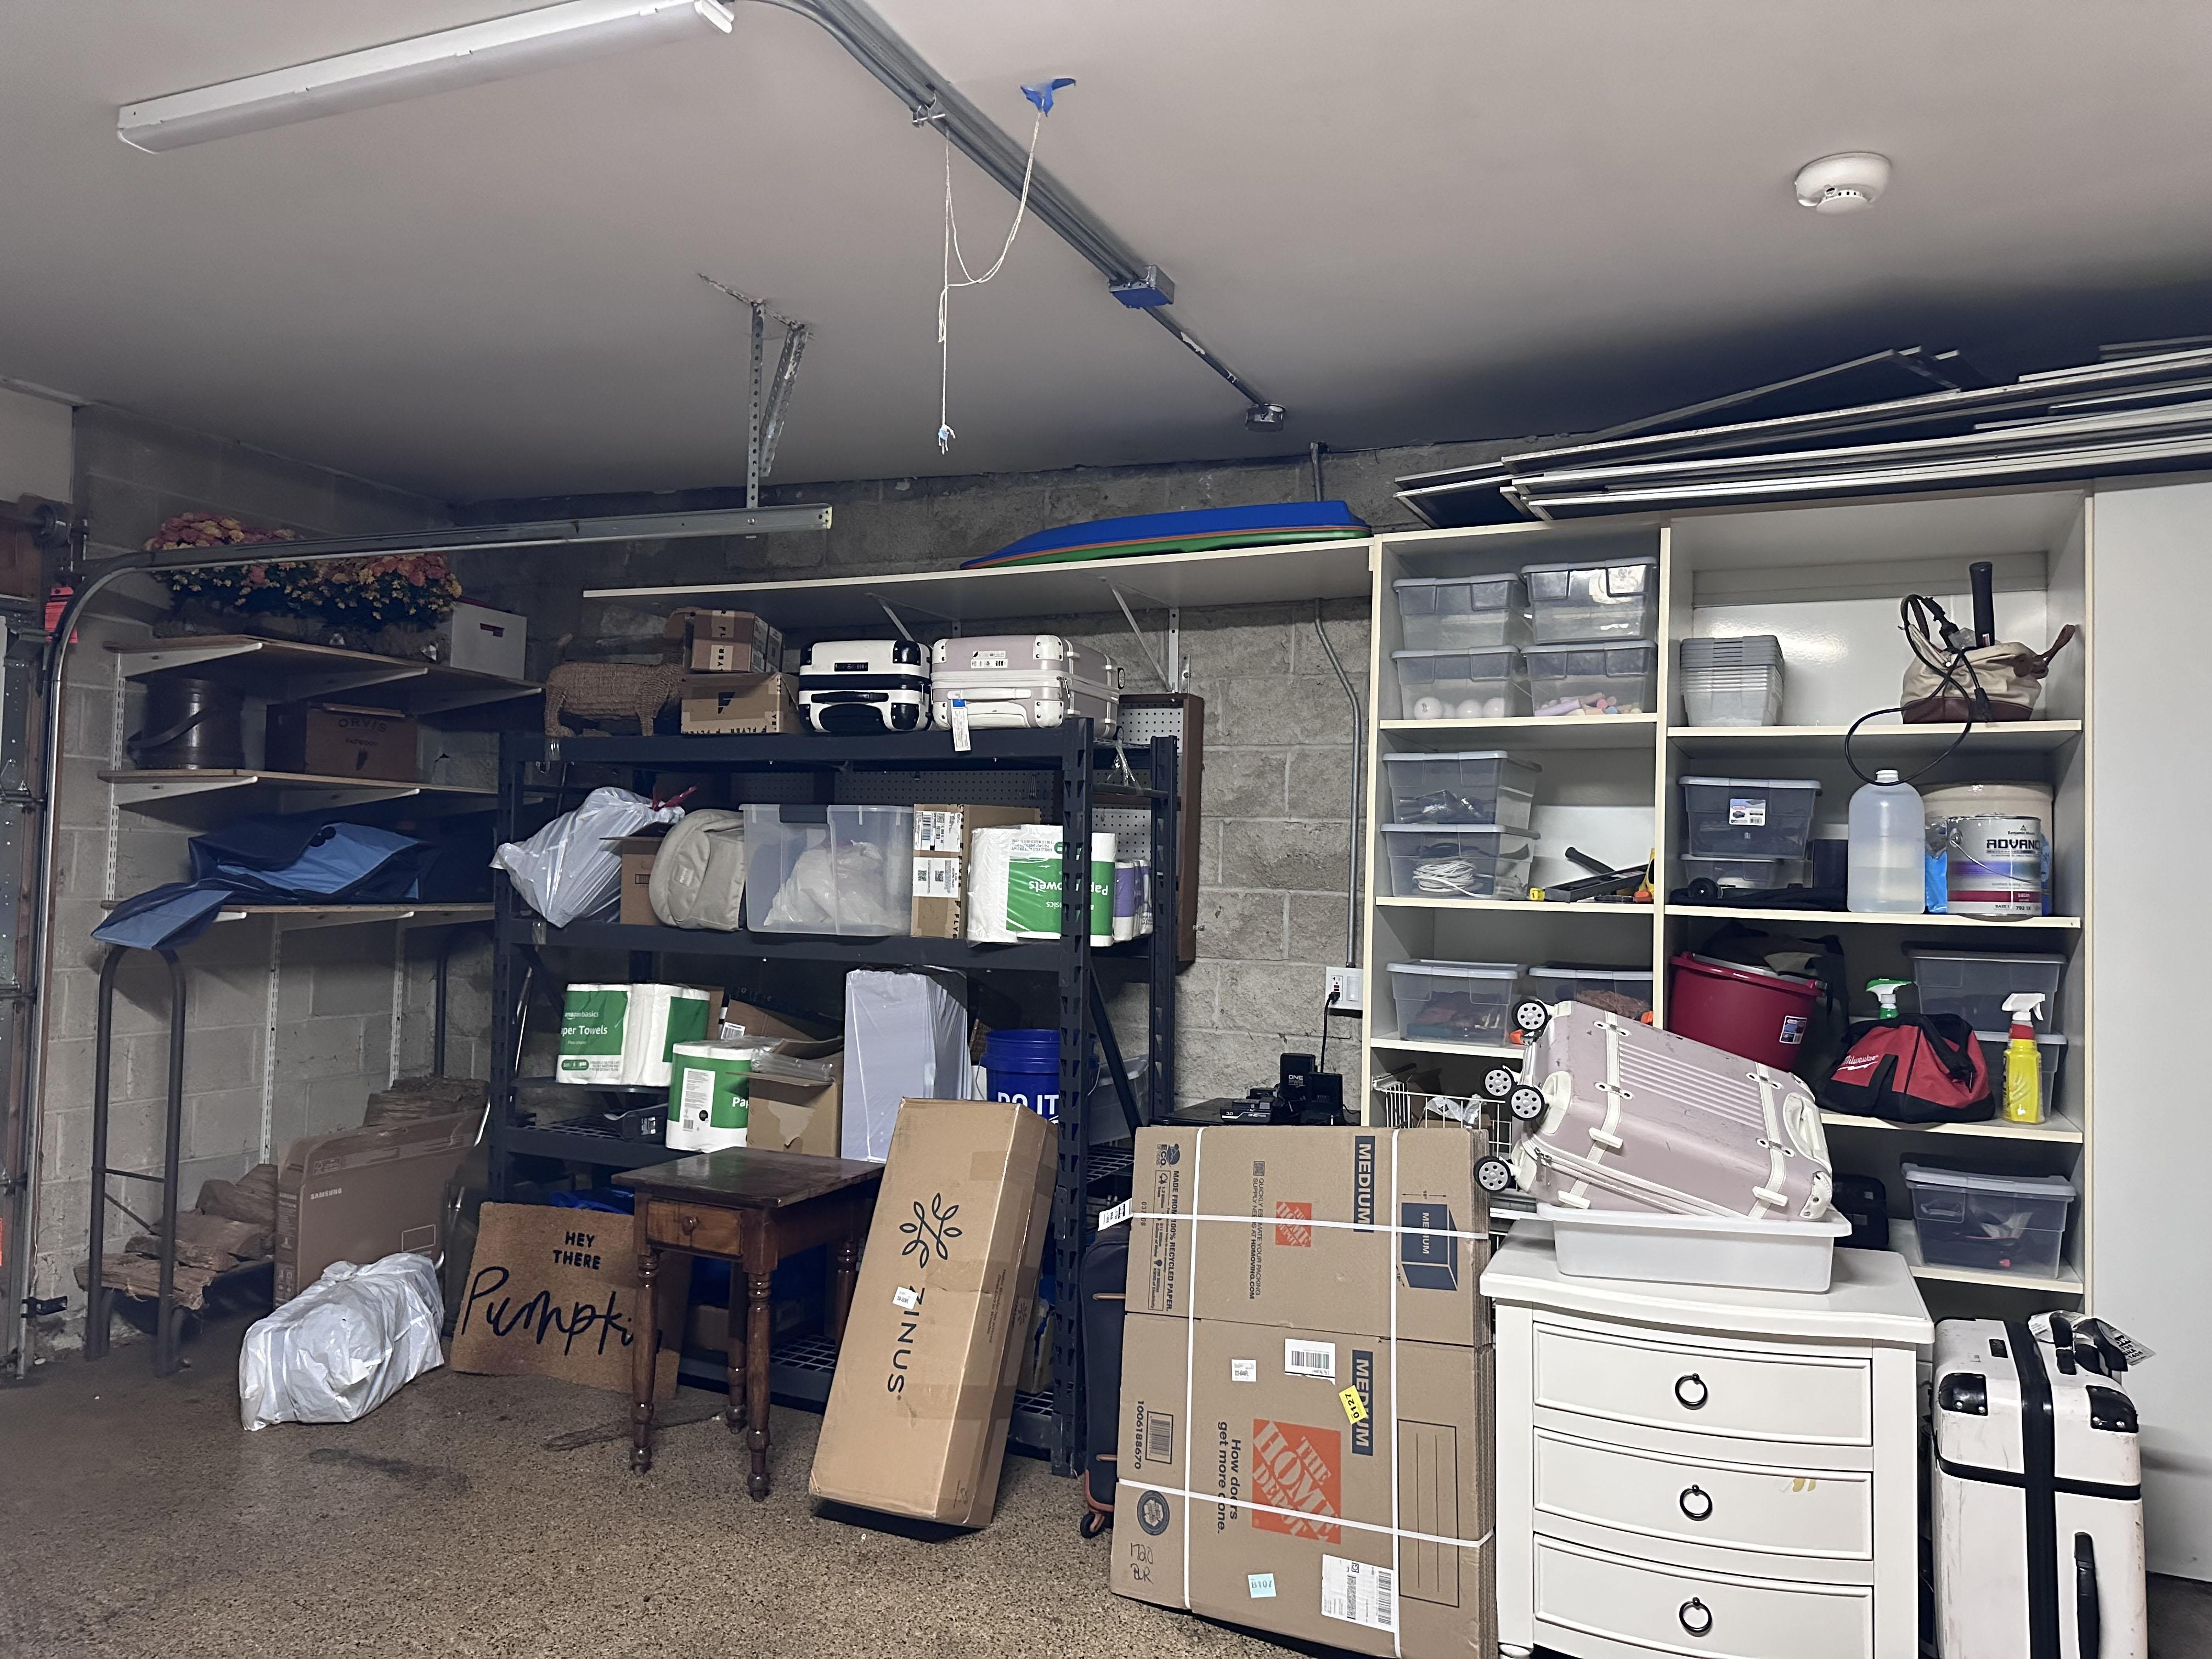

The before
This is what things looked like before the renovation. ^ It was clearly our dumping ground. It was so messy that it actually got in the way of us doing the things we wanted to do, and it was too crowded for the car. Every once in a while, Kelly and I would dedicate an evening to cleaning it out, but it fell back in to disarray every time.
Other problems—and what actually prompted us to start this project—were a dire need for tuck-pointing and sealing to masonry. You can see what I’m talking about here. Not good. It needed to be fixed!
Modular Closets
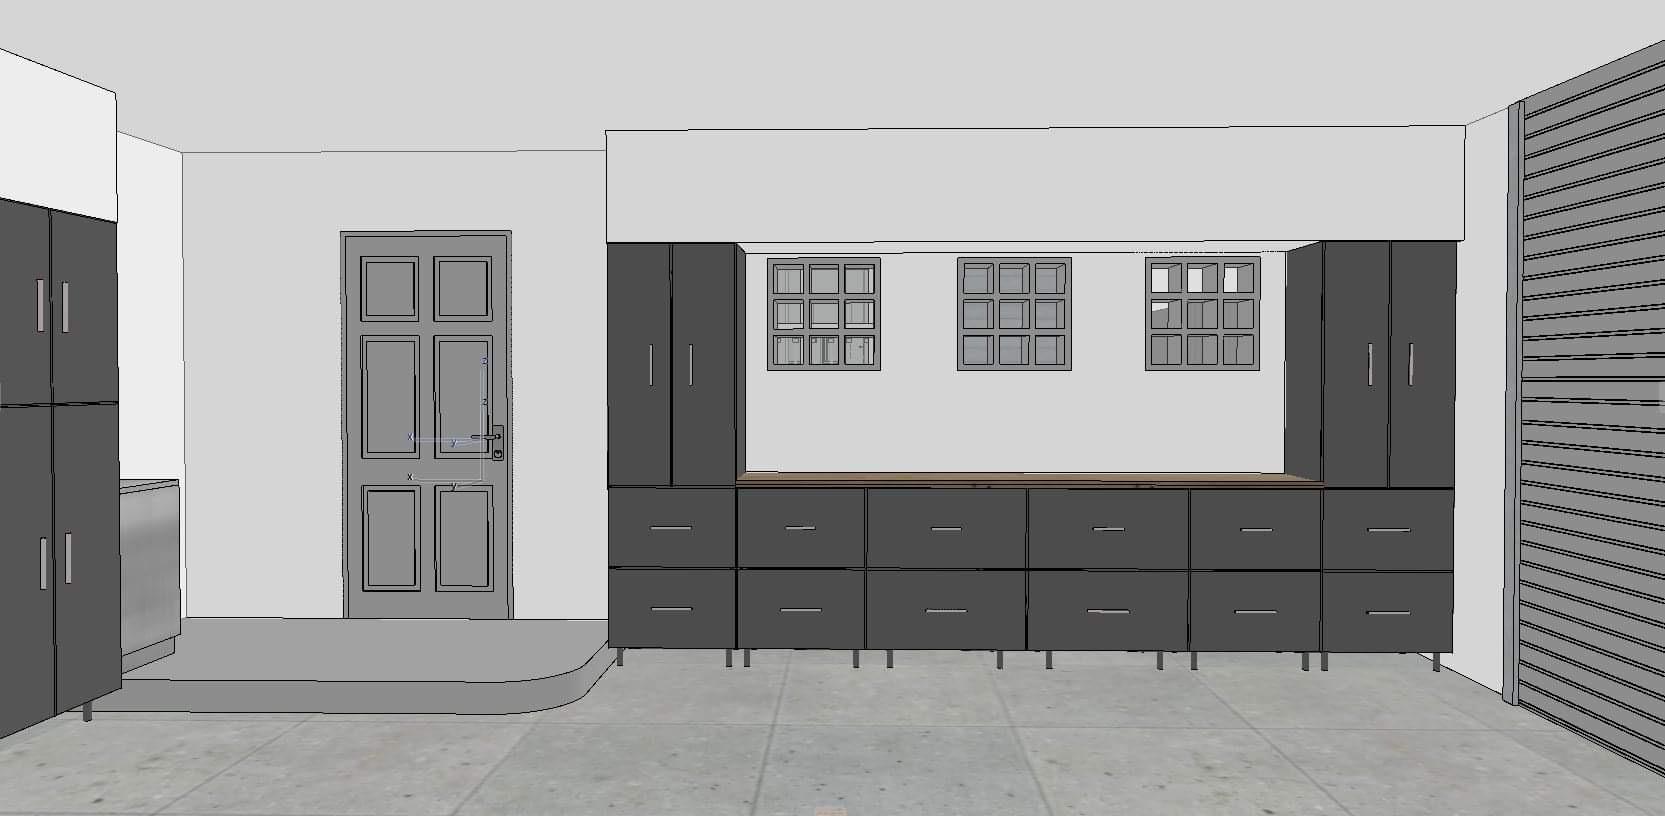
I was definitely overwhelmed when I first started planning. But Modular Closets‘ incredibly helpful designers and customer service representatives helped me get started. Here’s how the process went:
- I brought a few quick measurements of the garage to Modular Closets’ online 3D design center. This was tough considering all the junk in there.
- I designed the whole project using their software. This took me a matter of minutes. Though if you’re not in the mood, Modular Closets will design your project for you… for free!
- I had it looked over by a pro. This was also done through the website, so I never even had to leave my office.
- I got their seal of approval, and the order was placed. All in all, I’d say the total design process took maybe half an hour and I had the cabinets, drawers, Handiwall and workbench ordered in less time than it took me to take the measurements. And all of the supplies arrived only a week later!
The design + materials
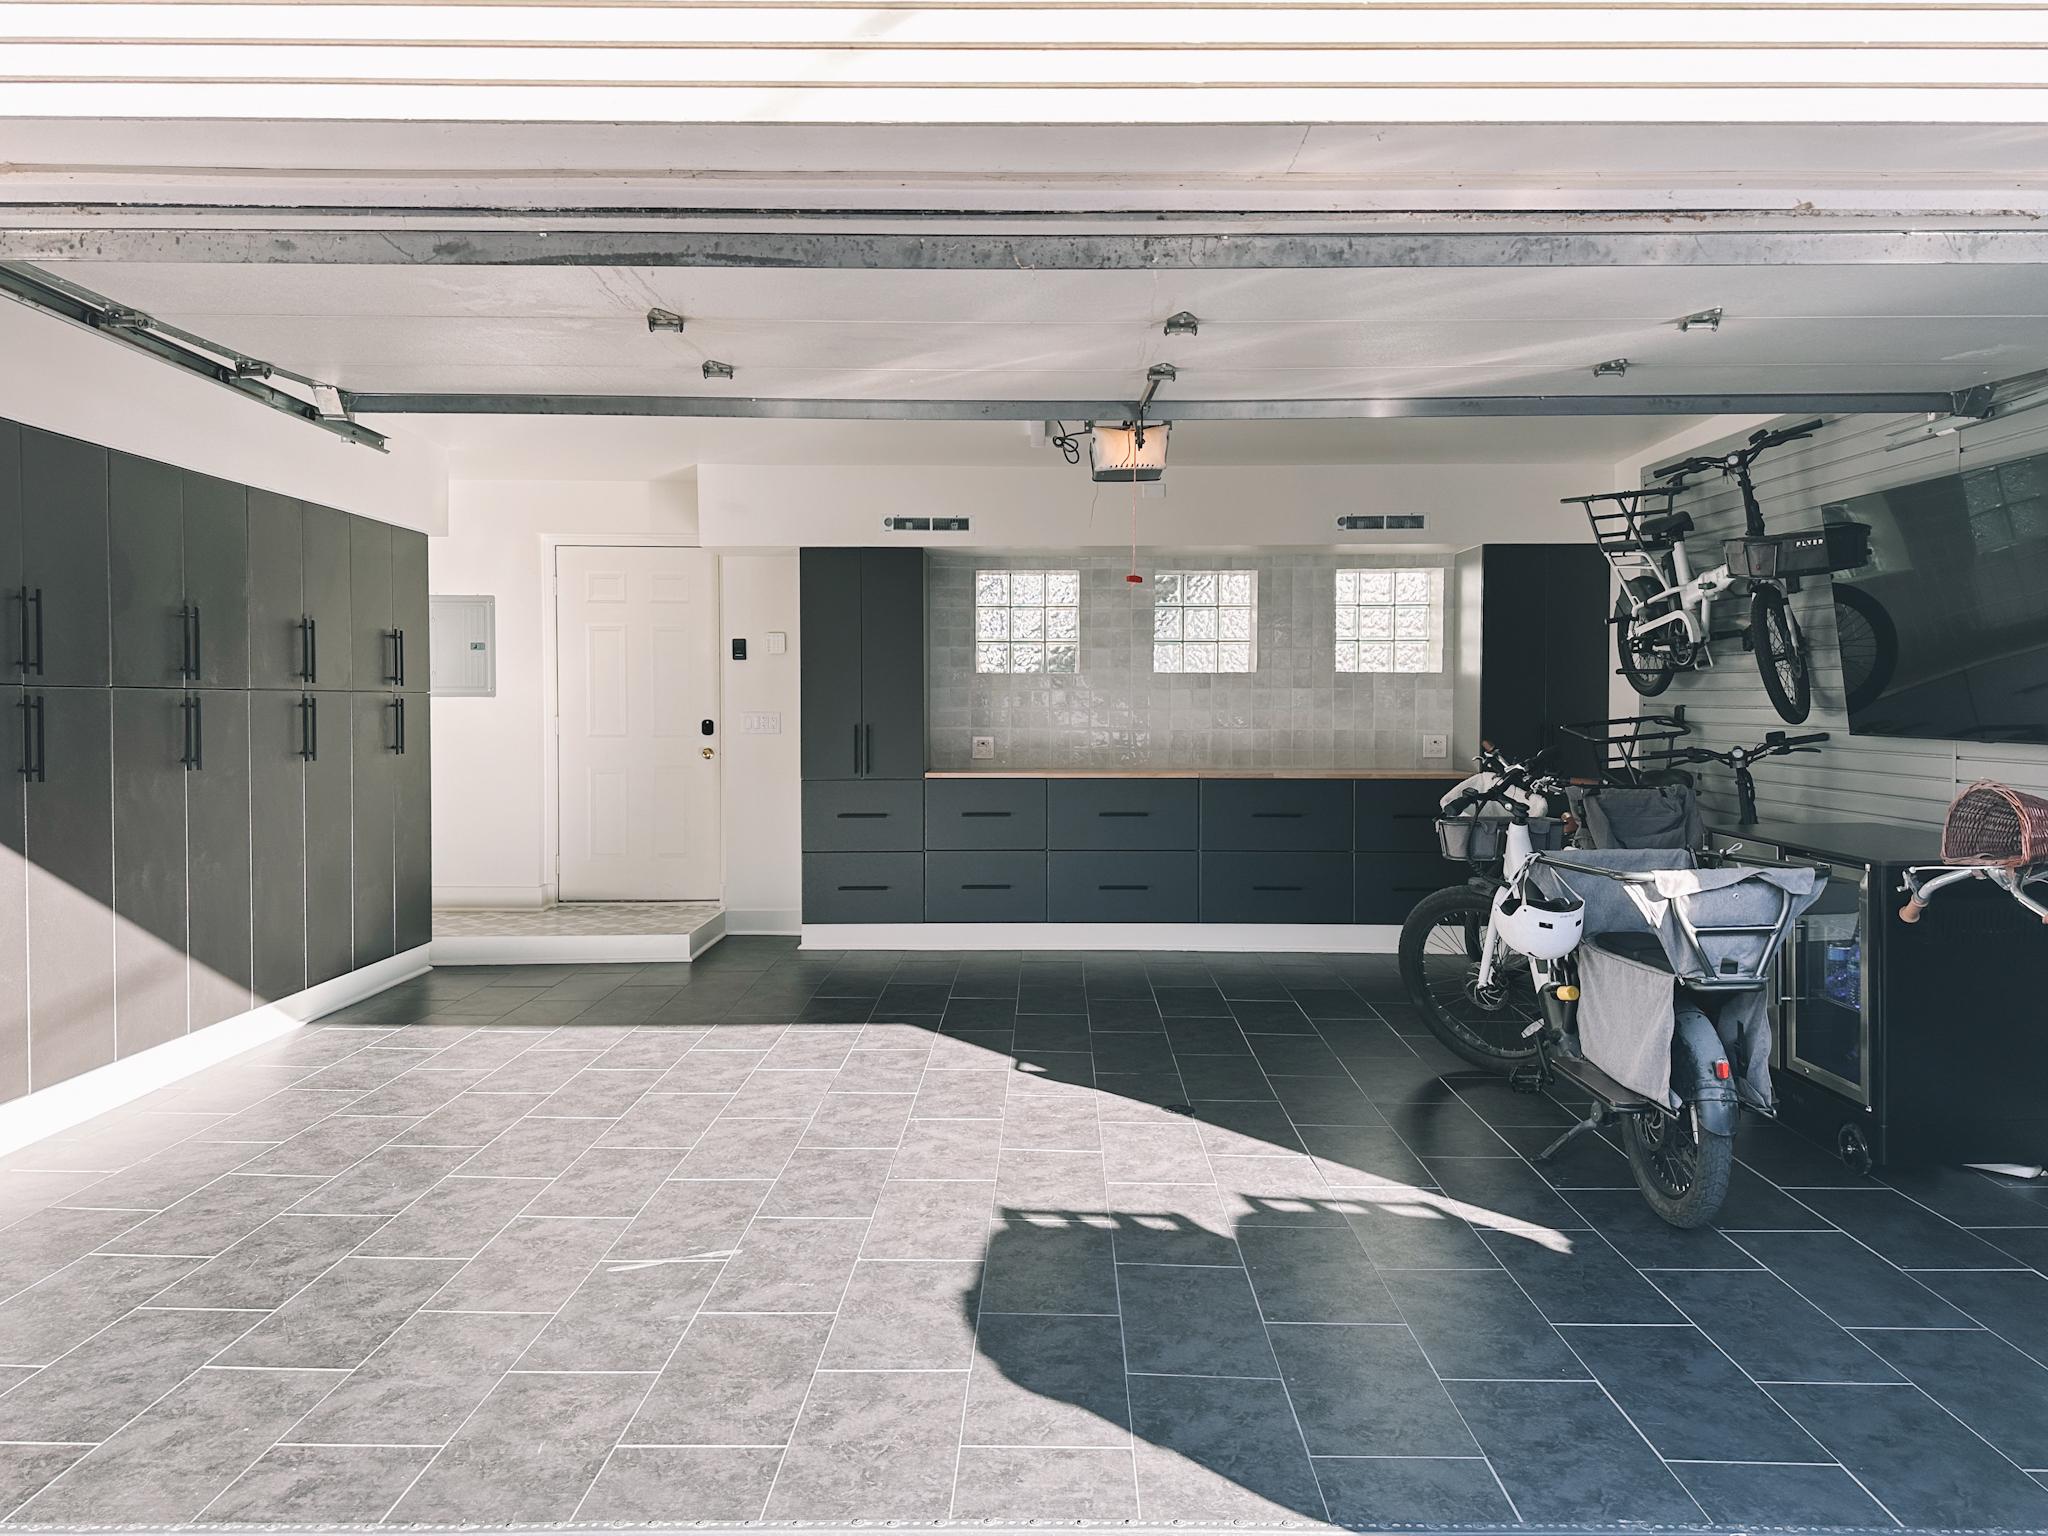
Our goal: To make the garage a storage powerhouse with as many cabinets and drawers as we could fit into the place. We also wanted to insulate it and install heaters so we could use the space for hobbies while maintaining the ability to park our car and charge our eBikes in it.
The materials:
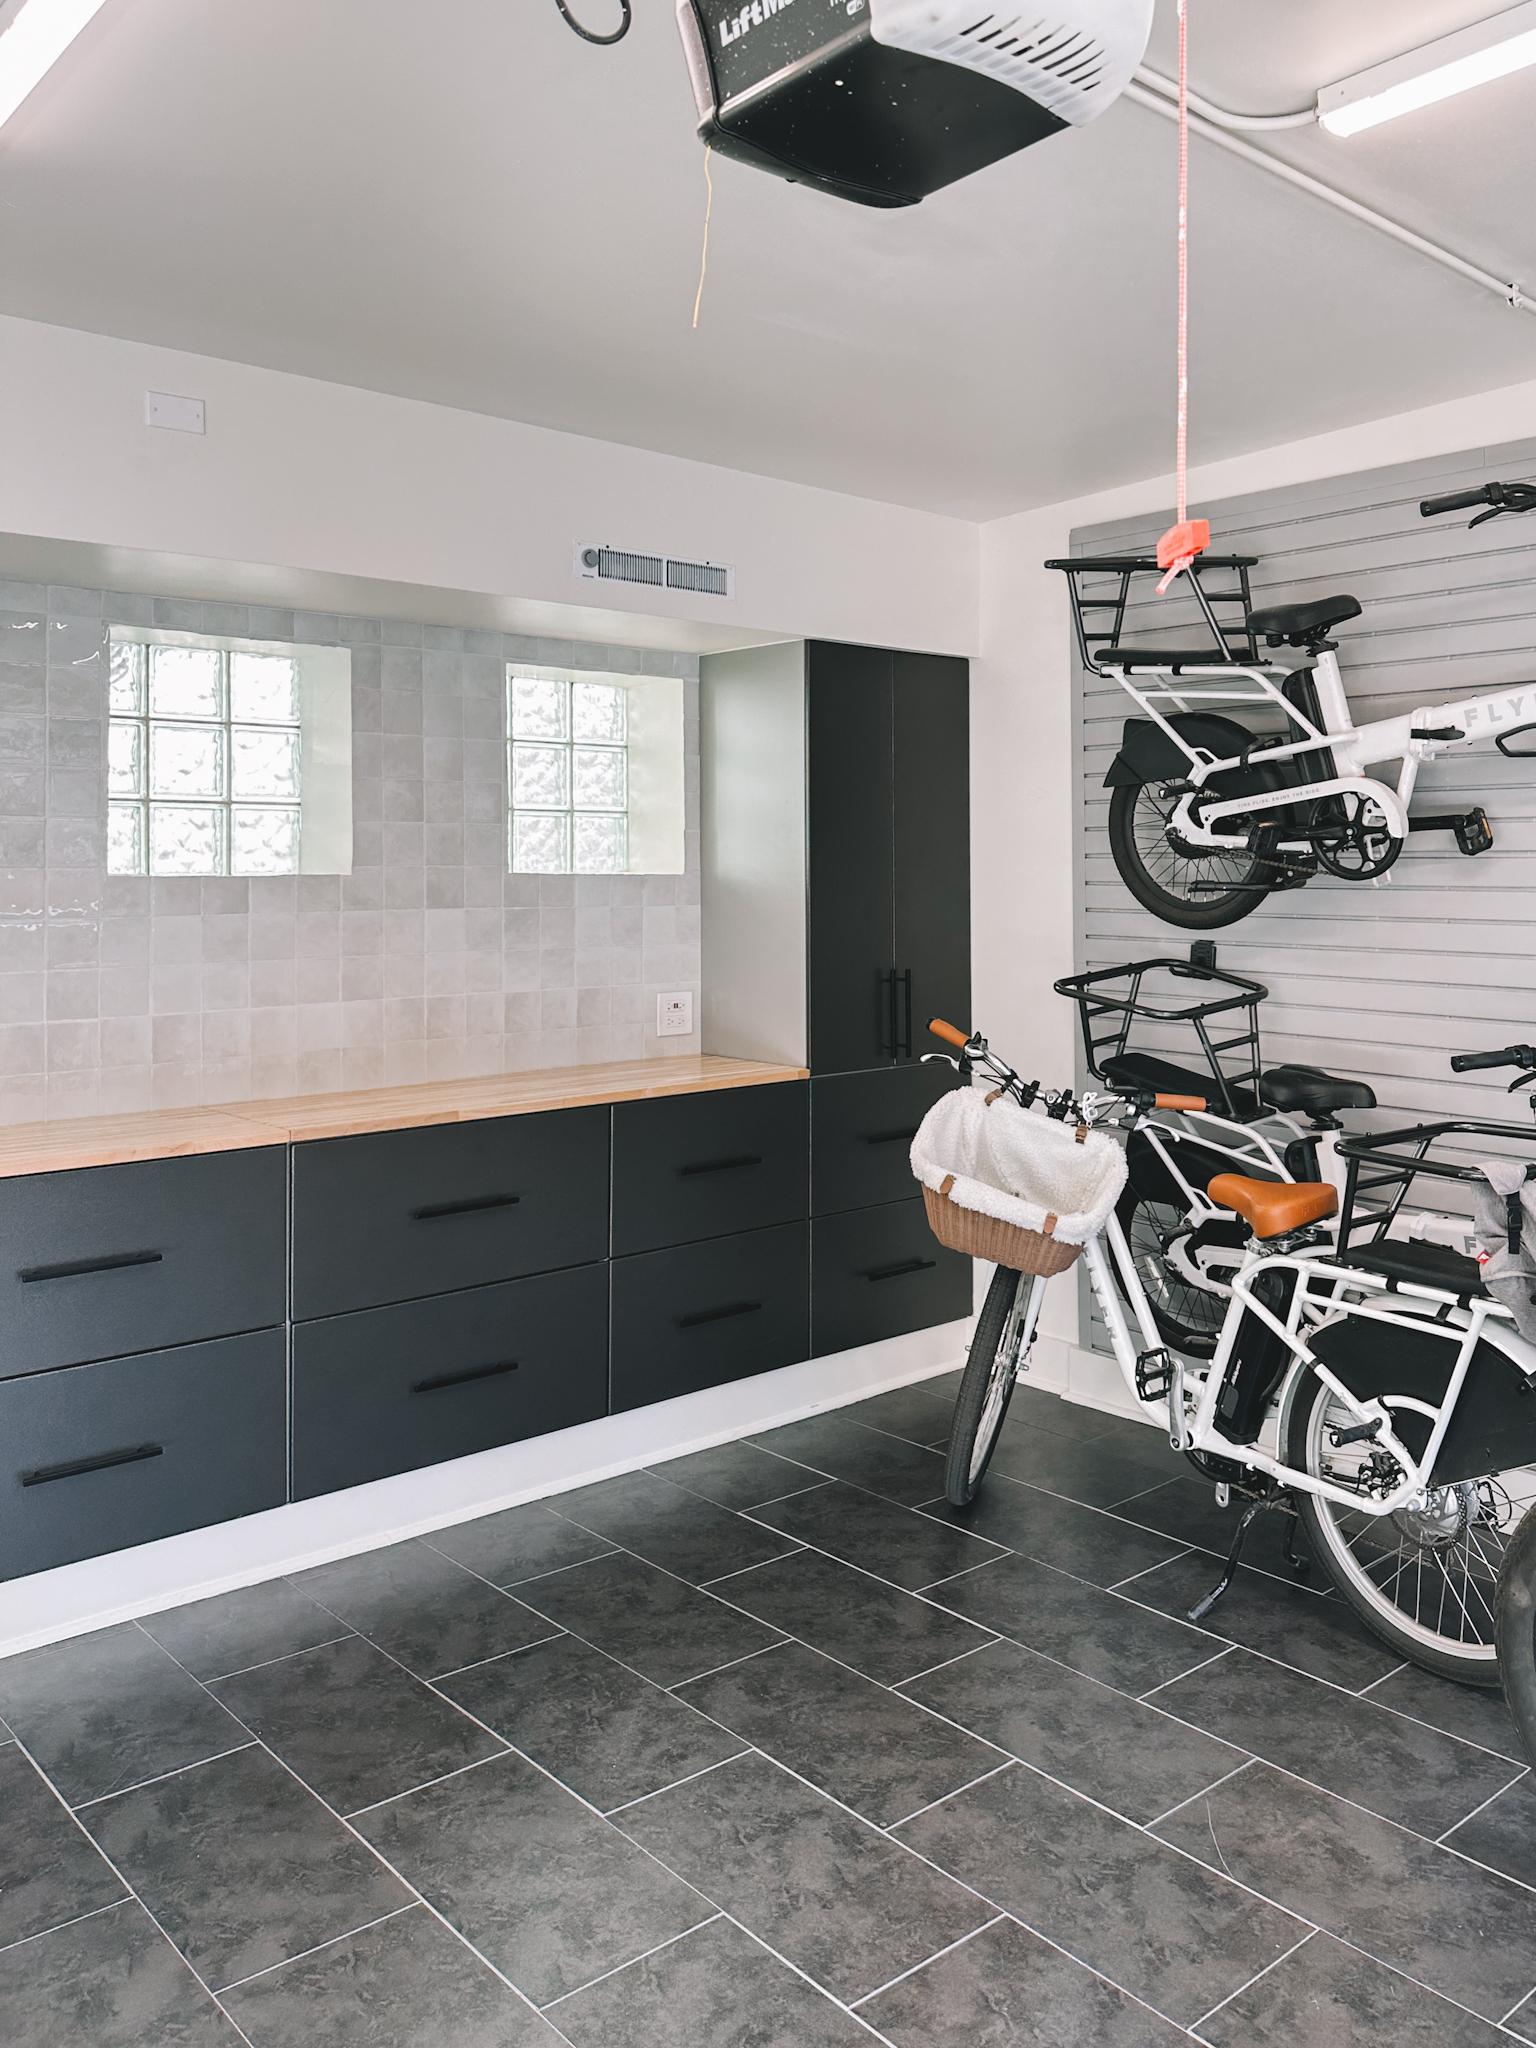
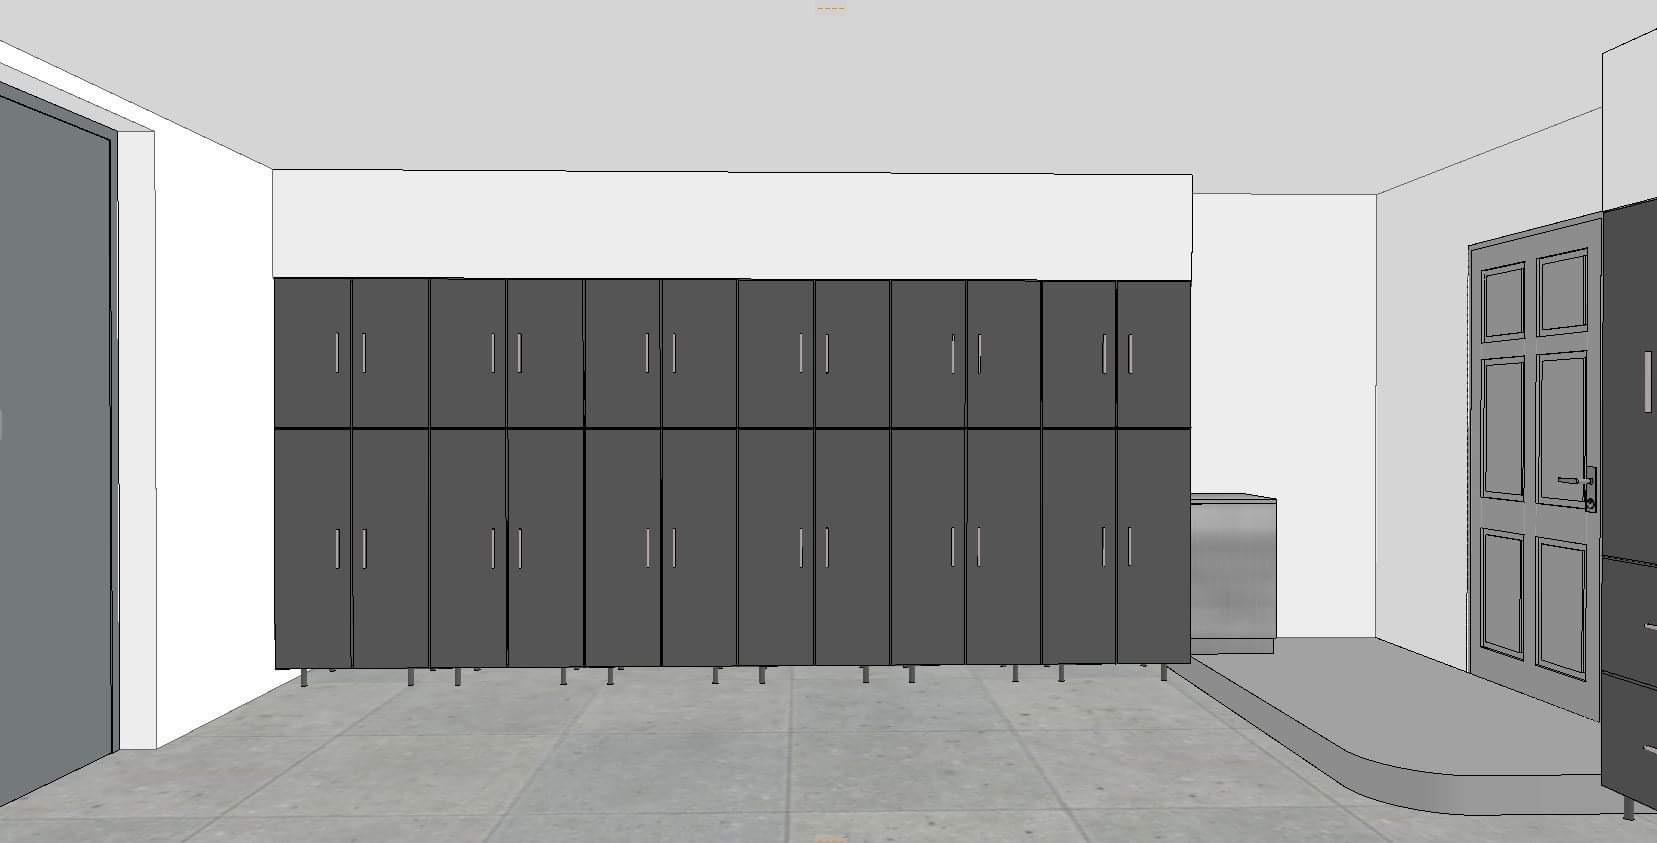
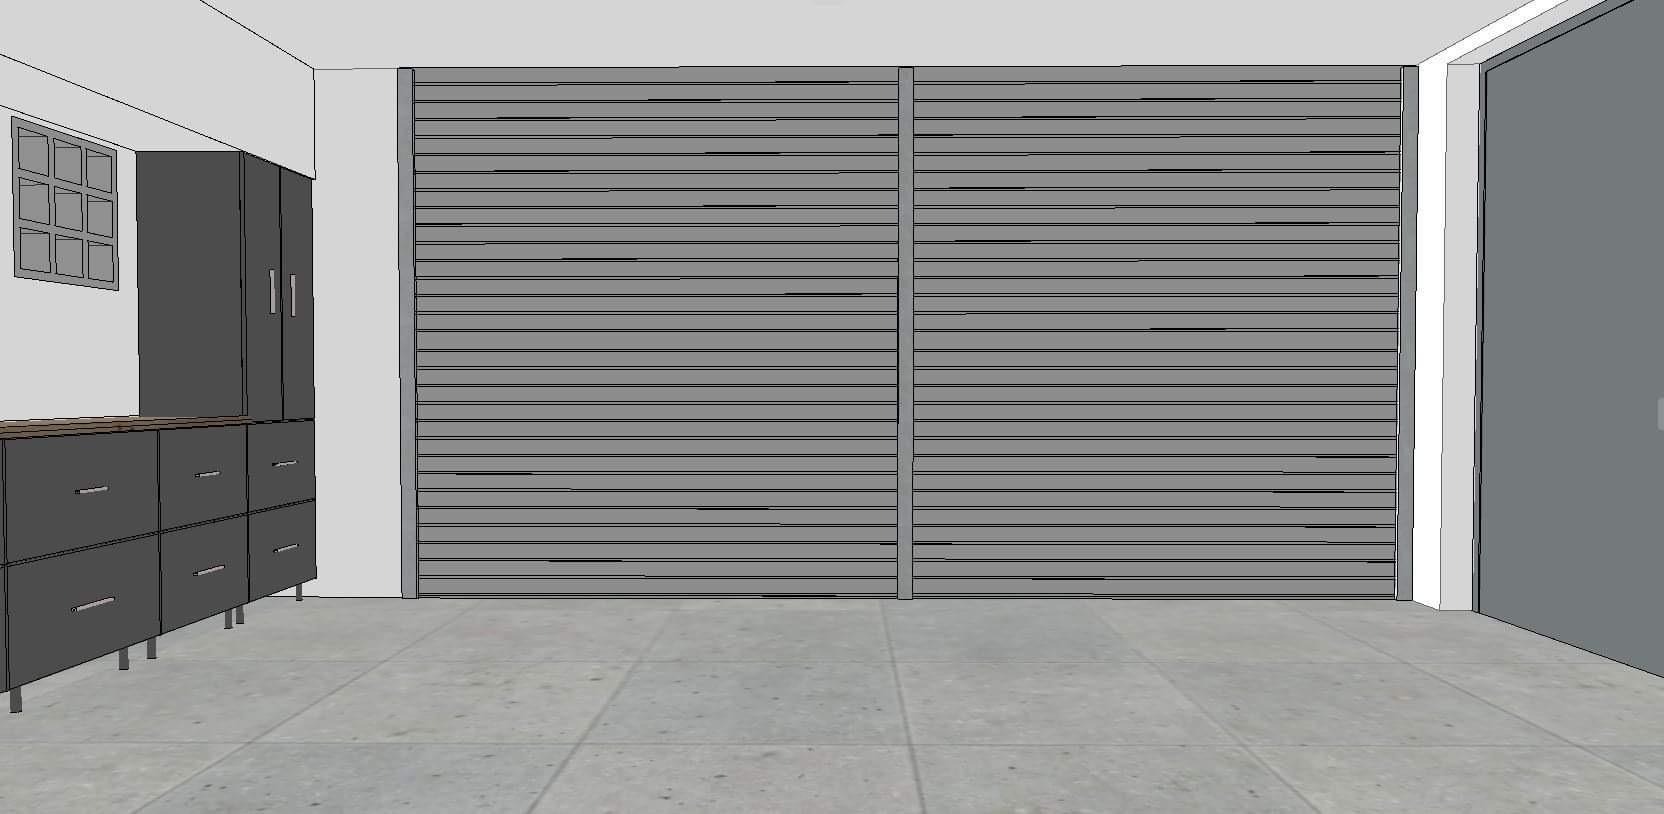
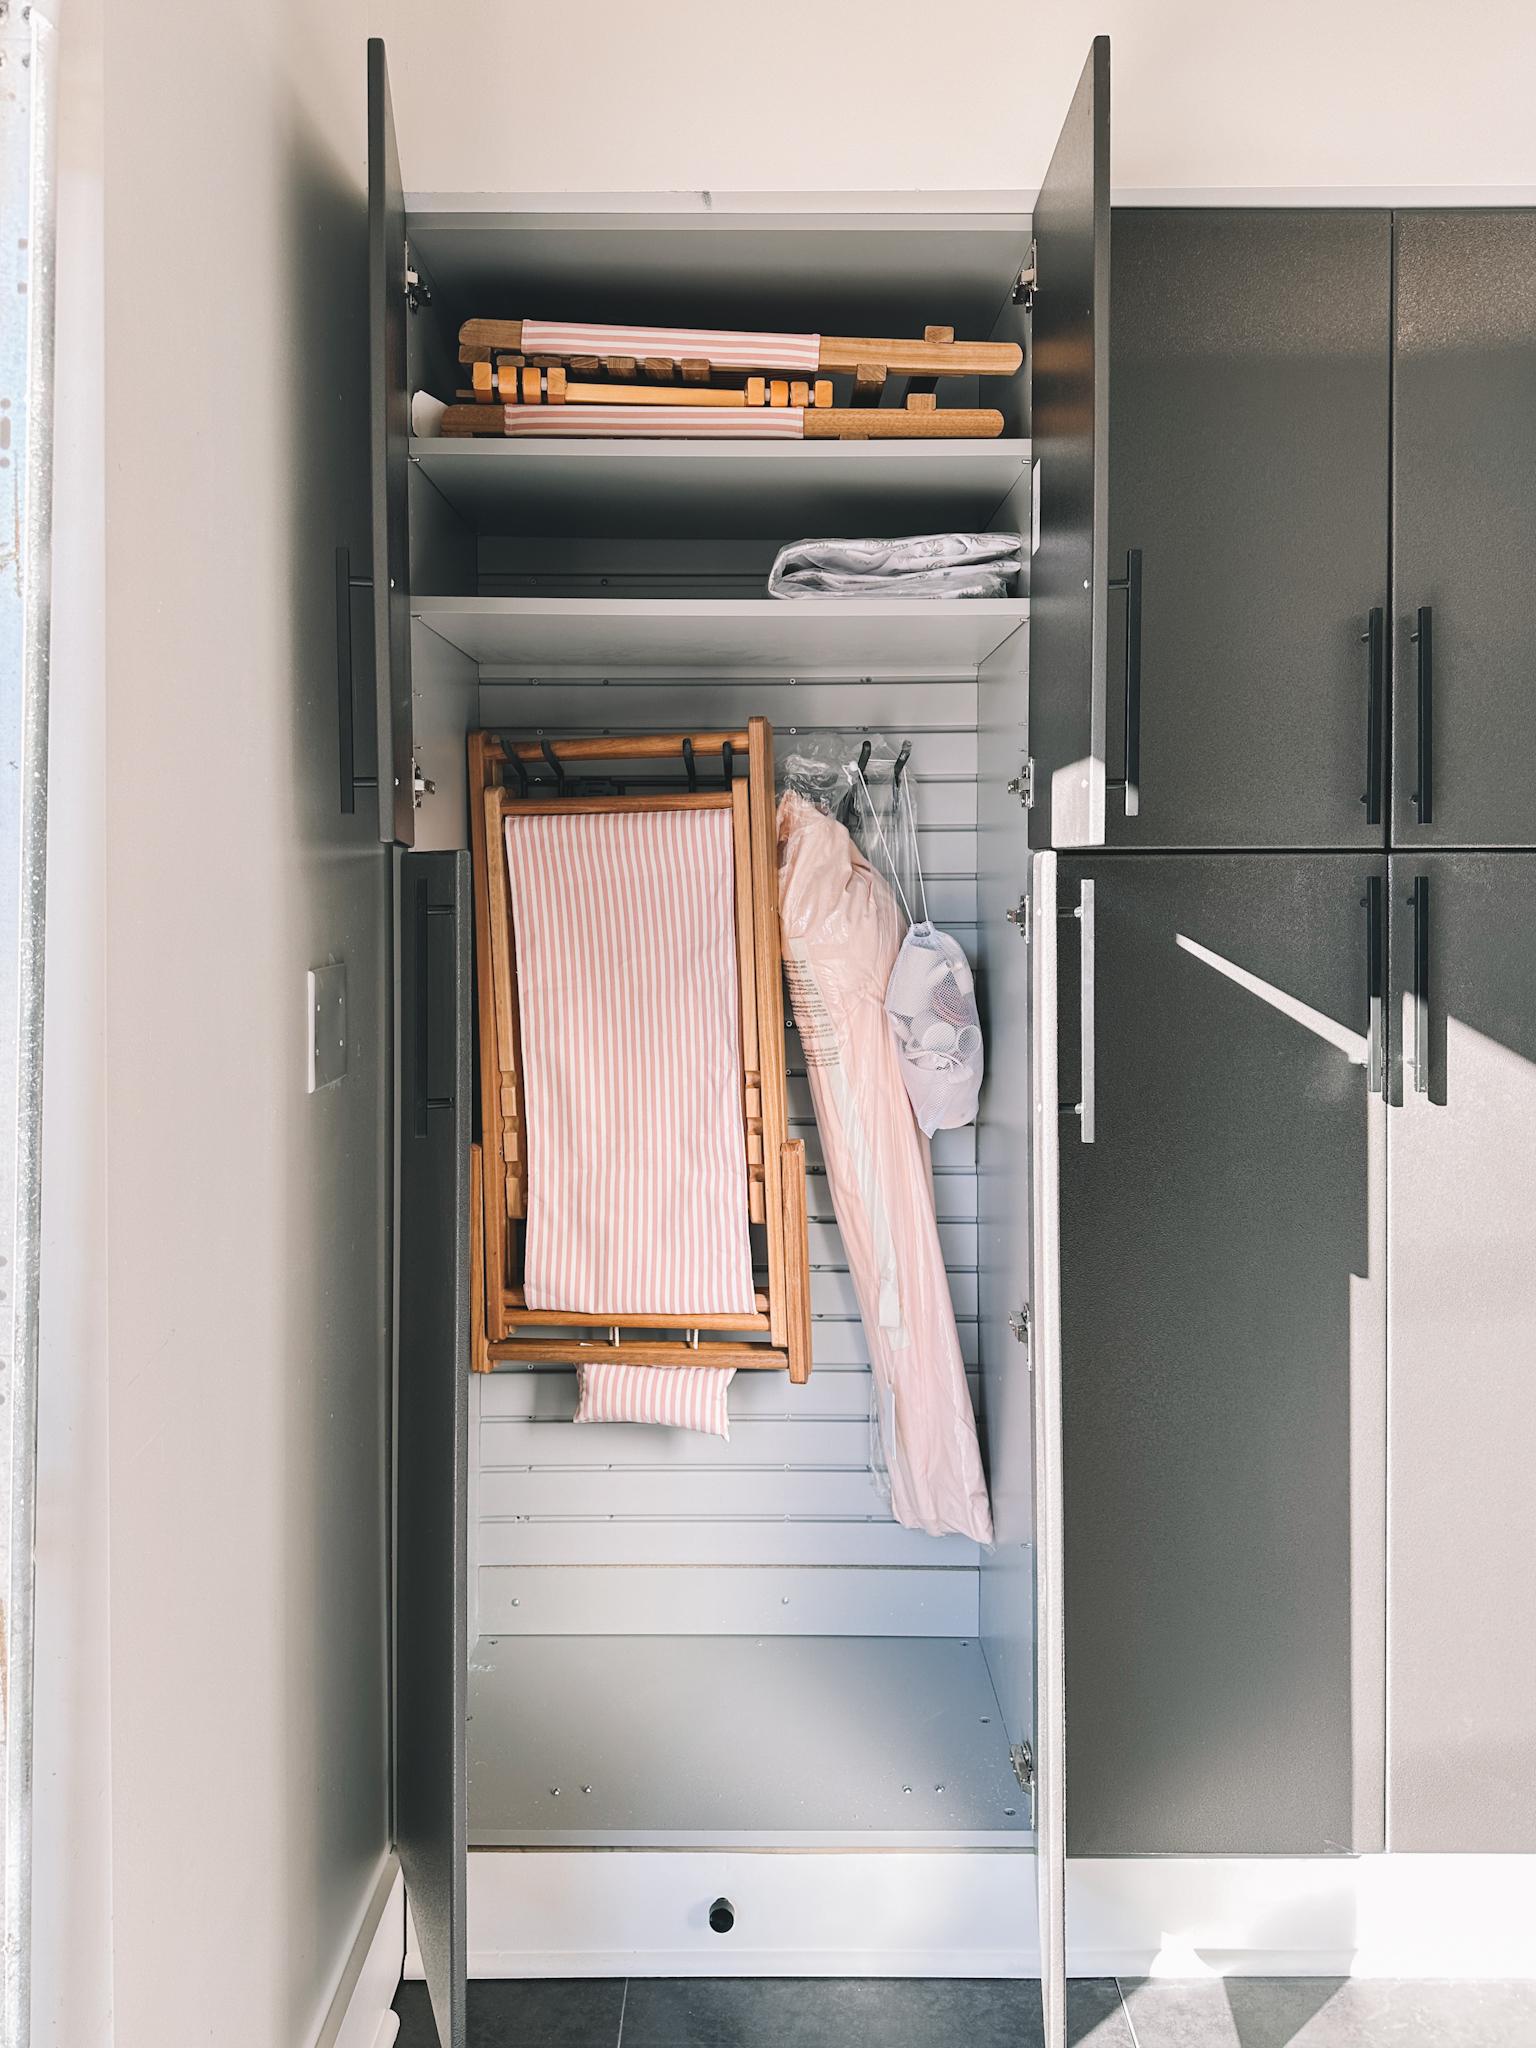
Modular Closets really isn’t kidding around with that word “modular.” Their various base cabinets and towers come in every imaginable variation to fit our space perfectly. We chose the 4-Door Tower Cabinet, 2-Drawer Cabinet and 2-Door Cabinet for the floor-to-ceiling parts and the 2-Drawer Base Cabinet with Butcher Block Countertops for a workbench.
Extras: Modular Closets also offers the Handiwall slat wall storage system and accessories, which we chose to hang our ebikes and scooters from. Handiwall is incredibly strong and versatile, and when put in tandem with all the other storage solutions, I knew we had it all covered.
Why Modular Closets’ pieces are so great: Modular Closets uses Thermo-Foil Laminate Boards so pieces won’t crack, peel or warp—even in a garage. They also have a higher weight capacity than most other closet systems due to their 3/4″ thickness. Finally, everything is wrapped up in 1mm thick PVC edge banding to further protect against moisture and stains.
Demolition and prepping
Designing the project with Modular Closets was so easy that it really forced me to get my butt into gear after clicking the order button. Here’s what we did to demo and prep:
- Sold a lot of stuff: I first listed most of the junk you see in these ‘before’ pictures on Facebook Marketplace, and used the proceeds to help pay for the renovation.
- Donated/discarded the rest: Other unneeded stuff was donated, and broken things were recycled/trashed. (Things we decided to keep were temporarily stored on the covered walkway leading from the garage to the house.)
- Smashed things: Next I took great joy in smashing the old garage to bits with a hammer and cleaning up the space for installation. It was amazing to discover just how large the garage was once everything was cleared out!
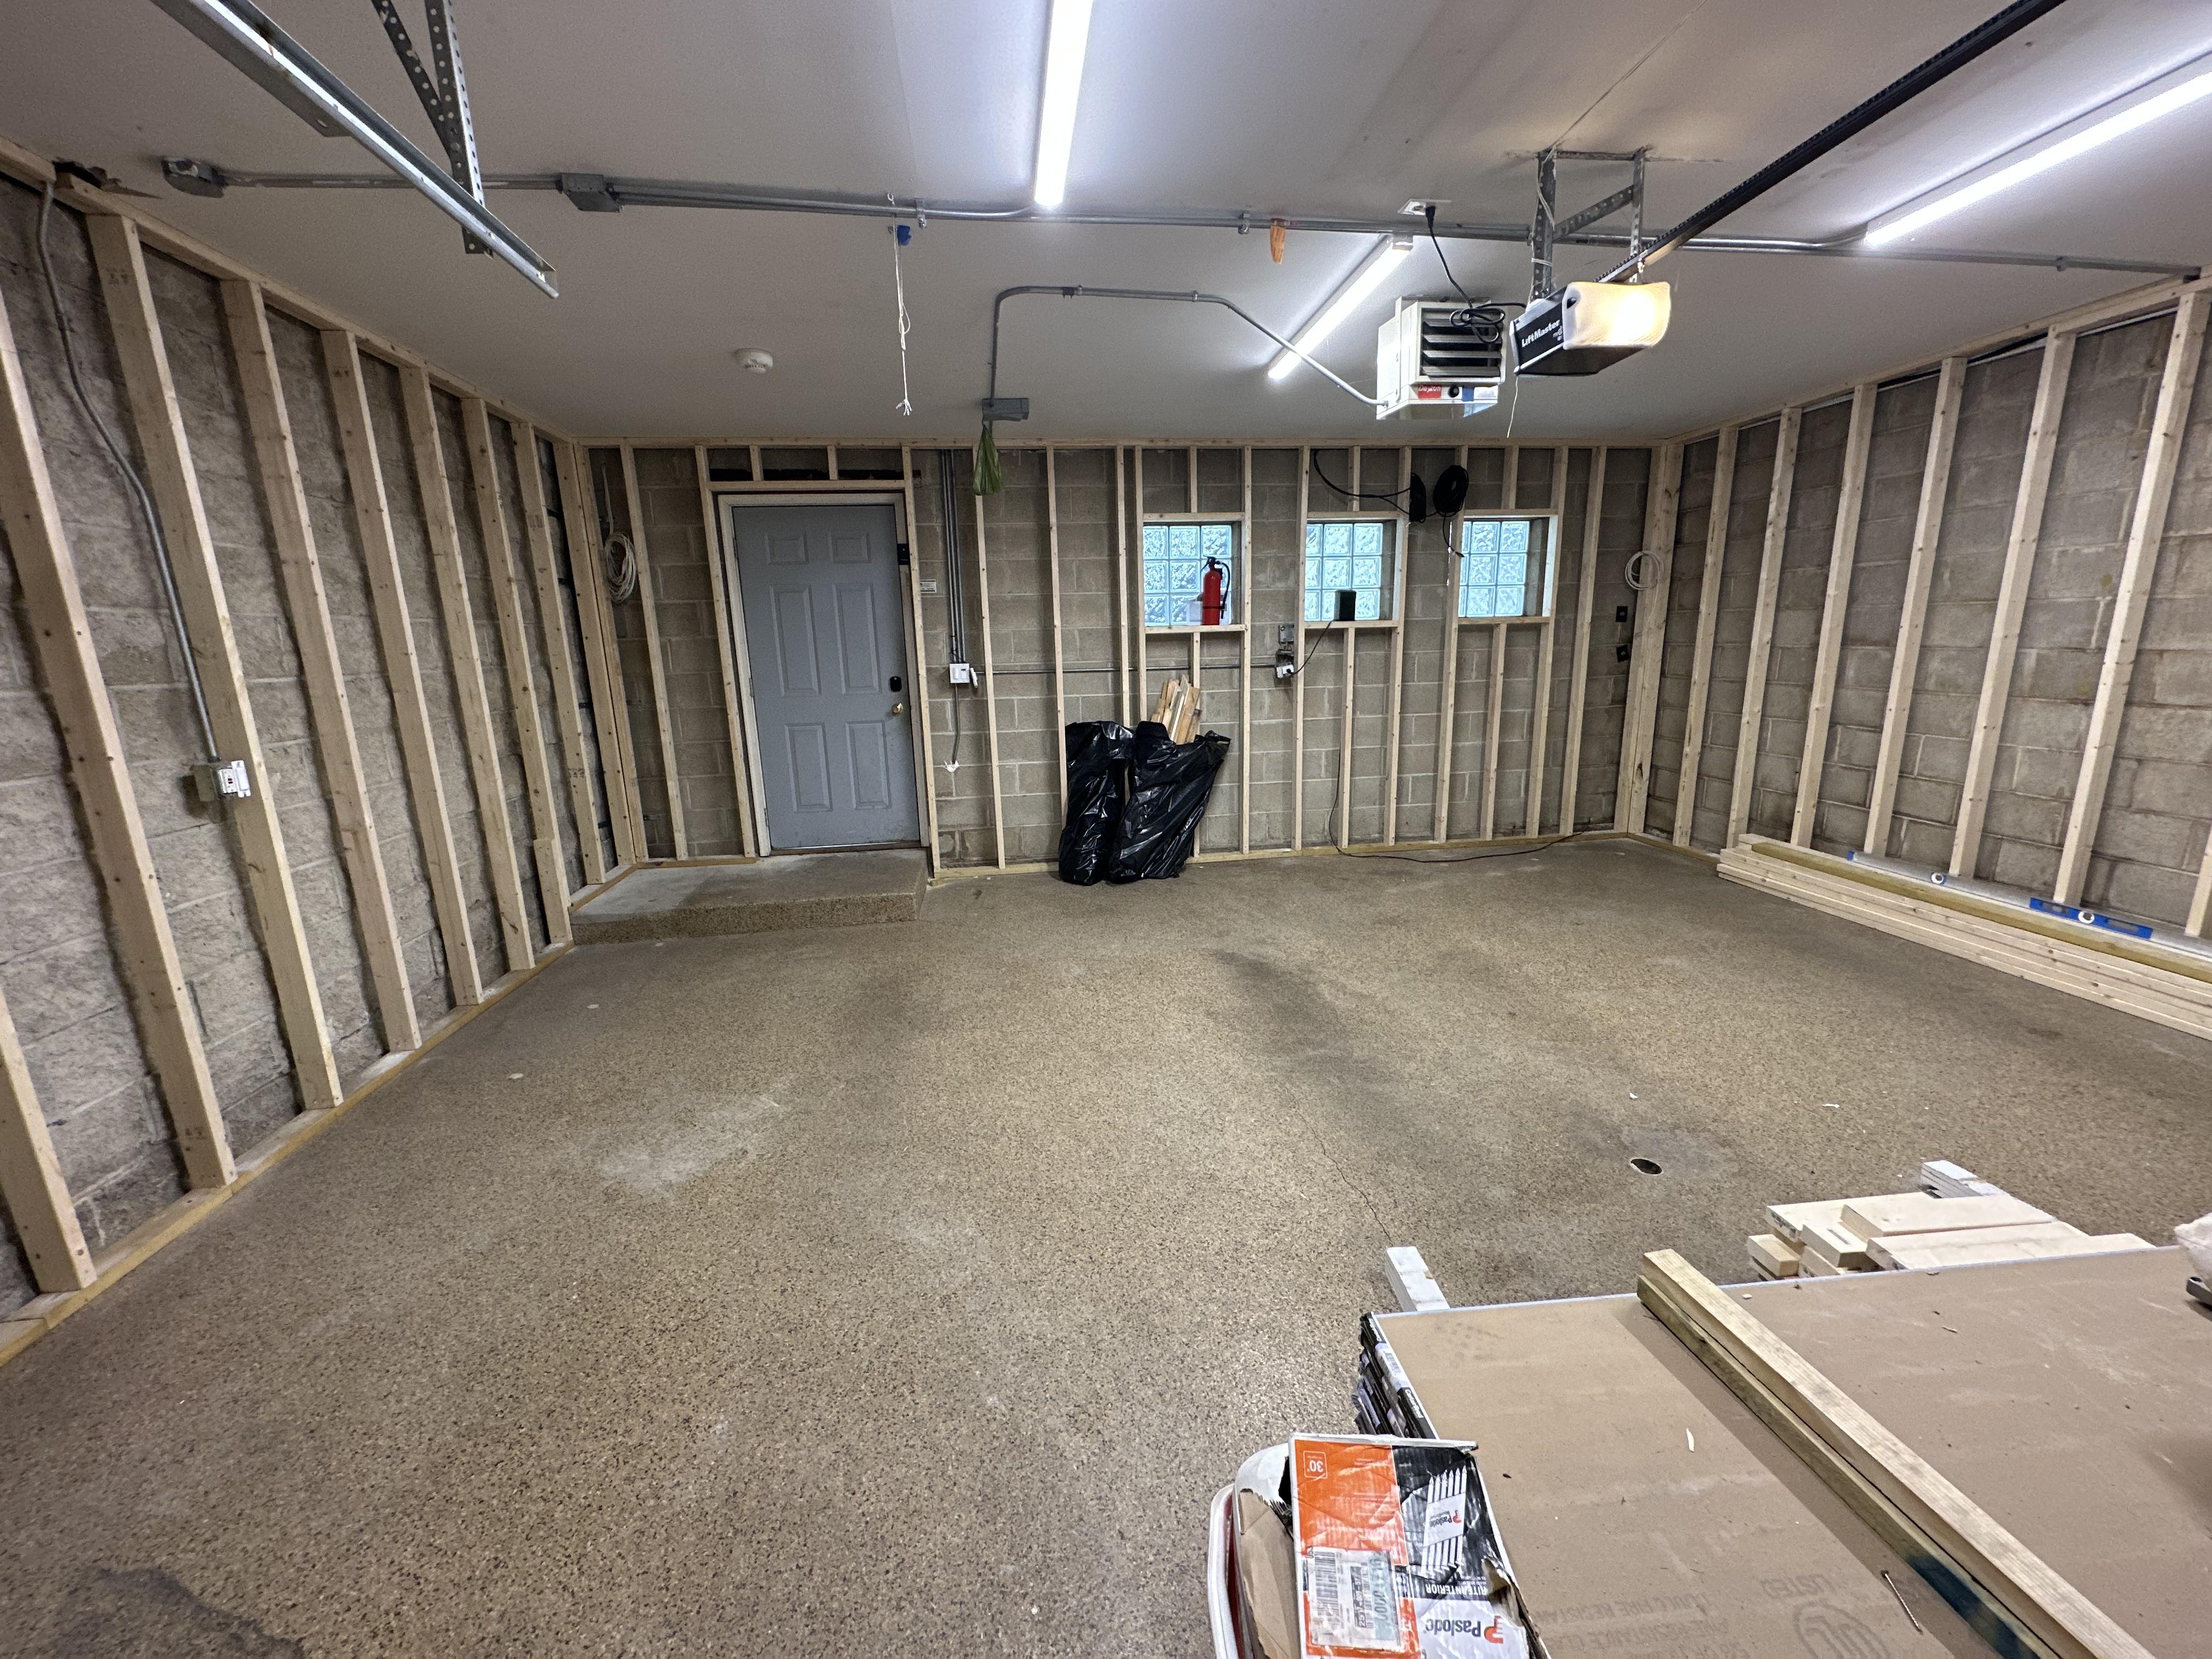
- Repair, frame and drywall: The walls in our garage are masonry stone and though we could’ve installed the Modular Closets cabinets directly onto it, we hired a professional to tuck-point and chemically seal it. Next, the professional framed the room and installed both insulation and drywall.
- Install heaters: Electrical was addressed during this time too. In addition to the heaters, we put in a bunch of outlets.
Time to DIY
I could take it from there, since Modular Closets makes DIY projects possible.
The materials arrived only a week after I ordered them so they were ready to go as soon as the drywall was up. Putting the cabinets together was incredibly simple—especially when compared to most other “some assembly required” furniture I’ve bought in the past—and it was so exciting to see the room come together as each piece went into its respective place.
Thanks to Modular Closets incredibly intuitive design tools, each part of the installation fit perfectly into place. I couldn’t believe it.
Keep in mind that I’d never done a big room renovation DIY before, and I was intimidated to get started. Because of how well things went with Modular Closets, though, I gained a ton of confidence.
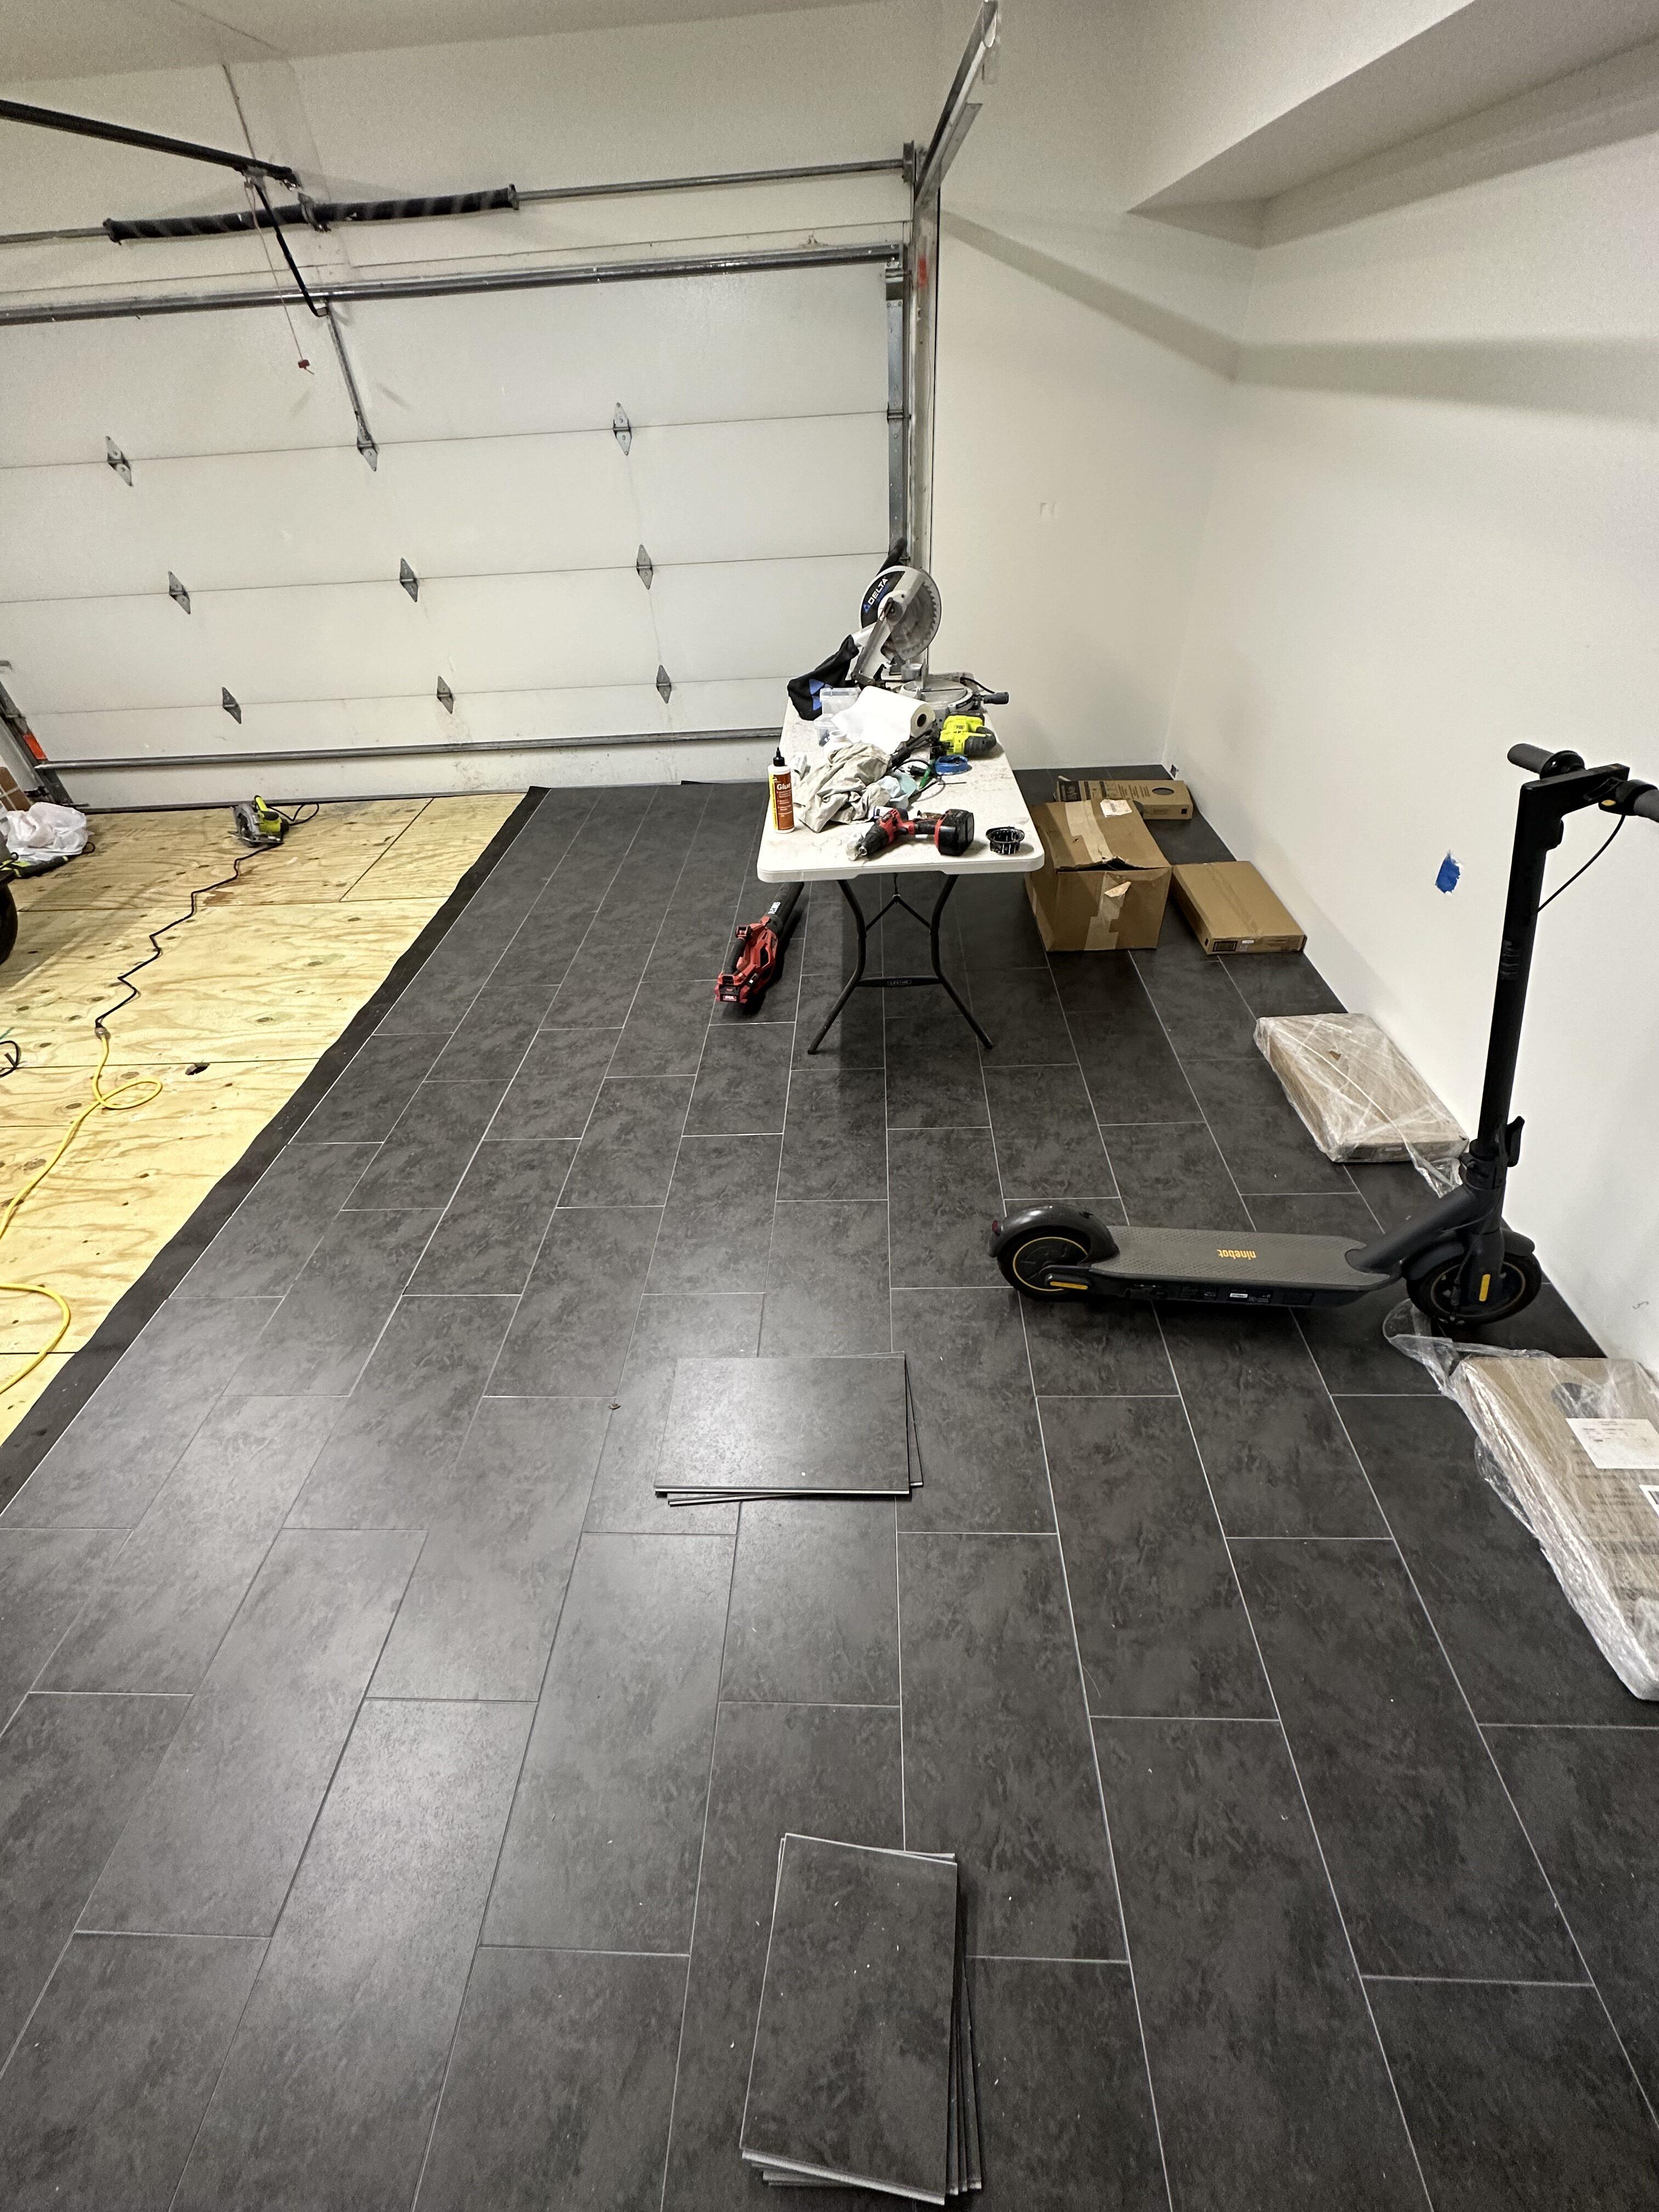
Installing the floor
The most frustrating part of this project was installing the floor. Our old floor was in rough shape. It was cracking, and no matter what we did, we simply could not get it clean. Every time the girls sat down on it, they ended up covered with muck. We learned that we really had two options: redo the epoxy or install commercial-grade stone composite flooring meant for parking trucks. We went with the latter as it looked so easy to keep clean.
REGRET. 😆
Listen: You live and you learn in the world of DIY. And we love how it came out. It looks spectacular, functions great, and is really easy to keep clean. But this was straight-up torture because our floors were not level. Lots of self-leveling cement and other remedies later, it was done. But I learned an invaluable lesson: When DIY-ing, you need to be okay with and willing to re-do your work again and again to get things done properly. Contractors are hired for their experience. Something I had nothing of!
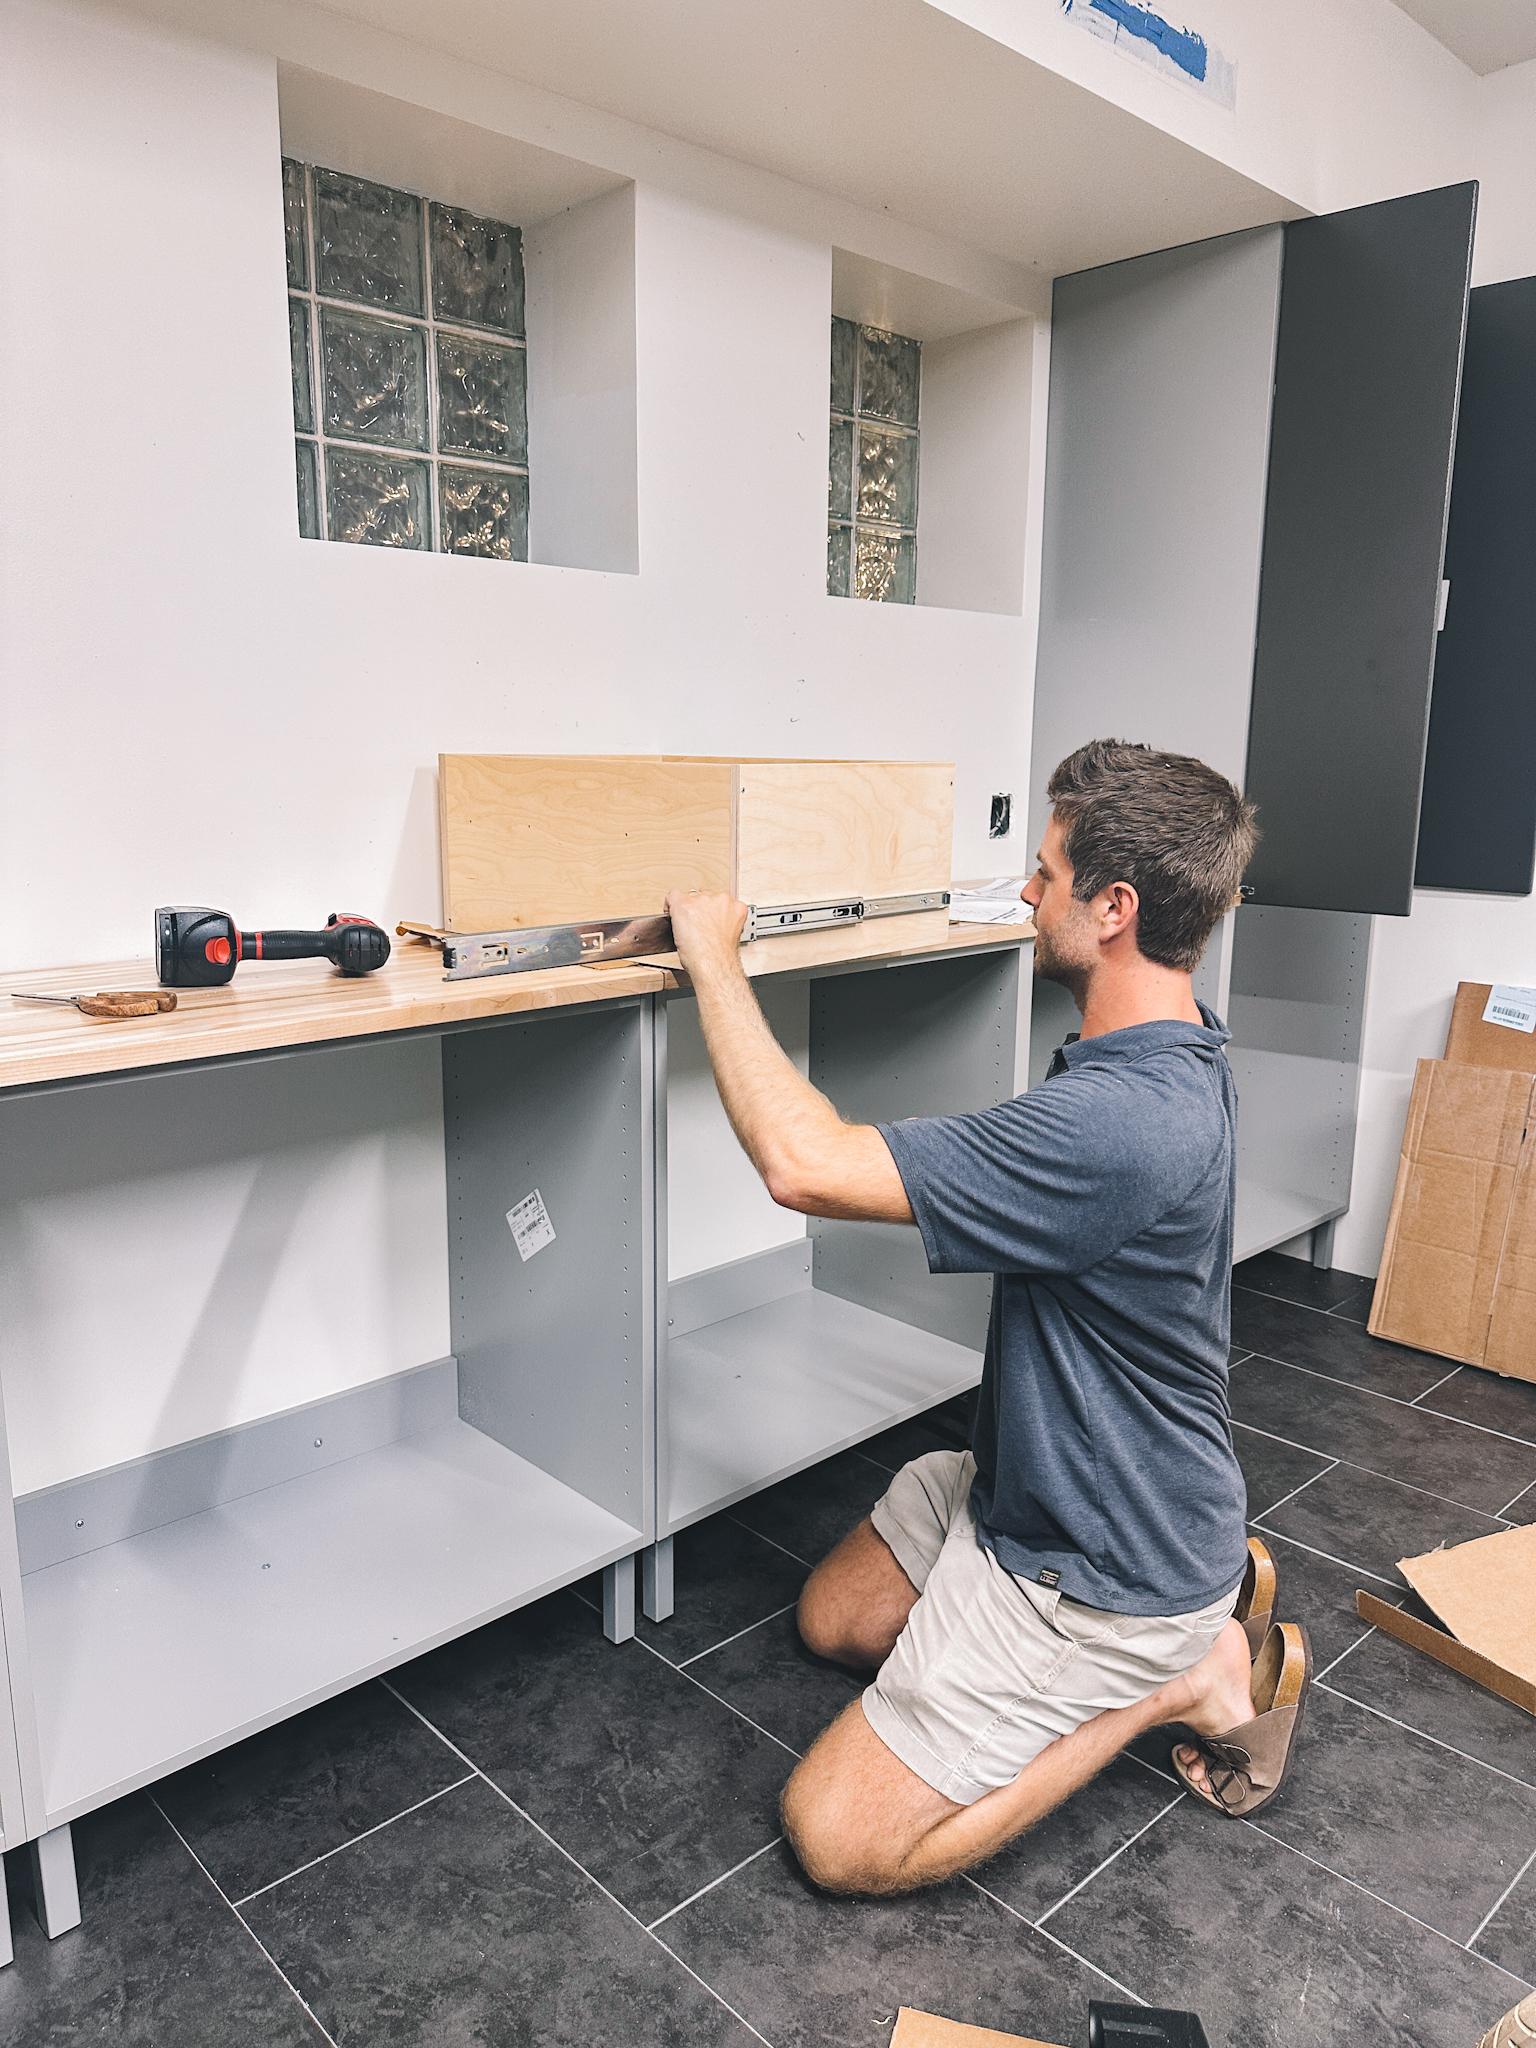
Installing the cabinets
As mentioned previously, the Modular Closets materials arrived about a week after I ordered them. They were delivered on two pallets right into the garage, which made it easy to cut open and organize. Everything I needed for the installation was in the boxes (minus a drill and stud finder), and every component was labeled perfectly. All the screws and hardware pieces fit together easily, too!
The installation came together super fast and it was SO EXCITING to see each cabinet go up. The cabinets and drawers have extremely high build quality and a robust coating which will stand up to anything we can throw at it. In practice, even sticky or oily messes wipe right off of them.
All the holes are pre-drilled and I was able to put everything together with only a screwdriver. I felt so confident that I added these Modular Closet Shelf Pull Outs which required me to drill some holes myself. Likewise, it was easy. Honestly, I feel like I got a lot of Husband/Dad Cred from my family for doing this project… but Modular Closets did all the work. I just took all the credit. Shhhh!
I should also mention that at one point, I made a mistake and ended up ruining a couple of cabinet doors. I wanted to cry. But Modular Closets’ customer service is incredible and sent me replacements no questions asked, and was basically like, “We all make mistakes! Don’t beat yourself up over it!” Which I appreciated. 😆 It was honestly the best customer service experience of all time.
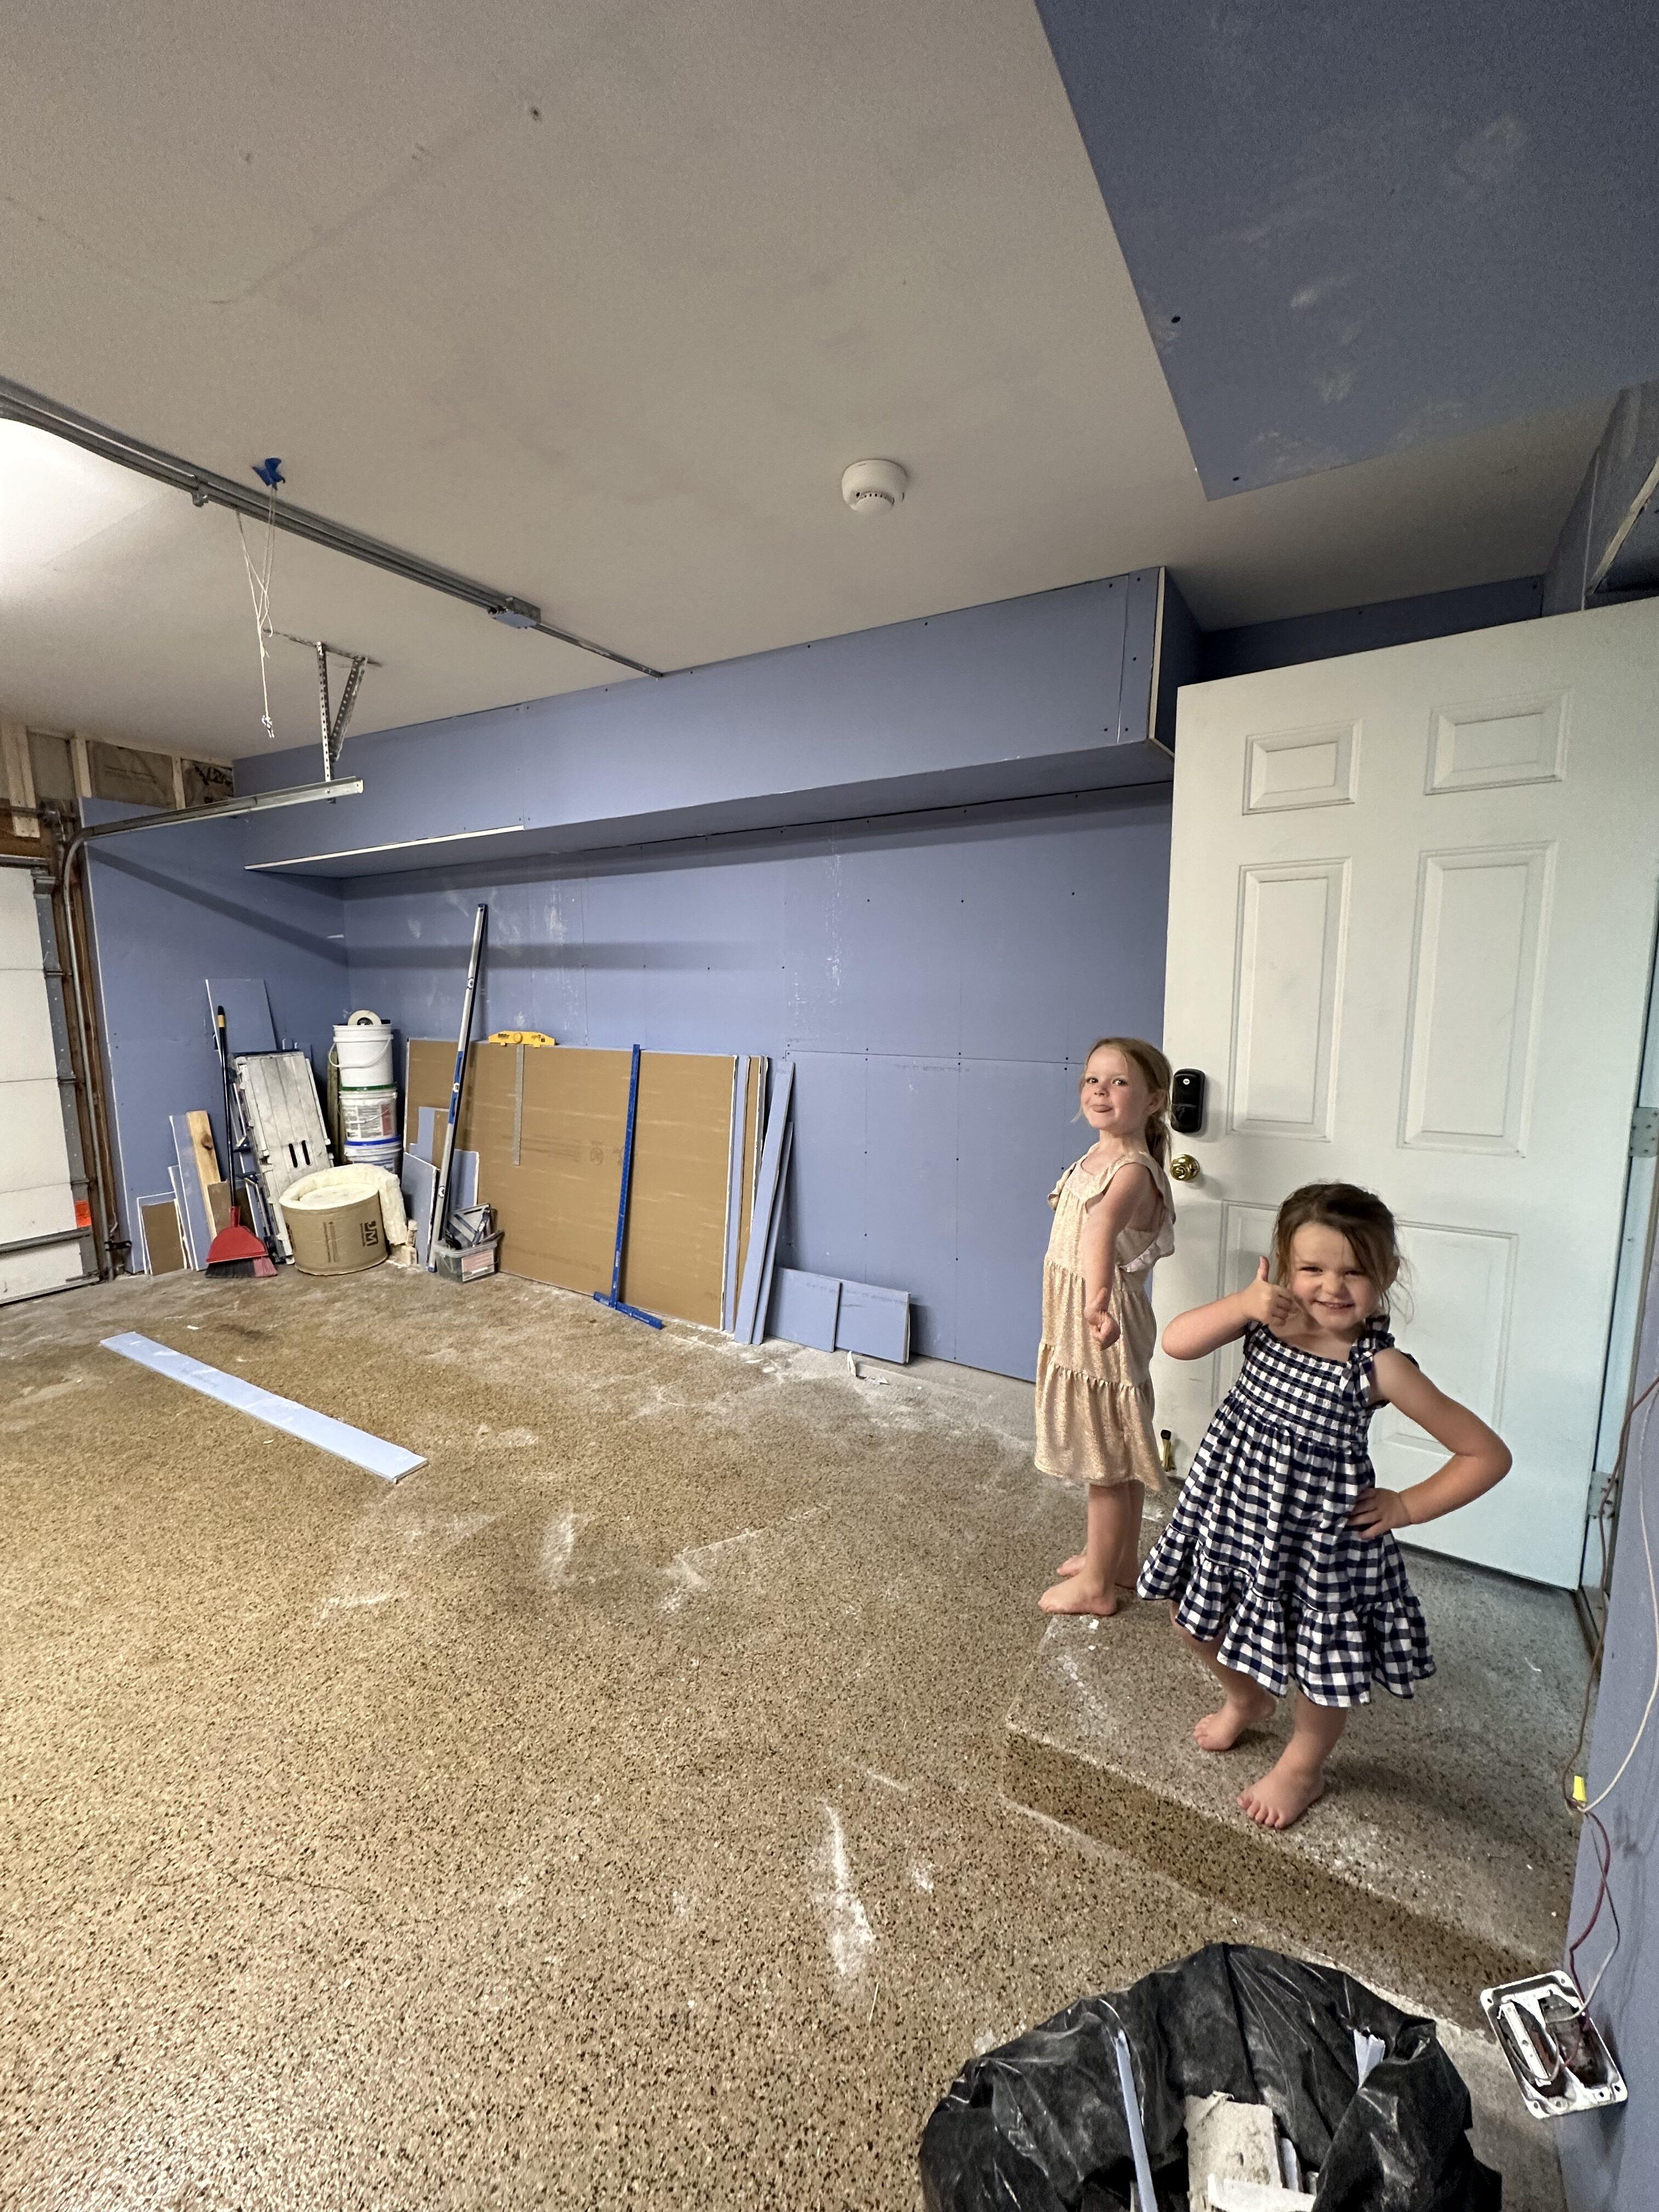
Finishing touches
If you remember, a big goal with this project was to have the space function as a studio as well. So we got crafty and worked toward warming the space up even more. Here’s what we did:
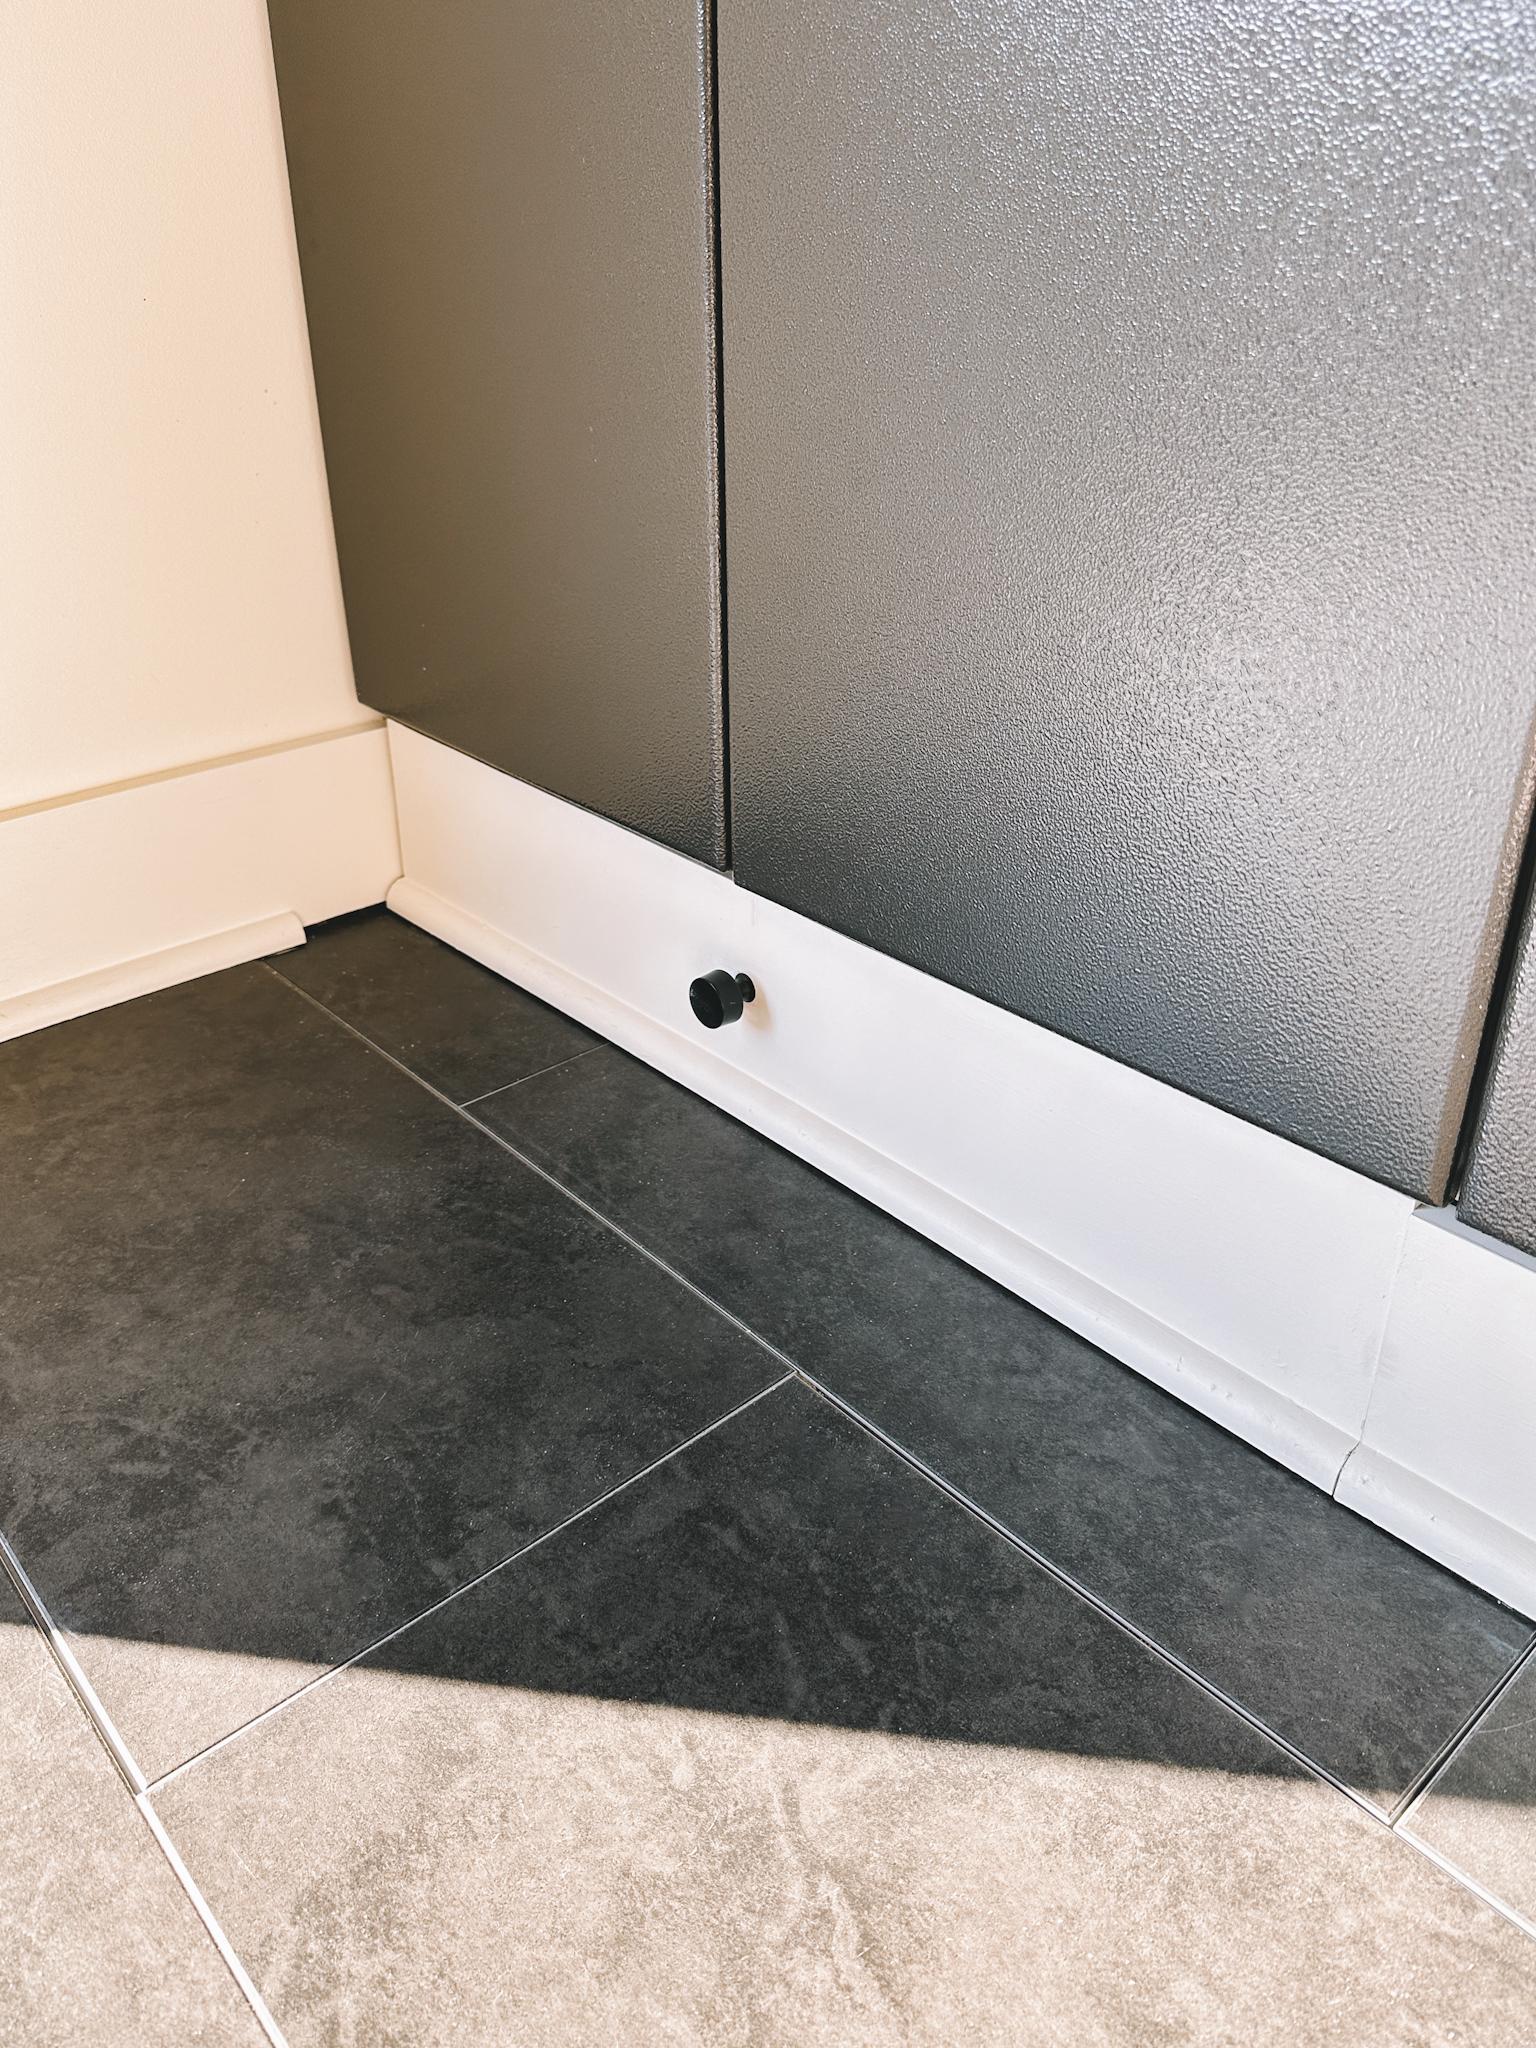
- Trim: I bought a saw and learned how to install white trim molding around the room to give it a finished feel and help maintain messes/general filth. I caulked and painted it with Benjamin Moore Select Exterior White Dove.
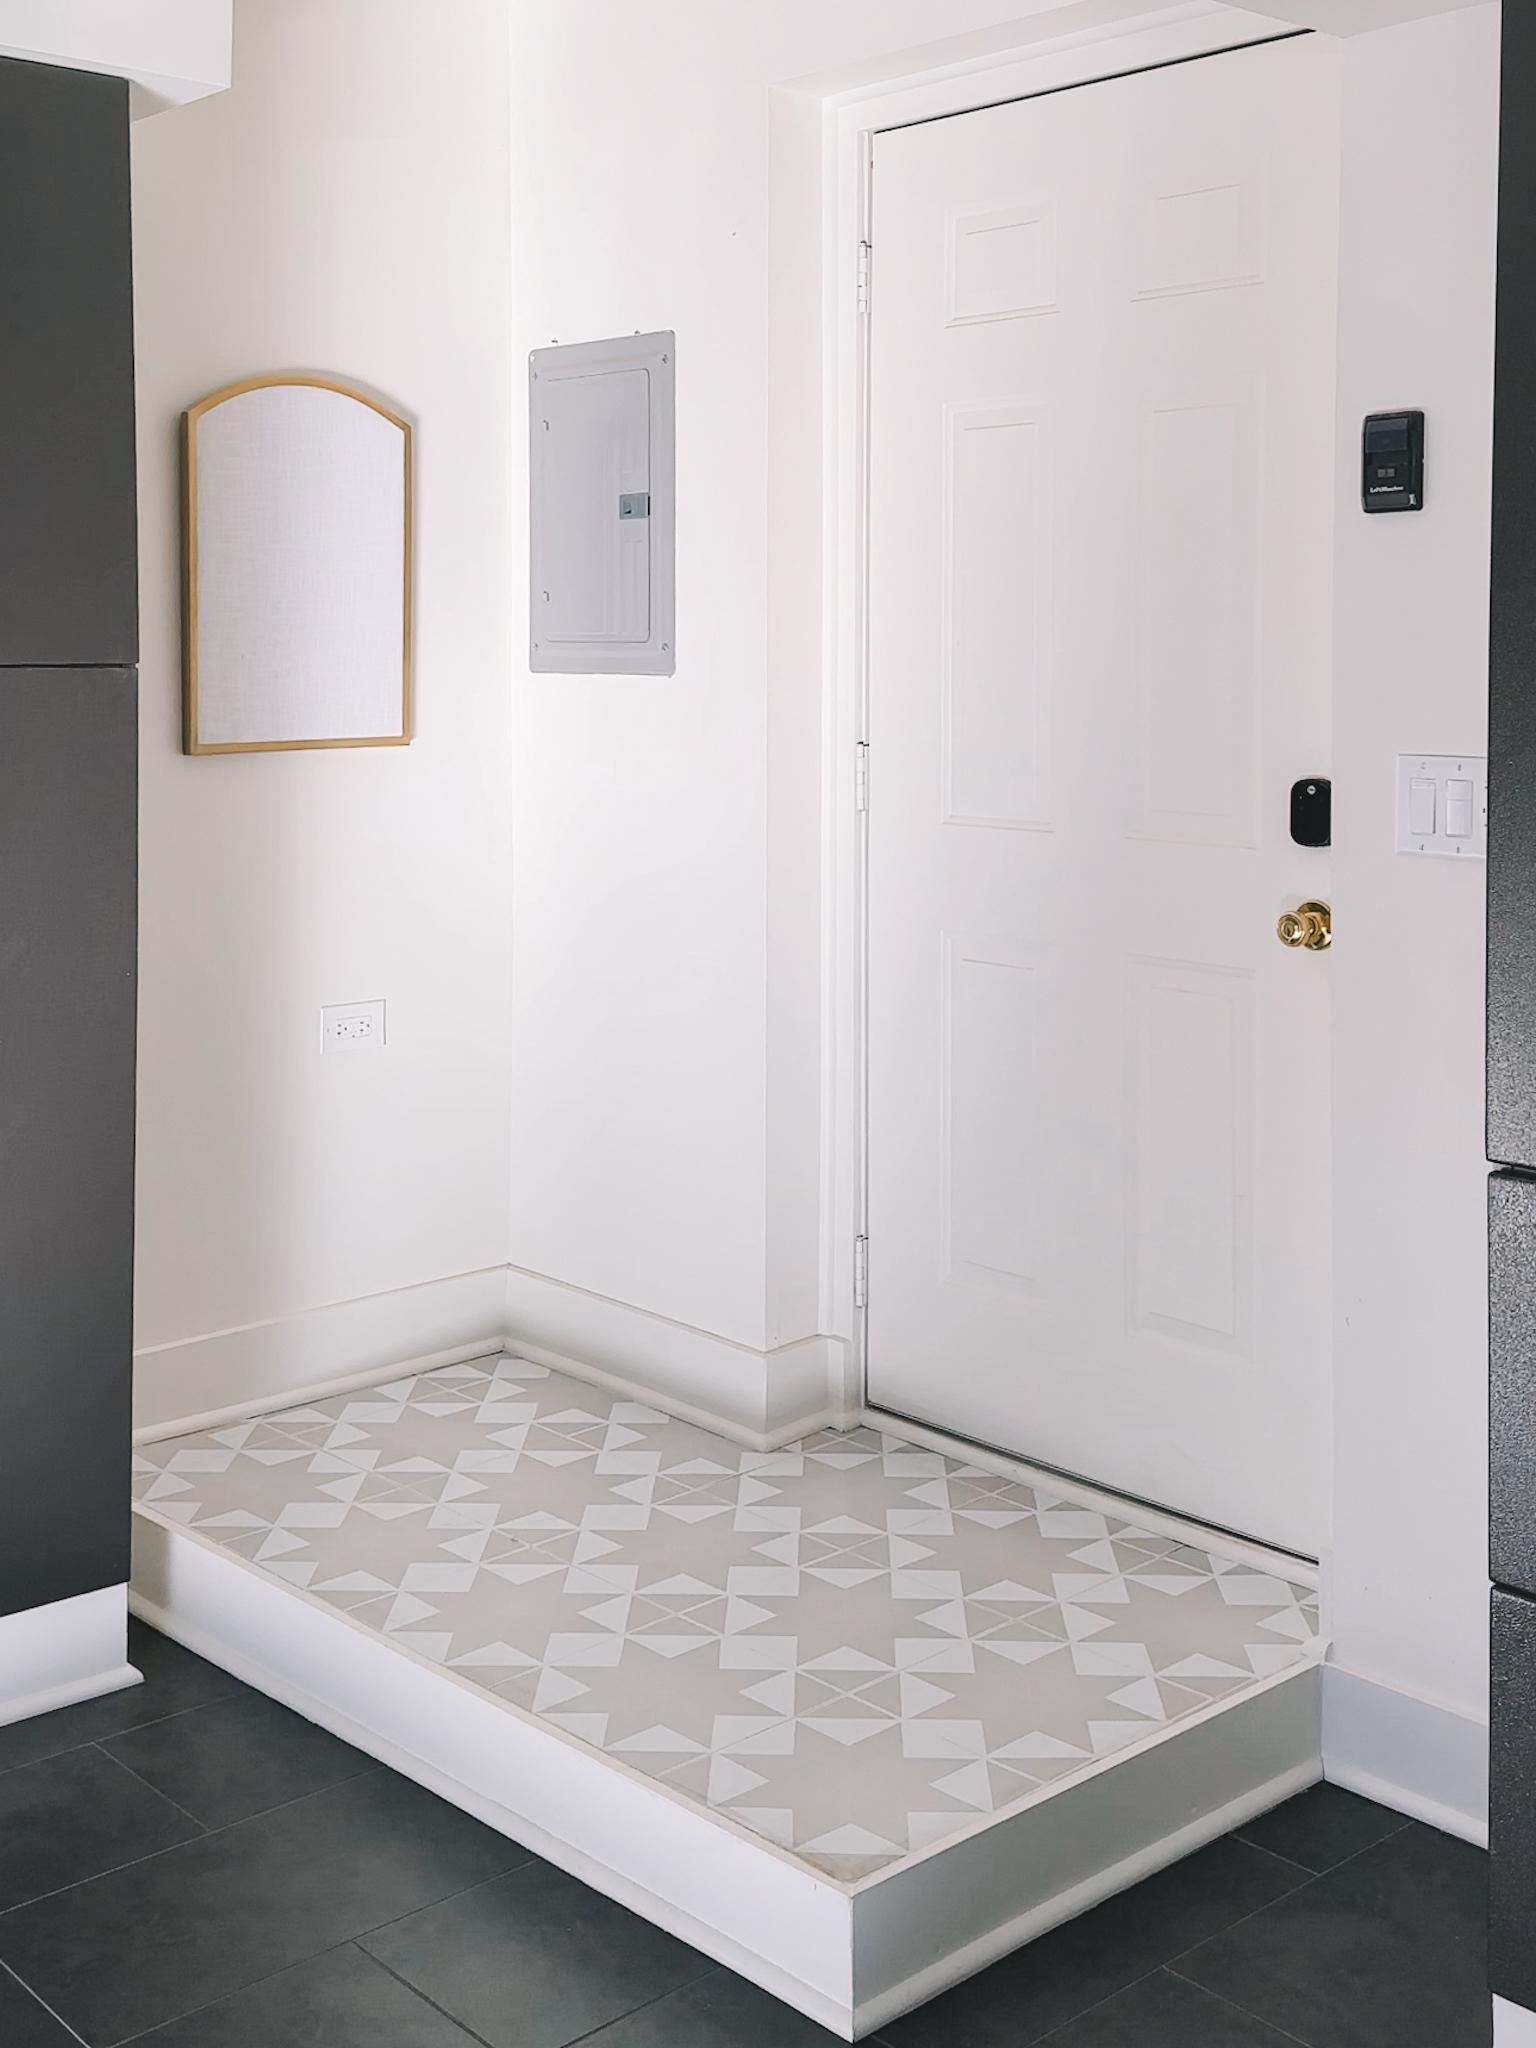
- Vinyl flooring on stoop: Kelly also laid this really cool peel-and-stick vinyl flooring on the stoop next to the door.
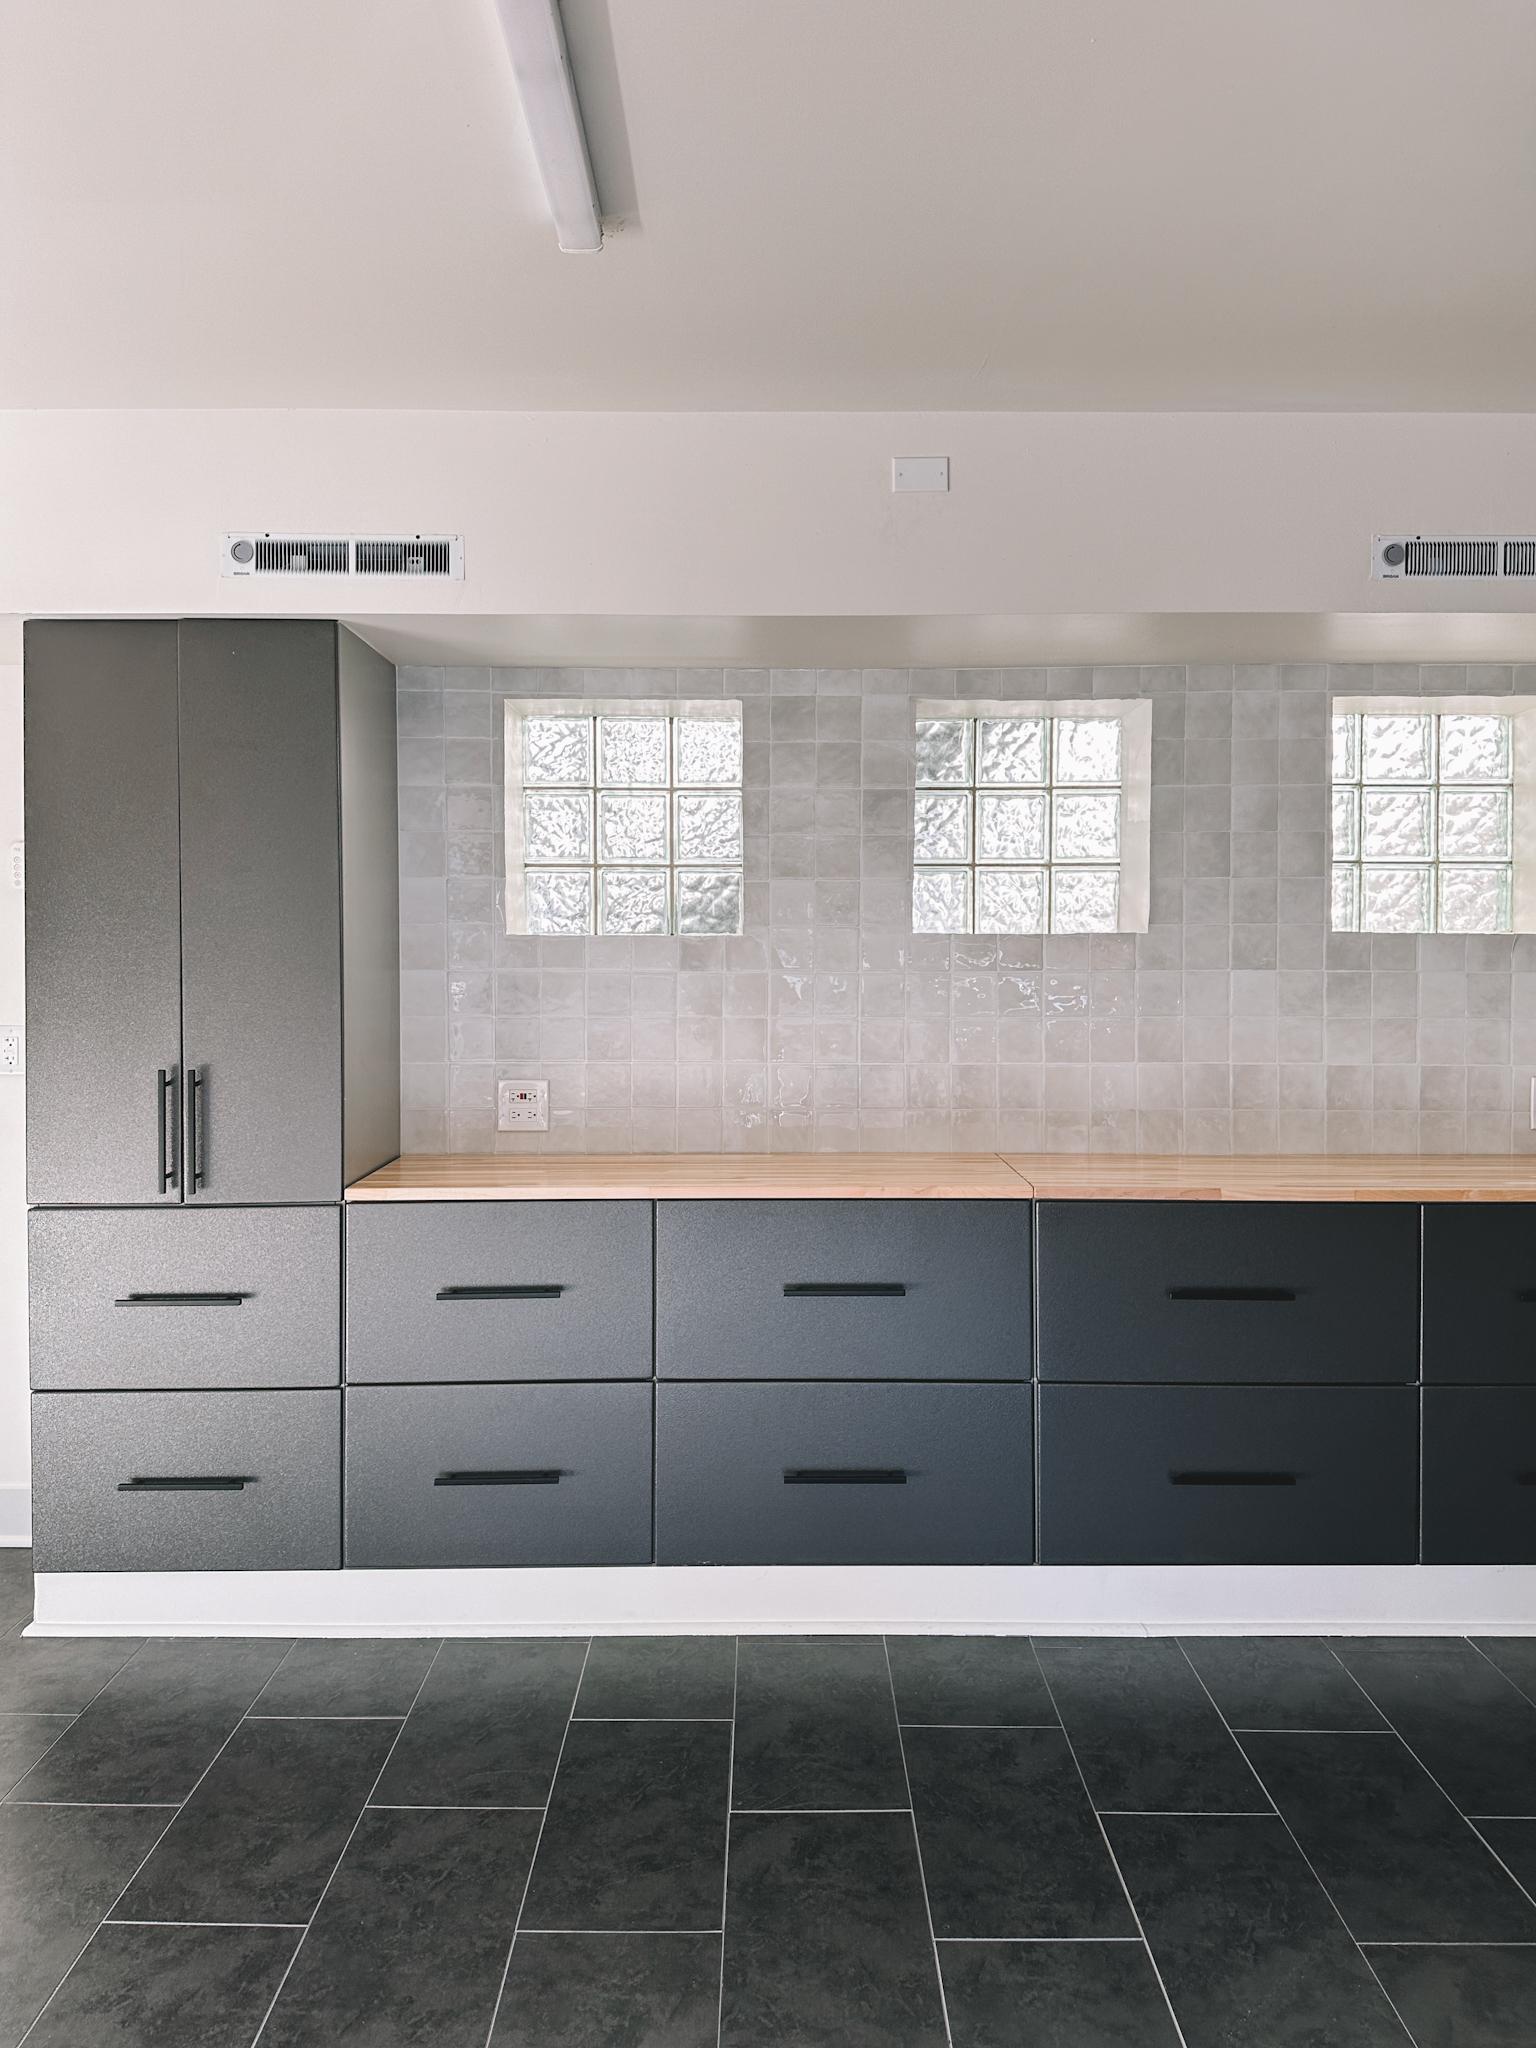

- Zellige backsplash: She also applied this peel and stick Zellige tile to the wall above the workbench to give it a more finished look. And then I swapped out the cabinet handles for these simple black pulls from Amazon.
Robert the Robot Roomba lives in here!
- Hidden Roomba home: Oh, and I installed a hinge on one strip of molding where the Robert the Roomba lives when he’s not out sweeping up our messes. The girls call it “Robert’s Robot Room.”
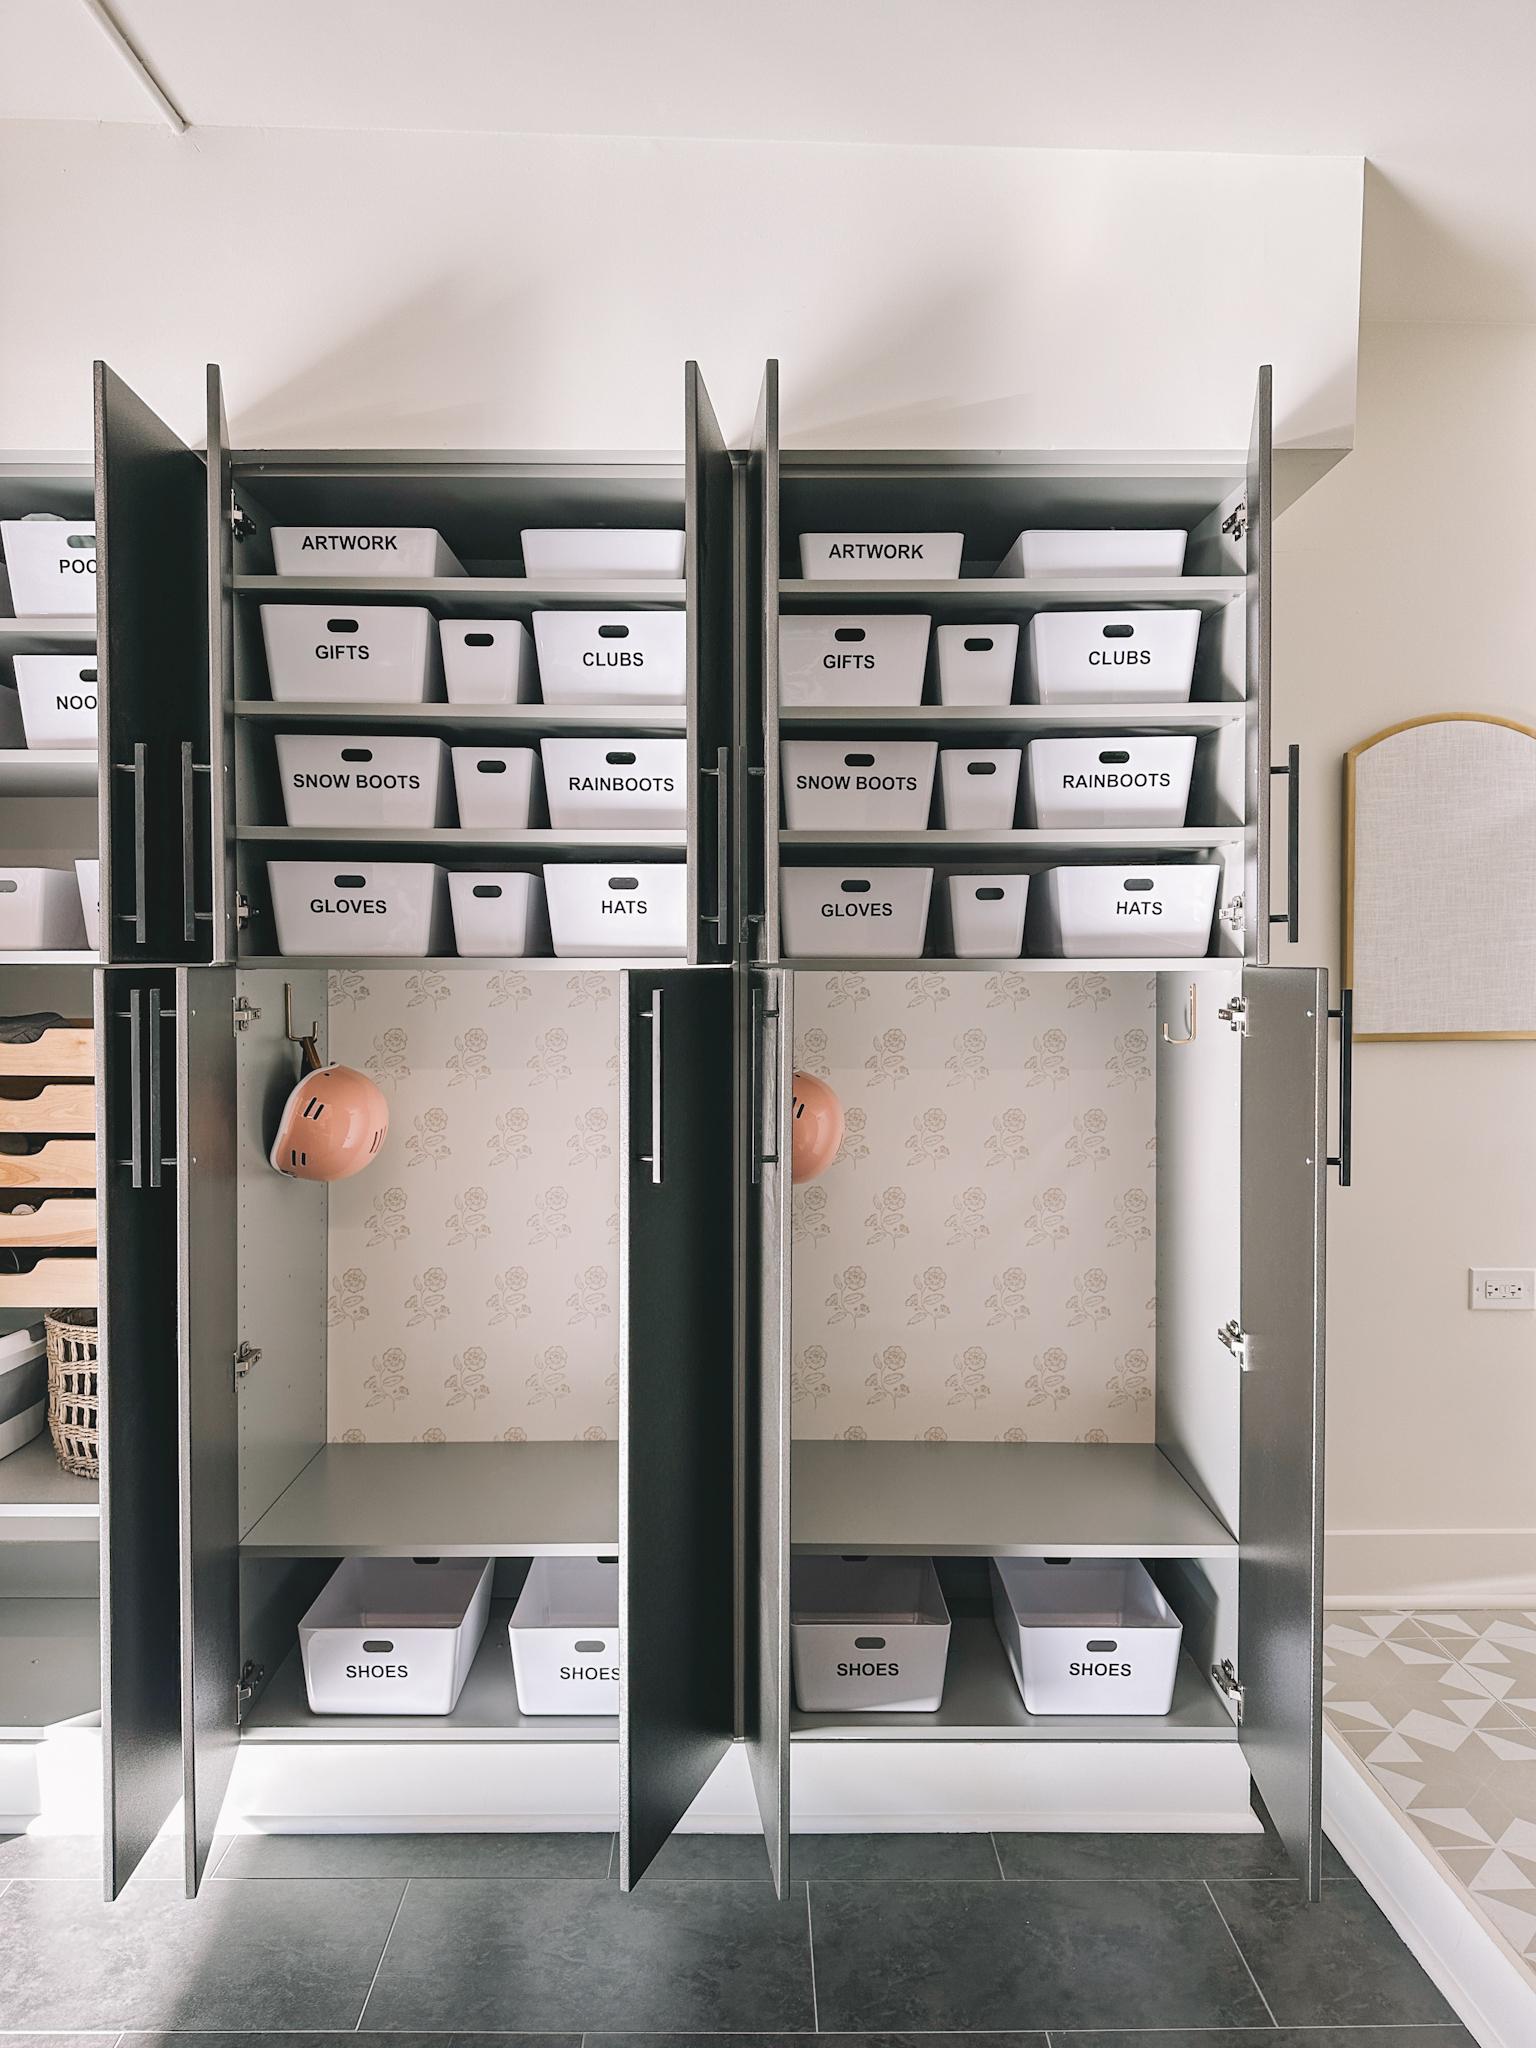
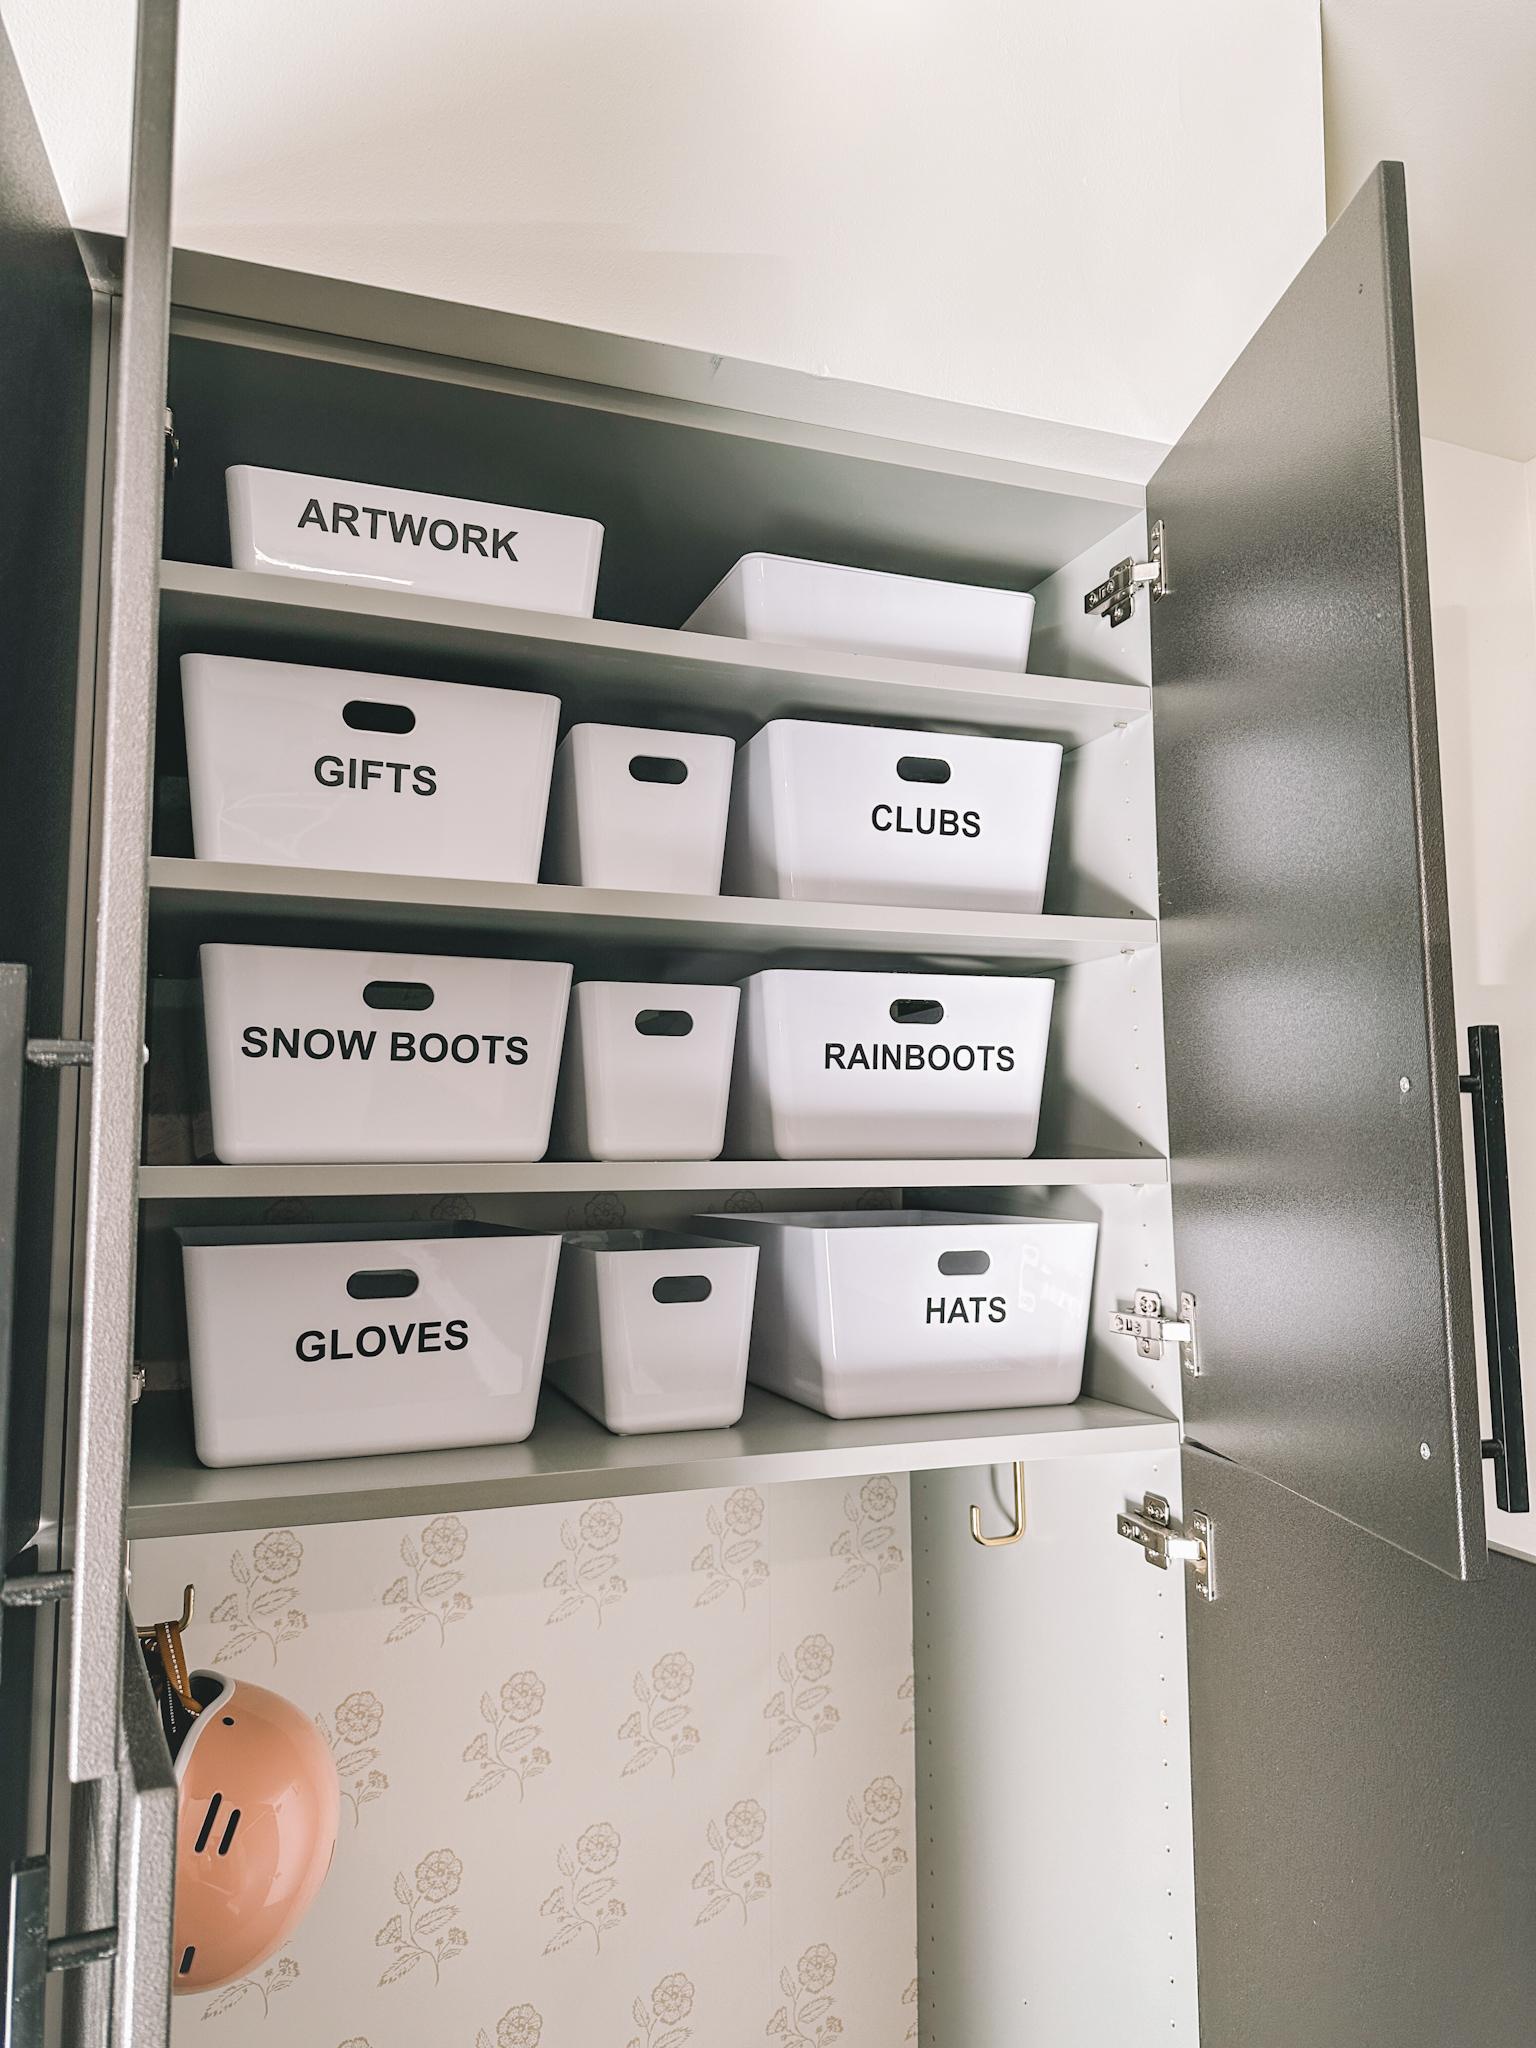
- Kids’ lockers: Kelly transformed two of the cabinets into lockers for Emma and Lucy. She used peel-and-stick wallpaper and hung these brass hooks. They screamed when they saw them!

Organization
I’m lucky that we have an in-house Marie Kondo. Kelly was positively chomping at the bit to organize all the shelves and drawers!
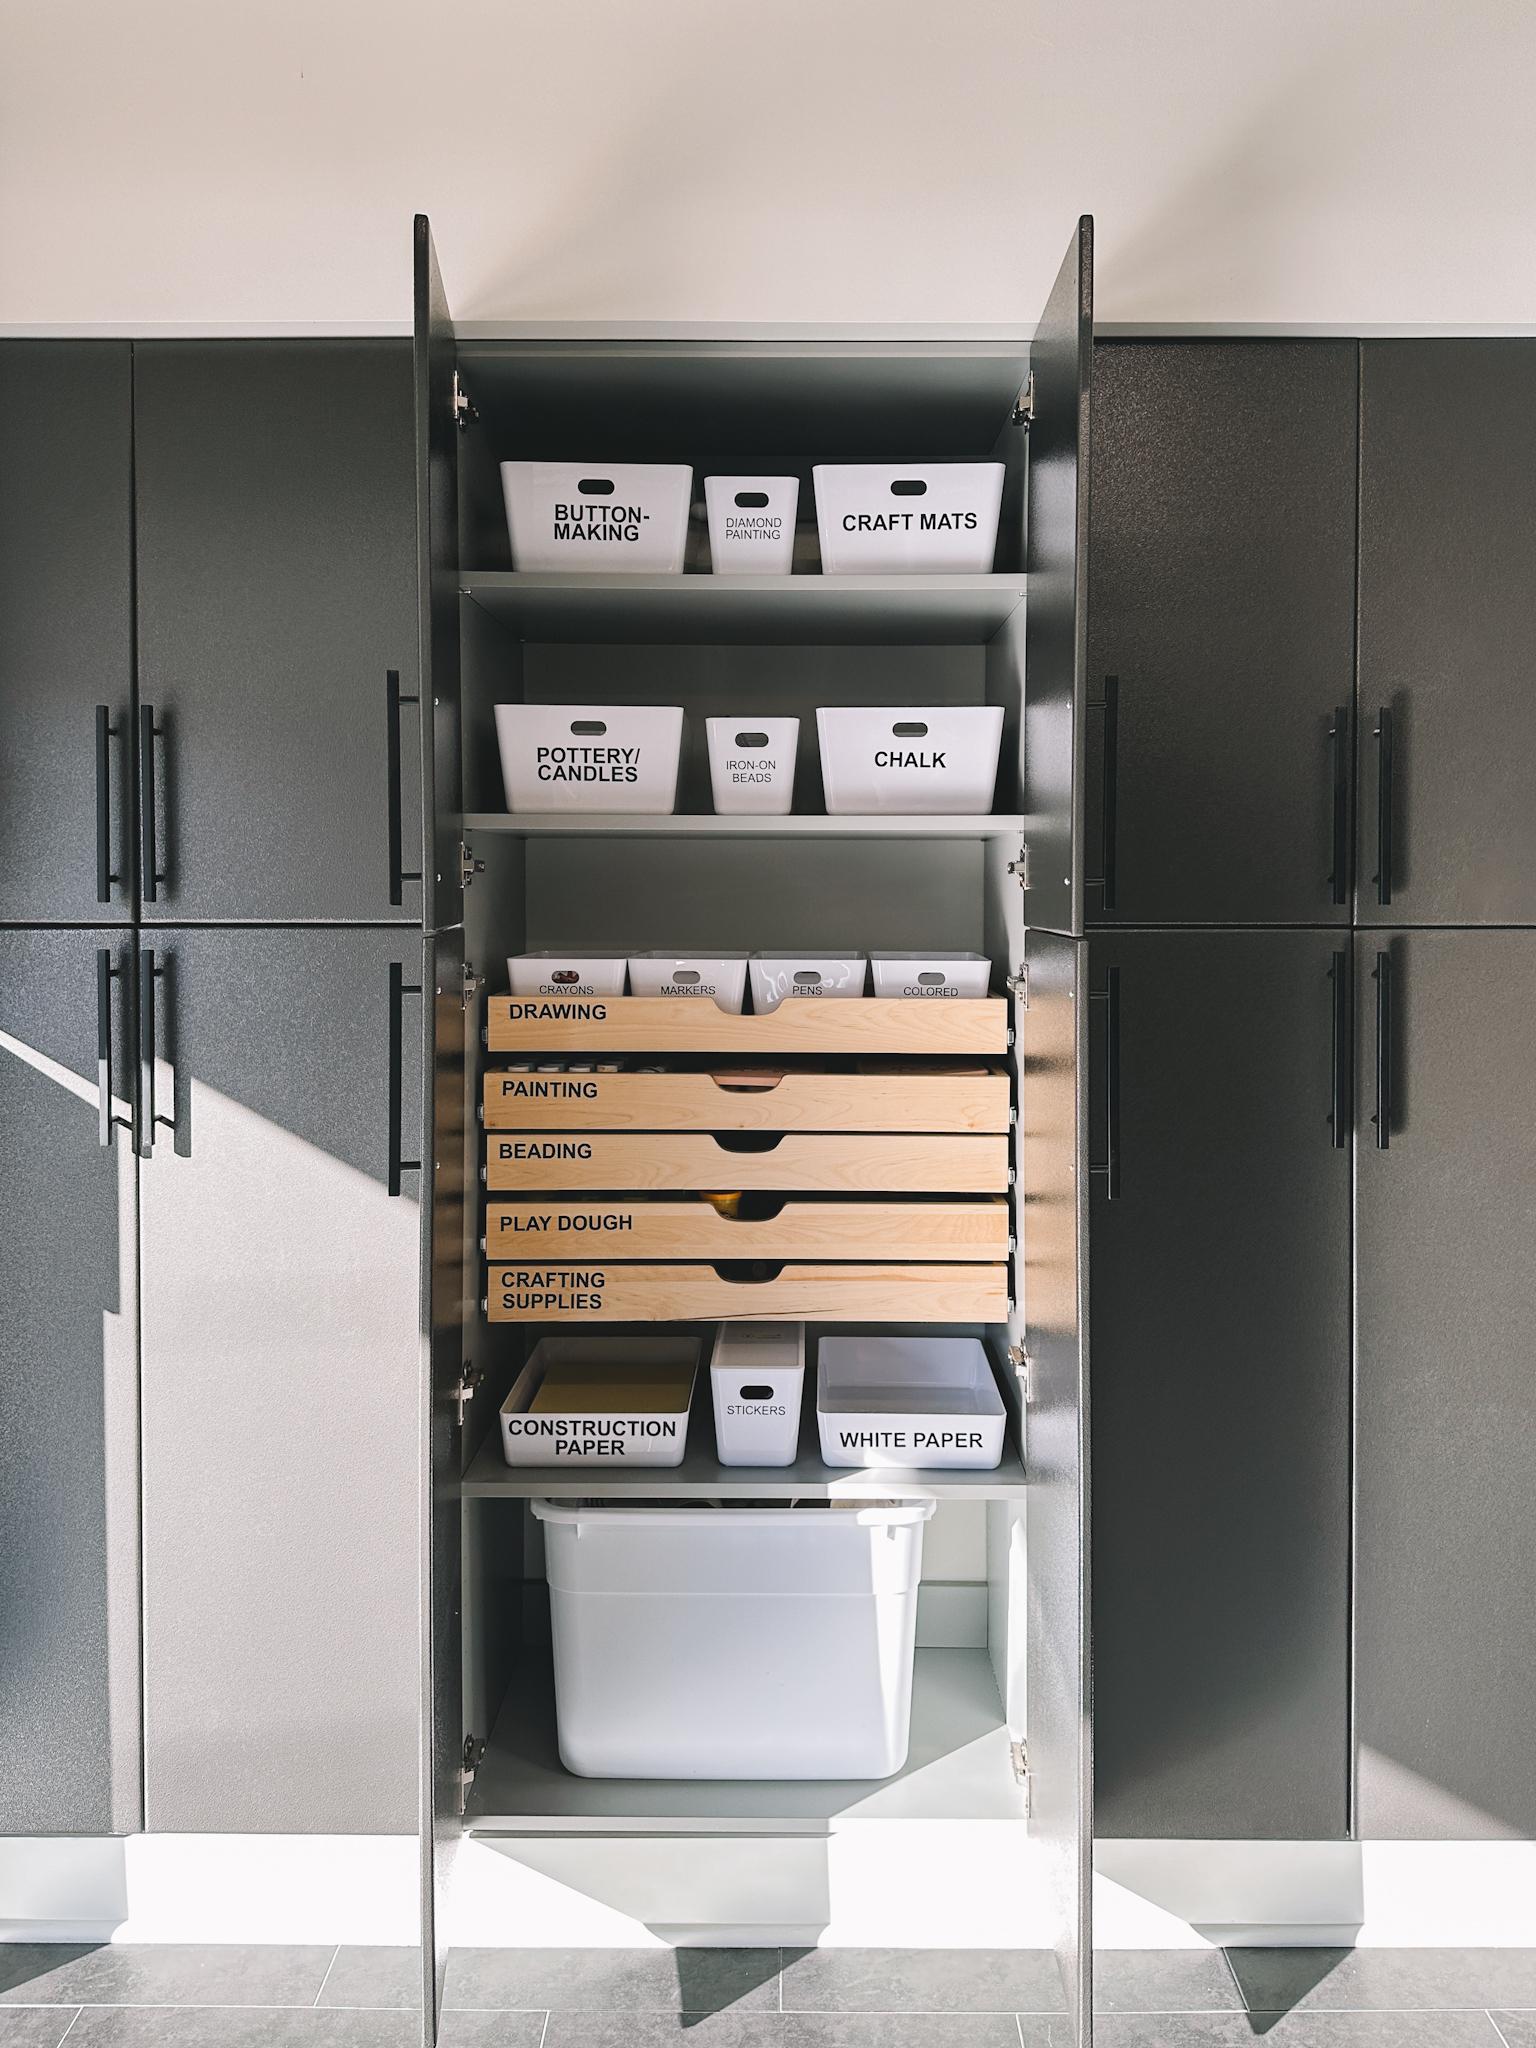
- The bins: She did extensive research on the perfect storage bins to fit the cabinets and ended up choosing these very affordable ones. They’re simple and white, and come in 11 L, 6L, 5L and 4L varieties. Kelly then designed and printed labels for each bin and drawer using her Cricut and this removable vinyl which helped us to define the storage spaces and help us avoid accumulating things we don’t need. For example, we can only own as much sidewalk chalk as fits in the sidewalk chalk bin. It’s a very easy concept, and requires no huge clean-outs like we used to do!
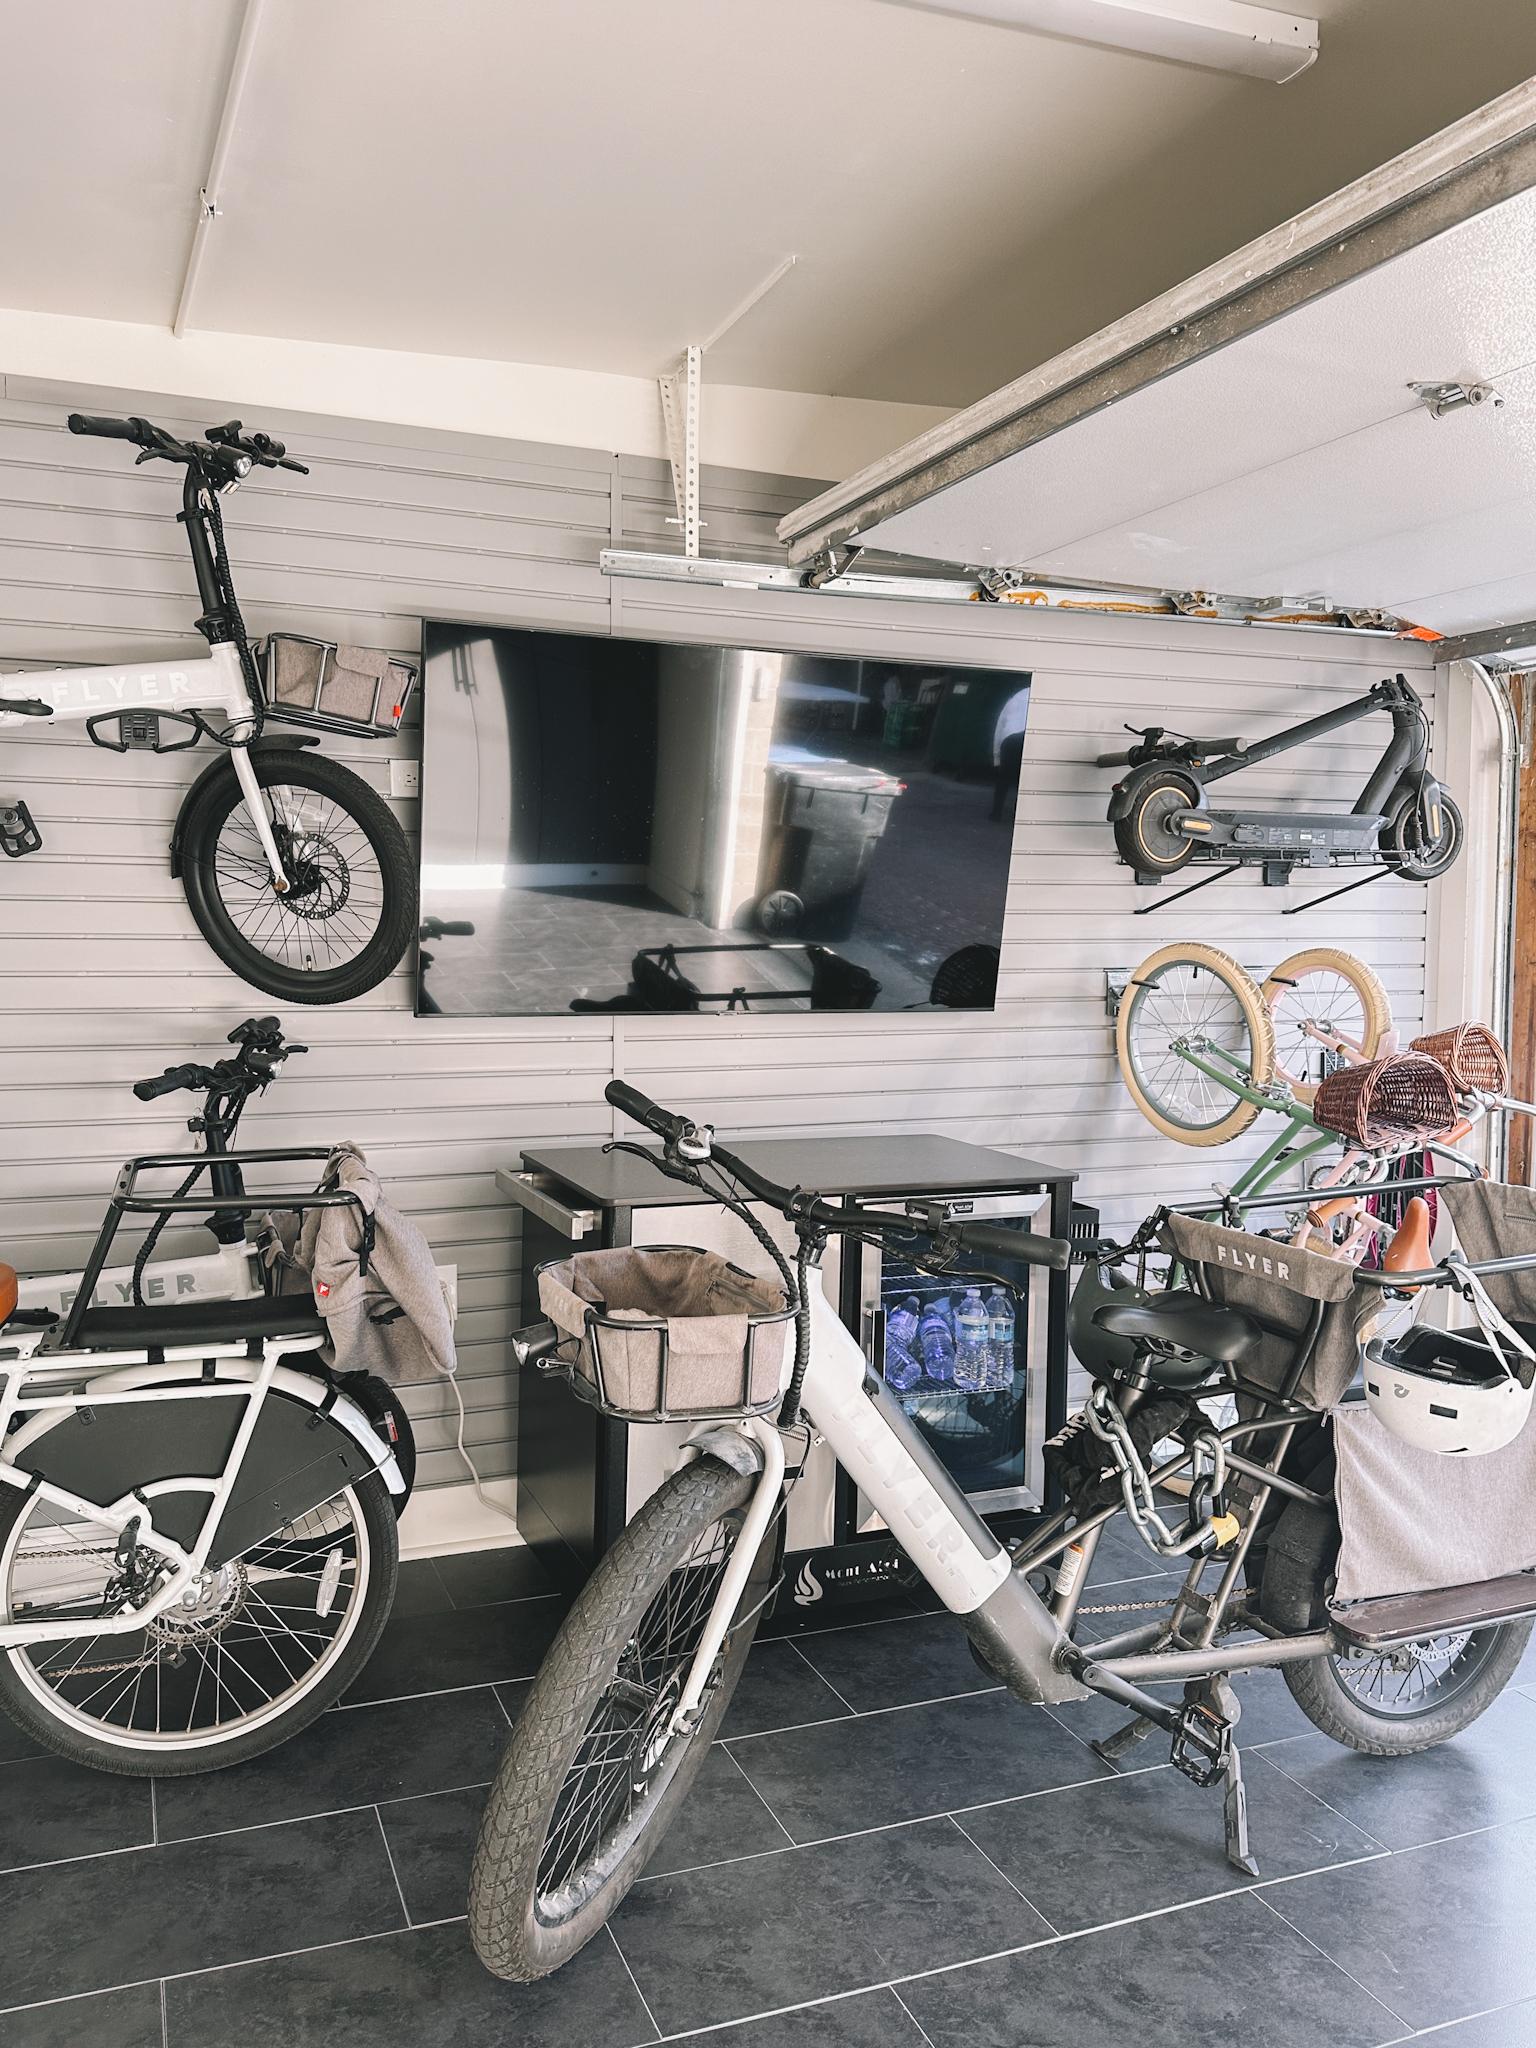
- The TV: The hardest thing for me to store every winter is our deck TV. Real outdoor TVs are extremely expensive, so I bought a used regular TV on Facebook Marketplace with the plan to just store it in the garage over the winter. But it’s gigantic and it would’ve taken up a whole cabinet all by itself. Then I had the most brilliant idea, though, if I don’t say so myself. What if I just mounted it on the wall in the garage in the winter instead of putting it away?! So now I have a giant TV in my garage and it is easily the girls’ favorite part of the whole project. They’ve used it for movie night while crafting as well as yoga and dance instruction!
- Bikes and Bar Cart: Our love for eBiking facilitated this whole project as we really started biking more than driving over the past year. The new garage has ample power outlets to charge our bikes. We also added a power station for our this amazing snack/drink station on wheels.
- The final clean-out: The last, and arguably most important step, was looking over what we’d decided to keep with a more discerning eye. It was a lot easier to part with things since this was the second time around!

A newfound happiness
This project gave me the confidence to scratch the age-old dad itch to buy some tools and start to work with wood. And I really can’t tell you how much I love it. Right now, I’m challenging myself to attempt increasingly challenging woodworking projects, buying used tools on Marketplace whenever a new need arises. It’s an extremely engaging and rewarding hobby and I would’ve never been able to start it without the new garage. And thanks to the incredible storage space and Handiwall from Modular Closets, I’ve been able to store everything neatly away after I’m done working for the day.
This is the beauty of such a versatile space! It can function as a wood shop, craft studio, gymnastics/dance studio, storage locker, electric bike charging port, and a place to park our car all in the same day! The whole family loves it.
Overall, doing this project with Modular Closets as a DIY cost roughly a tenth as much as it would’ve if we’d hired a contractor. And it’s so much more meaningful to me to have done it myself instead of handing it off to someone else.
I’ll see you in the garage!
Mitch. OUT!
This post contains gifted materials from Modular Closets, but all opinions are my own. As always, thank you so, so much for supporting the partnerships that keep Kelly in the City up and running!